
Durango 2WD V6-3.7L (2009)
Coupler HVAC: Service and Repair
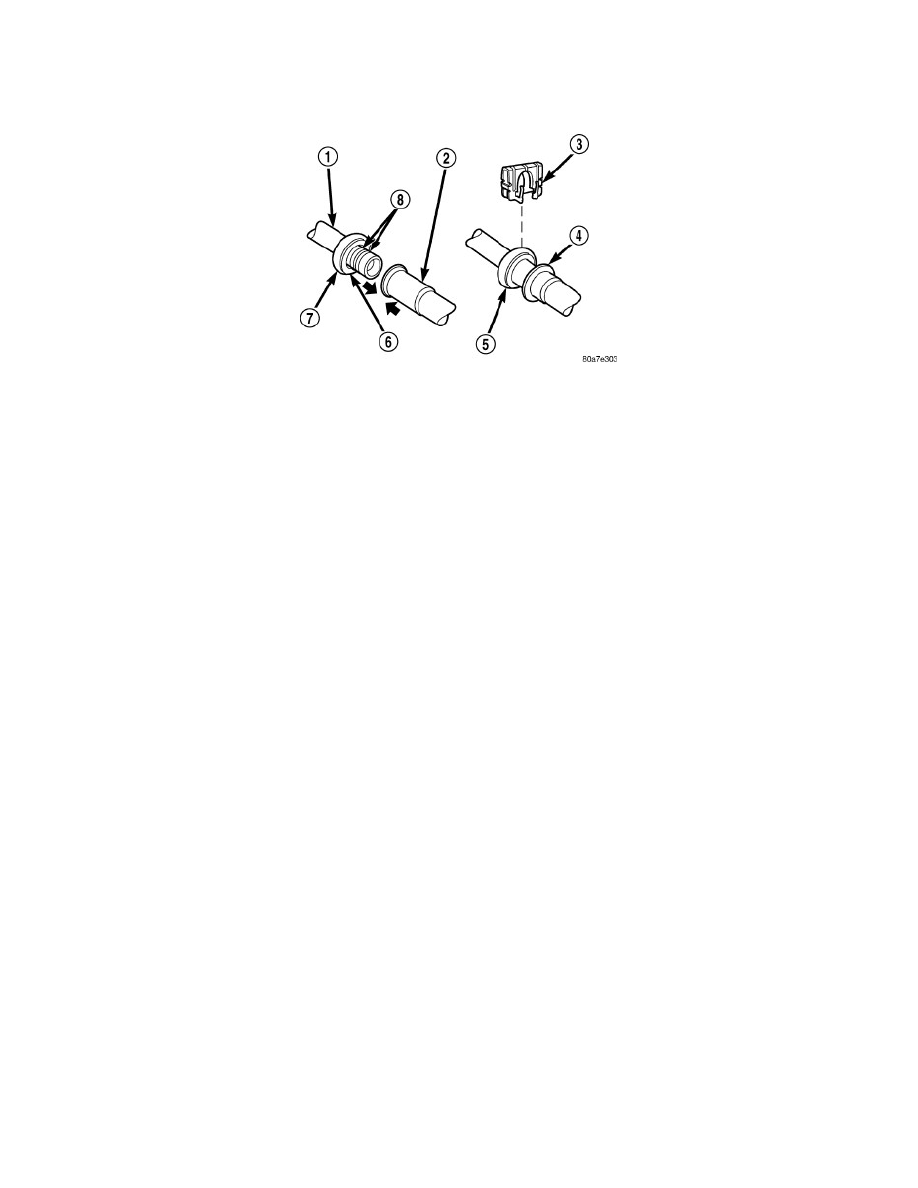
Refrigerant Line Coupler - Installation
INSTALLATION
1. Clean any dirt or foreign material from the spring-lock type refrigerant line coupler.
2. Check to make sure that the garter spring (6) is located within the cage (7) of the male half of the refrigerant line coupler (1), and that the garter
spring is not damaged.
a. If the garter spring is missing, install a new spring by pushing it into the coupler cage opening.
b. If the garter spring is damaged, remove it from the coupler cage with a small hook (DO NOT use a screwdriver) and install a new garter spring.
NOTE: Replacement of the refrigerant line O-ring seals is required anytime a refrigerant coupler is disconnected. Failure to replace the
rubber O-ring seals could result in a refrigerant system leak.
3. Install new O-rings (8) on the male half of the refrigerant line coupler.
4. Lubricate the O-rings, and the inside of the female half of the refrigerant line coupler (2) with clean R-134a refrigerant oil. Use only refrigerant oil
of the type recommended for the A/C compressor in the vehicle.
5. Position the female half of the coupler over the male half of the coupler.
6. Push together firmly on the two halves of the refrigerant line coupler until the garter spring in the cage on the male half of the coupler snaps over
the flanged end on the female half of the coupler.
7. Make sure that the refrigerant line coupler is fully engaged by firmly pulling the refrigerant lines away from each other on both sides of the
coupler.
8. Install the secondary retaining clip (3) over connected coupler cage (5).
9. Evacuate the refrigerant system See: Service and Repair/Refrigerant System Evacuate.
10. Charge the refrigerant system See: Service and Repair/Refrigerant System Charge.