
Durango 2WD V6-3.7L (2009)
NOTE: If the rubber seal is deformed or damaged, the seal must be replaced.
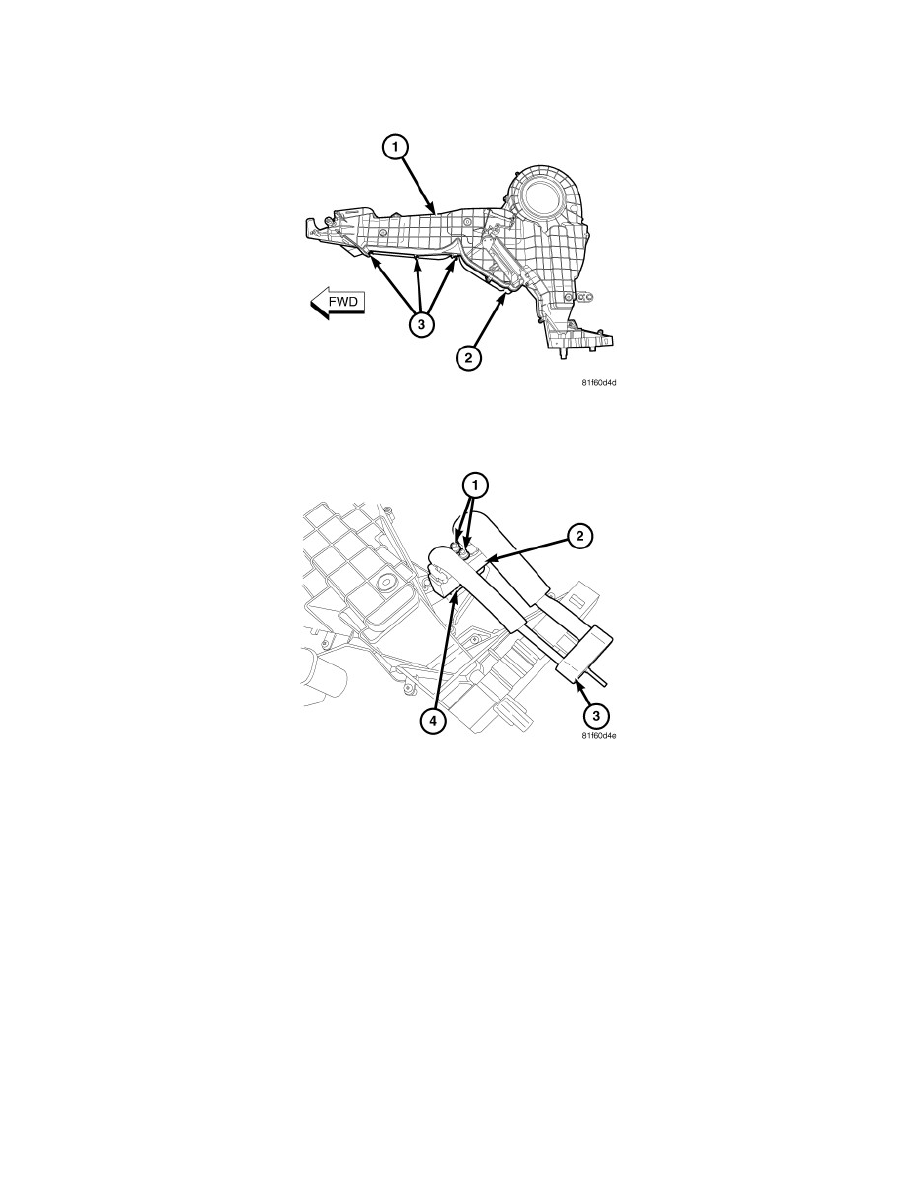
4. Install the rubber seal (2) into the groove on the rear heater-A/C housing.
5. Align the pivot shafts of the air doors located in the inboard half on the rear heater-A/C housing (1) to the openings located in outboard half of the
rear heater-A/C housing (2) and install the two halves of the rear housing together.
6. Install the twenty screws (3) that secure the two halves of the rear heater-A/C housing together. Tighten the screws to 2 Nm (17 in. lbs.).
7. Remove the tape or plugs from the rear evaporator tube and extension line fittings and all rear expansion valve ports.
8. Lubricate new rubber O-ring seals with clean refrigerant oil and install them onto rear evaporator tube and extension line fittings. Use only the
specified O-rings as they are made of a special material for the R-134a refrigerant system. Use only refrigerant oil of the type recommended for the
A/C compressor in the vehicle.
9. Install the rear A/C expansion valve (2) onto the rear A/C evaporator tube tapping block (4).
10. Connect the rear evaporator extension lines (3) to the rear A/C expansion valve and install the two retaining bolts (1). Tighten the bolts to 11 Nm
(97 in. lbs.).