
Durango 2WD V6-3.7L (2009)
Parking Assist Warning Indicator: Service and Repair
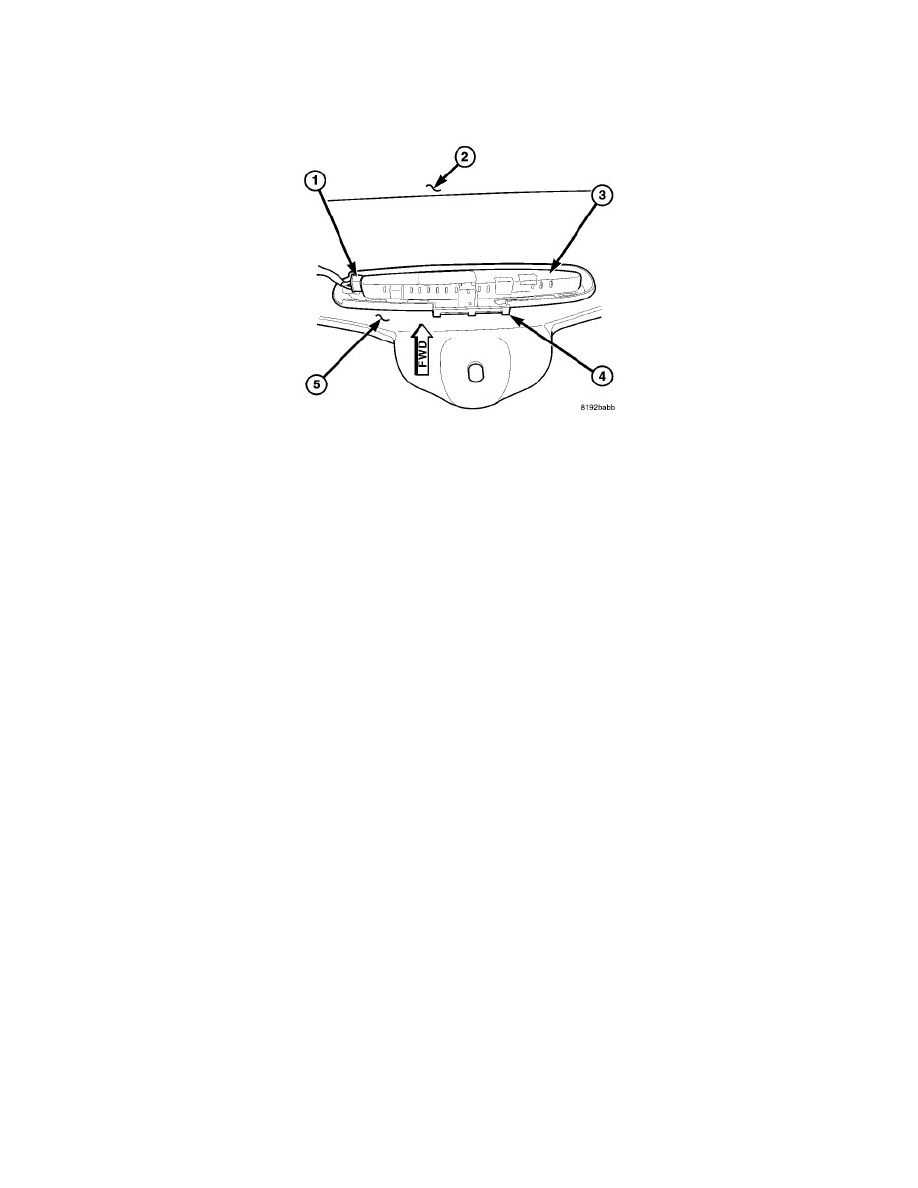
Park Assist Display - Installation
INSTALLATION
1. Carefully position the connector receptacle on the left end of the park assist display housing (3) through the left end of the display opening in the
lower surface of the headliner (5).
2. Slide the display toward the left side of the vehicle far enough to engage the right end of the display housing into the right end of the display
opening in the headliner.
3. Carefully pull down the rear edge of the headliner from the upper liftgate opening header (2) far enough to access the rear park assist display
housing.
4. With the display lens held flush against the lower surface of the headliner, position the molded plastic retainer (4) over the display housing with
the installation tab oriented towards the rear of the vehicle.
5. Slide the retainer down over the display housing until it is flash with the headliner substrate and the three tabs of the retainer are engaged in the
three slots of the display housing.
6. Reconnect the wire harness connector (1) to the connector receptacle on the left end of the display housing.
7. Reinstall the trim onto both upper D-pillars. See: Body and Frame/Interior Moulding / Trim/Trim Panel/Service and Repair/Pillar Trim/D-Pillar
Trim/Installation.
8. Reinstall the trim onto the upper liftgate opening. See: Body and Frame/Doors, Hood and Trunk/Trunk / Liftgate/Trunk / Liftgate Interior Trim
Panel/Service and Repair/Liftgate Trim Panel - Removal.
9. Reconnect the battery negative cable. On vehicles equipped with the optional Hybrid Electric Vehicle (HEV) system, a technician trained in
proper HEV service safety procedures must also reinstall the high voltage service disconnect into the high voltage battery pack.