
Durango 2WD V6-3.7L (2009)
10. Install the air cleaner housing and resonator (1) See: Filters/Air Cleaner Housing/Service and Repair/Air Cleaner Body - Installation.
WARNING: Always follow vehicle service procedures to properly connect batteries on an HEV model. Serious or fatal injury may result from
improper service procedures.
11. On HEV models, reconnect the battery system using the service disconnect at the battery pack .
12. On gasoline only models, connect the negative battery cable.
13. Evacuate the refrigerant system See: Heating and Air Conditioning/Service and Repair/Refrigerant System Evacuate.
14. Adjust the refrigerant oil level See: Heating and Air Conditioning/Specifications/Capacity Specifications/Refrigerant Oil Capacity.
15. Charge the refrigerant system See: Heating and Air Conditioning/Service and Repair/Refrigerant System Charge.
REAR SECTION
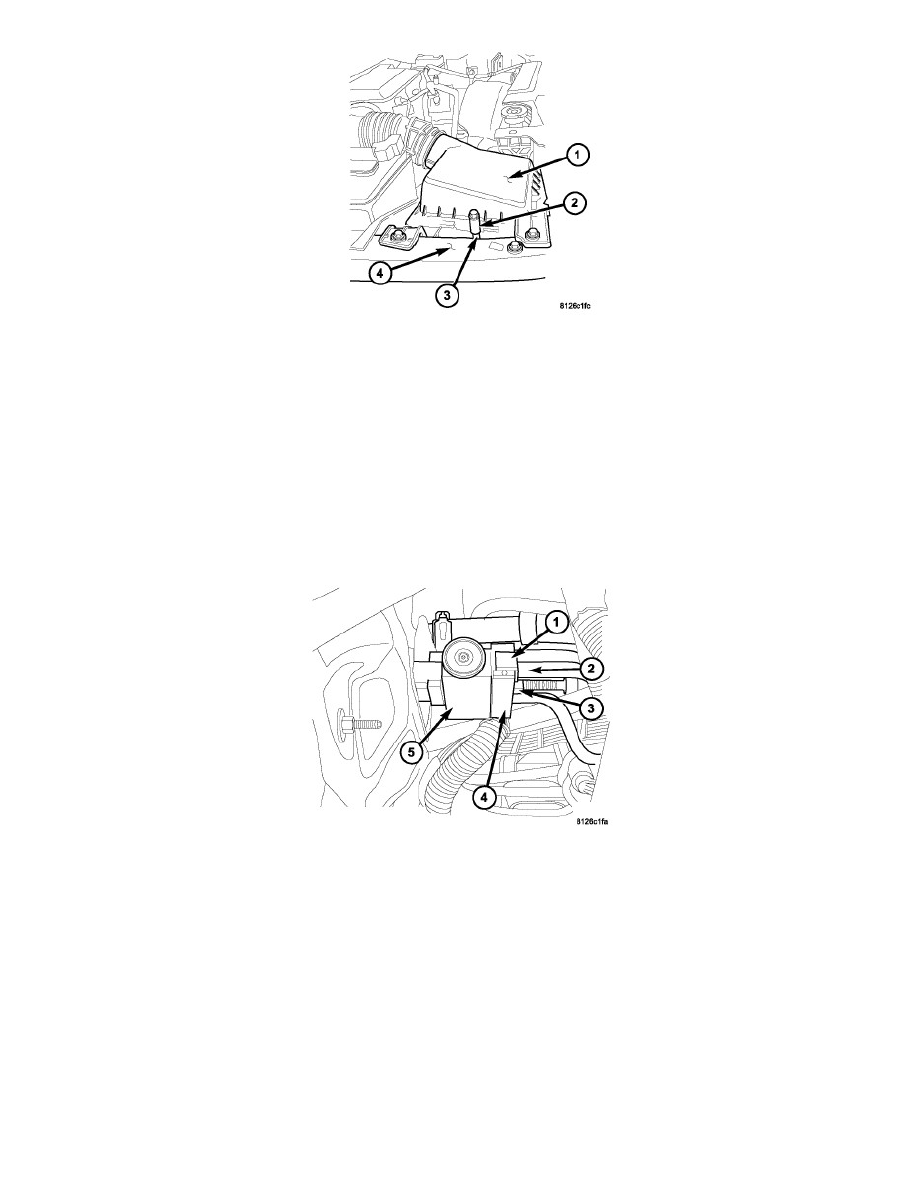
1. Position the rear section of the A/C liquid line into the engine compartment.
2. Install the A/C suction line (2) into the liquid line tapping block (4).
3. Install the plastic retainer (1) that secures the A/C suction line to the liquid line tapping block.
4. Remove the tape or plugs from the suction and liquid line fittings and the A/C expansion valve (5).
5. Lubricate new rubber O-ring seals with clean refrigerant oil and install them and a new gasket onto the A/C expansion valve. Use only the
specified O-rings as they are made of a special material for the R-134a system. Use only refrigerant oil of the type recommended for the A/C
compressor in the vehicle.
6. Connect the A/C suction line and the rear section of the A/C liquid line to the A/C expansion valve.
7. Install the nut (3) that secures the refrigerant line tapping block to the A/C expansion valve. Tighten the nut to 23 Nm (17 ft. lbs.).
8. On models equipped with the rear heating-A/C system, connect the underbody liquid line to the liquid line tapping block See: A/C Liquid Line -
Installation or See: Heating and Air Conditioning/Coupler HVAC/Service and Repair/Refrigerant Line Coupler - Installation.
9. Install the right front wheelhouse splash shield.
10. Lower the vehicle.