
Durango 2WD V8-4.7L (2008)
Evaporator Temperature Sensor / Switch: Customer Interest
A/C - No A/C After Long Trip With Blower On Low Speed
NUMBER: 24-004-10
GROUP: Heating & Air Conditioning
DATE: April 7, 2010
SUBJECT:
No A/C Or Evaporator Freeze Up On Long Trips With Blower In Low Speed Position
OVERVIEW:
This bulletin involves adding a resistor 470 ohm resistor in the evaporator temperature sensor signal circuit.
MODELS:
2004-2009
(HB)
Durango
2007-2009
(HG)
Aspen
NOTE:
This bulletin applies to all HB/HG vehicles with A/C (sales code HAA or HAB or HAF). This bulletin does not cover the 2009 HG HEV vehicle.
SYMPTOM/CONDITION:
The customers may experience poor A/C, little to no A/C operation or reduced airflow from the instrument panel vents. This condition often occurs after
a extended drive cycle (greater that 2 hours) with the A/C on and the blower speed is set to the low position. Once the vehicle is shut off or the A/C is
turned off for approximately 2 hours the A/C will operate normally.
Adding the resistor to the evaporator temperature sensor signal wire allows the A/C Compressor to cycle at a higher temperature more frequently to
avoid this condition.
DIAGNOSIS:
Using a Scan Tool (wiTECH(TM) or StarSCAN(R)) with the appropriate Diagnostic Procedures available in TechCONNECT, verify all A/C systems
are functioning as designed. If DTC's are present record them on the repair order and repair as necessary before proceeding further with this bulletin.
If the above condition is present, perform the Repair Procedure.
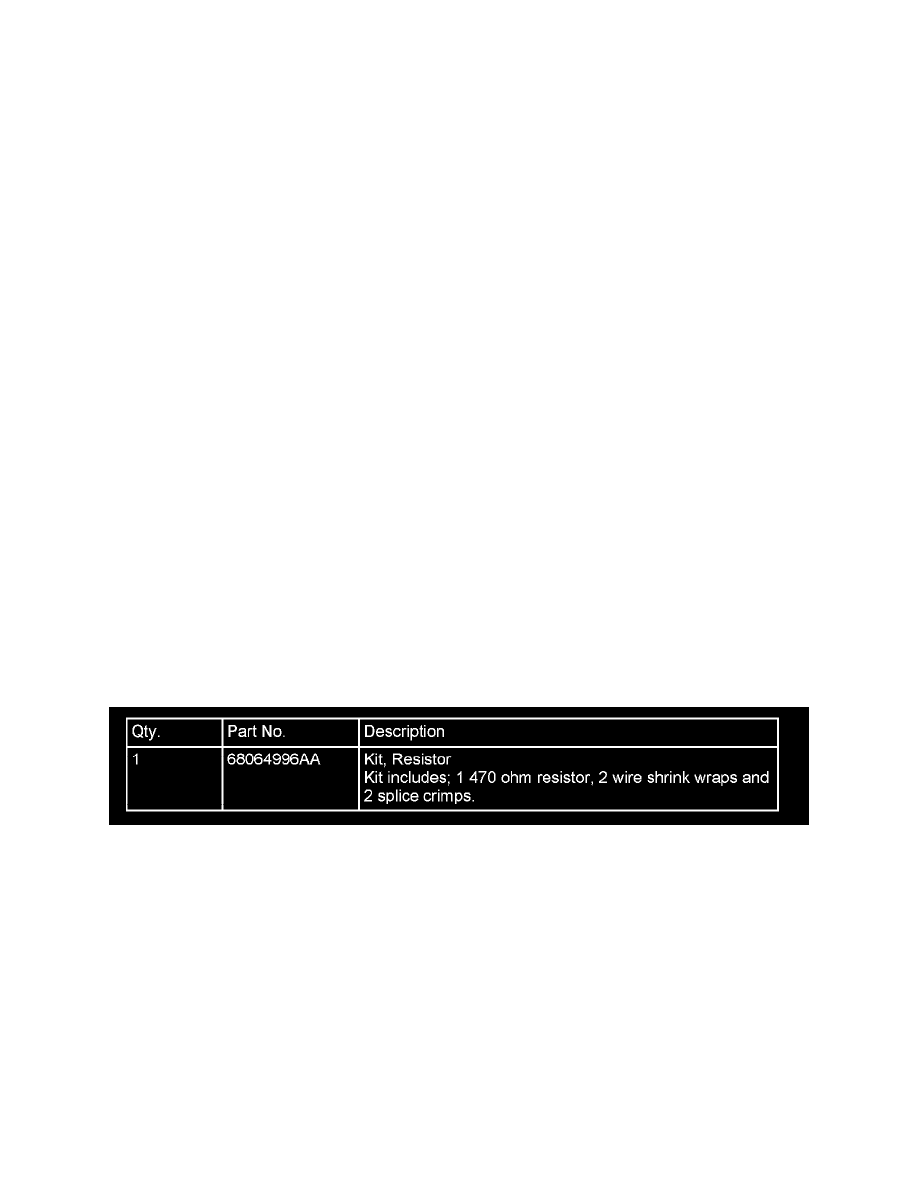
PARTS REQUIRED:
REPAIR PROCEDURE:
1. Remove and disconnect the ATC or MTC control head. Follow the detailed service procedures available in DealerCONNECT/TechCONNECT,
Refer To Group 24 - Heating & Air Conditioning > Controls, Front > Controls, A/C & Heater Removal Procedures.
2. Using the wiring diagrams available in DealerCONNECT/TechCONNECT locate the evaporator temperature sensor signal wire. Cavity 10 of the C2
black 12 - way connector for ATC systems. Cavity 2 of 20 - way black C1 connector for MTC systems.
3. Measure 76mm (3 inches) down from end of ATC/MTC connector and cut the evaporator temperature sensor signal wire.
4. Using the 2 splice crimps and 2 wire shrink wraps from resistor kit p/n 68064996AA splice in the 470 ohm resistor. Follow the detailed wiring
procedures available in DealerCONNECT/TechCONNECT, Refer To the Wiring Tab > 8W-01 - Wiring Diagram Information > Wire > Standard
Procedure.
NOTE:
Be sure to use the splice crimps and shrink wrap on wires and resistor.