
Durango 2WD V8-4.7L (2008)
Map Light: Service and Repair
Reading Lamp - Removal
REMOVAL
NOTE: The optional overhead console includes a Light Emitting Diode (LED) lighting package which contains three LED units, each with its
own dedicated printed circuit board. The two outboard articulating eyeball-type LED reading lamp pod units with their integral lens-actuated
switches and printed circuit boards are available for separate service replacement. However, if the fixed center LED unit or printed circuit
board is damaged or ineffective, the entire overhead console housing unit must be replaced.
1. Disconnect and isolate the battery negative cable.
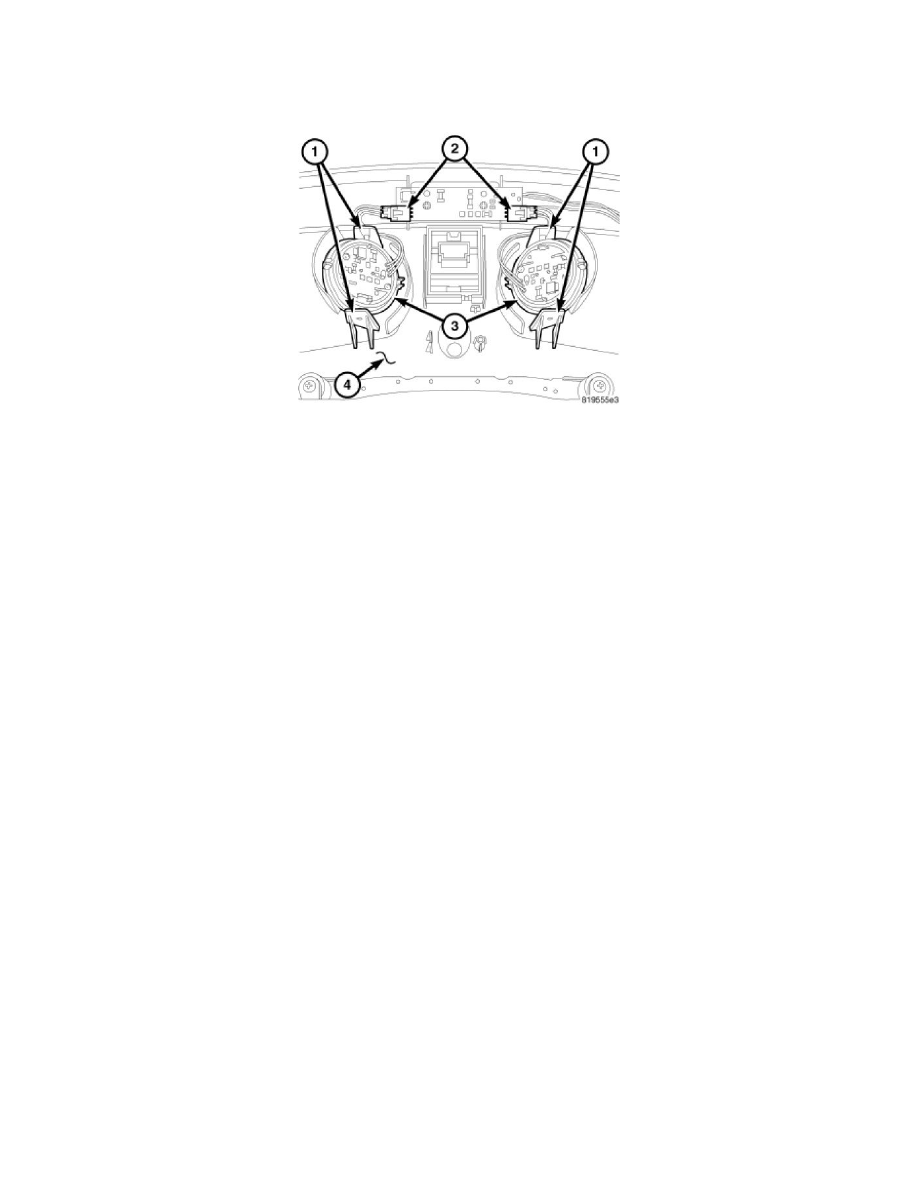
2. Remove the overhead console unit (4) from the headliner. See: Body and Frame/Interior Moulding / Trim/Console/Service and Repair/Overhead
Console - Removal.
3. From the top of the overhead console housing, disconnect the pod pigtail wire connector (2) from the fixed dome lamp printed circuit board in the
center of the console housing.
4. Pry gently and evenly on one of the pod mounting stanchions (1) far enough to disengage the pivot pin on one side of the pod (3).
5. Pry gently and evenly on the mounting stanchion on the opposite side of the pod far enough to disengage the opposite pivot pin.
6. Lift the pod out of its receptacle within the overhead console housing.