
Durango 2WD V8-4.7L VIN N (2001)
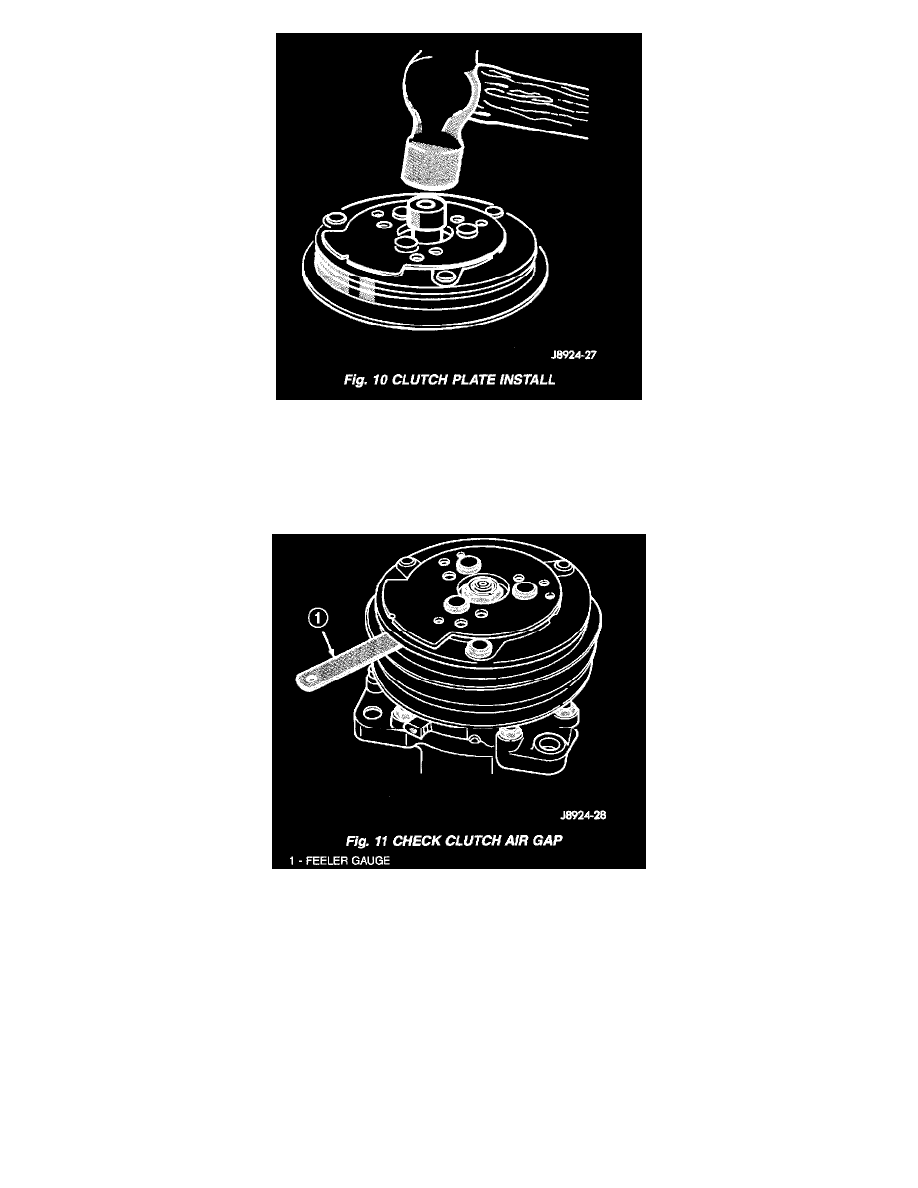
Fig. 10 Clutch Plate Install
9. Install the clutch plate. Use the shaft protector (Special Tool 6141-2 in Kit 6460) to install the clutch plate on the compressor shaft. Tap the clutch
plate over the compressor shaft until it has bottomed against the clutch shims. Listen for a distinct change of sound during the tapping process, to
indicate the bottoming of the clutch plate.
10. Replace the compressor shaft hex nut. Tighten the nut to 14.4 Nm (10.5 ft. lbs.).
Fig. 11 Check Clutch Air Gap
11. Check the clutch air gap with a feeler gauge. If the air gap does not meet the specification, add or subtract shims as required. The air gap
specification is 0.41 to 0.79 millimeter (0.016 to 0.031 inch). If the air gap is not consistent around the circumference of the clutch, lightly pry up
at the minimum variations. Lightly tap down at the points of maximum variation.
NOTE: The air gap is determined by the spacer shims. When installing an original, or a new clutch assembly, try the original shims first. When
installing a new clutch onto a compressor that previously did not have a clutch, use 1.0, 0.50, and 0.13 millimeter (0.040, 0.020, and 0.005 inch)
shims from the clutch hardware package that is provided with the new clutch.
12. To complete the procedure.