
Durango 2WD V8-4.7L VIN N (2001)
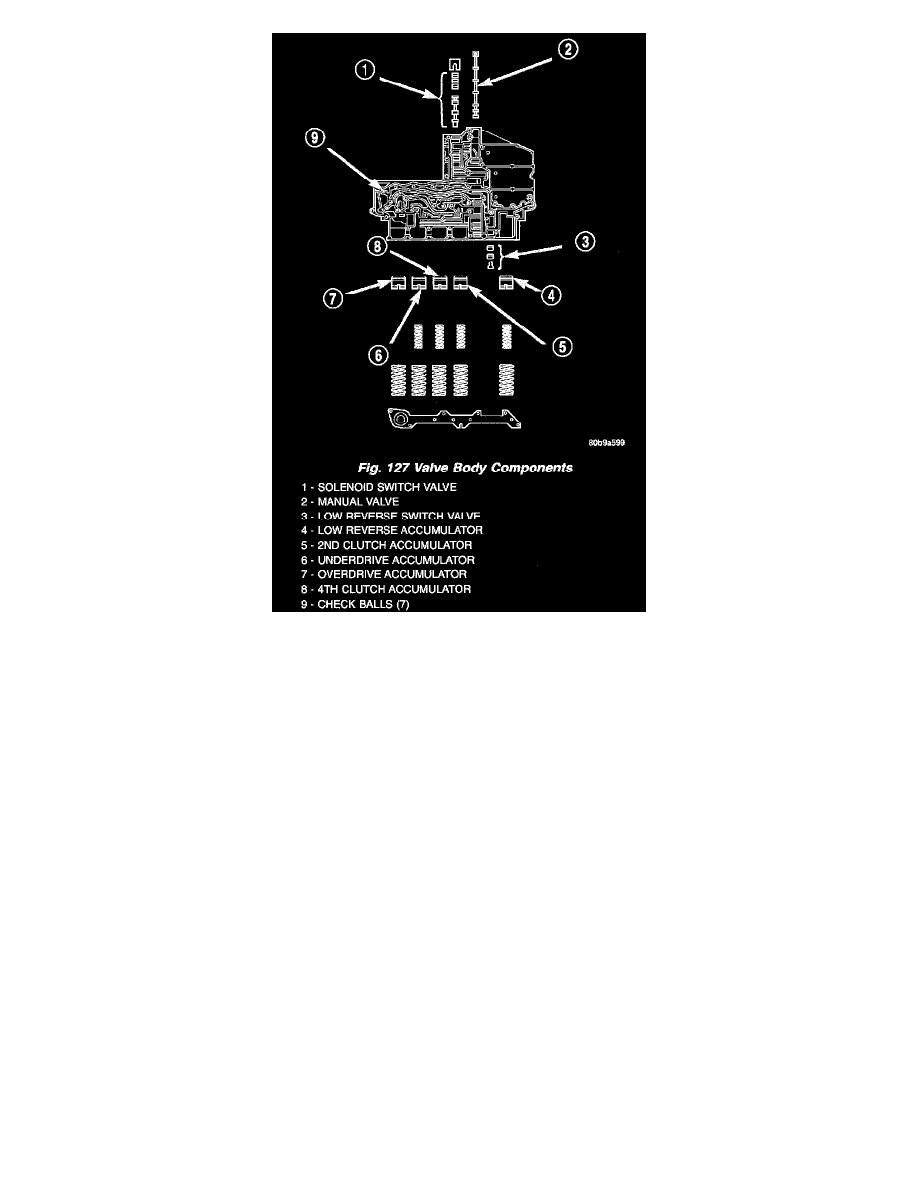
13. Remove the retainers securing the solenoid switch valve, manual valve, and the low/reverse switch valve into the valve body and remove the
associated valve and spring. Tag each valve and spring combination with location information to aid in assembly. (Fig. 127)
Assembly
ASSEMBLY
1. Lubricate valves, springs, and the housing valve bores with clean transmission fluid.
2. Install solenoid switch valve, manual valve, and the low/reverse switch valve into the valve body.
3. Install the retainers to hold each valve into the valve body.
4. Install the valve body check balls into their proper locations.
5. Position the transfer plate onto the valve body.
6. Install the screws to hold the transfer plate to the valve body. Tighten the screws to 5.6 Nm (50 inch lbs.).
7. Install the accumulator pistons and springs into the valve body in the location from which they were removed. Note that all accumulators except
the overdrive have two springs. The overdrive accumulator piston has only one spring.
8. Position the accumulator cover onto the valve body.
9. Install the screws to hold the accumulator cover onto the valve body. Tighten the screws to 4.5 Nm (40 inch lbs.).
10. Install the TRS selector plate onto the valve body and the manual valve.
11. Install the solenoid and pressure switch assembly onto the valve body.
12. Install the screws to hold the solenoid and pressure switch assembly onto the valve body. Tighten the screws to 5.7 Nm (50 inch lbs.). Tighten the
screws adjacent to the arrows cast into the bottom of the transfer plate first.
13. Position the detent spring onto the valve body.
14. Install the screw to hold the detent spring onto the valve body. Tighten the screw to 4.5 Nm (40 inch lbs.).
15. Install new clutch passage seals onto the valve body, if necessary