
Durango 2WD V8-5.7L (2008)
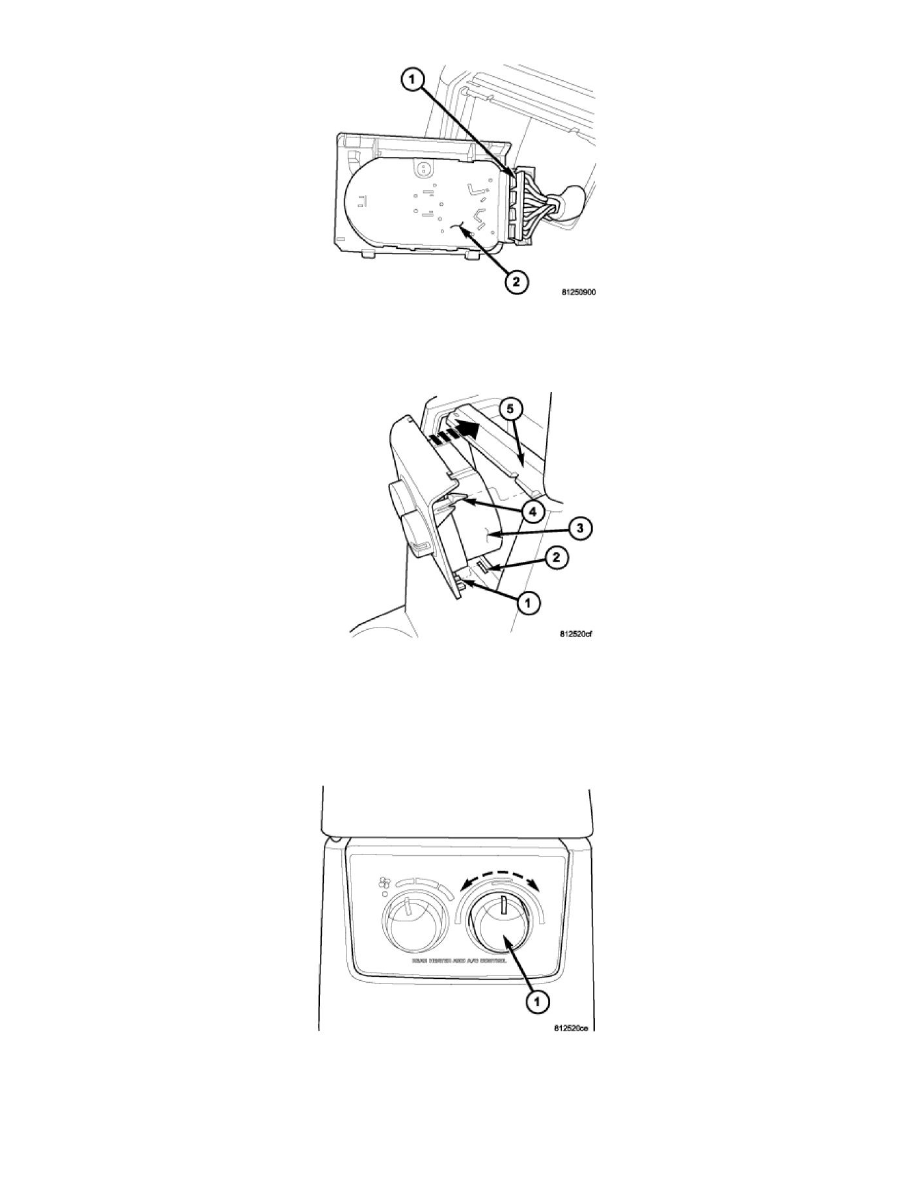
1. Position the rear A/C-heater control (2) near the center floor console.
2. Connect the wire harness connector (1) to the back of the rear A/C-heater control.
3. Insert the two locator tabs on the bottom of the rear A/C-heater control (1) into the two slots on the bottom edge of the floor console opening (2).
4. Rotate the rear A/C-heater control (3) forward far enough to align the two snap clips on the top of the rear A/C-heater control (4) with the
receptacles in the top edge of the floor console opening (5).
5. Using hand pressure, press the top edge of the rear A/C-heater control forward until the two snap clips are fully seated in into the receptacles.
6. Reconnect the negative battery cable.
7. Using a scan tool, calibrate the Rear Temperature Selector potentiometer calibration values.
8. Verify that the Actuator Calibration of the front A/C-heater control has passed. If an Actuator Calibration has not passed correct any errors before
proceeding.
9. Rotate the Rear Temperature Selector counter (1) clockwise to the Cold Position, allow the Selector to remain in the Cold Position for 5 seconds.
10. Rotate the Rear Temperature Selector Clockwise to the Hot Position, allow the Selector to remain in the Cold Position for 5 seconds.