
Durango 2WD V8-5.7L (2008)
Expansion Valve: Service and Repair
Plumbing - Rear
Removal
REMOVAL
WARNING: Refer to the applicable warnings and cautions for this system before performing the following operation See: Service
Precautions/Warning and See: Service Precautions/Caution. Failure to follow the warnings and cautions could result in possible personal
injury or death.
1. Recover the refrigerant from the refrigerant system See: Service and Repair/Refrigerant System Recovery.
2. Remove right rear quarter panel trim See: Body and Frame/Interior Moulding / Trim/Trim Panel/Service and Repair/Quarter Panel Trim/Quarter
Trim Panel - Removal.
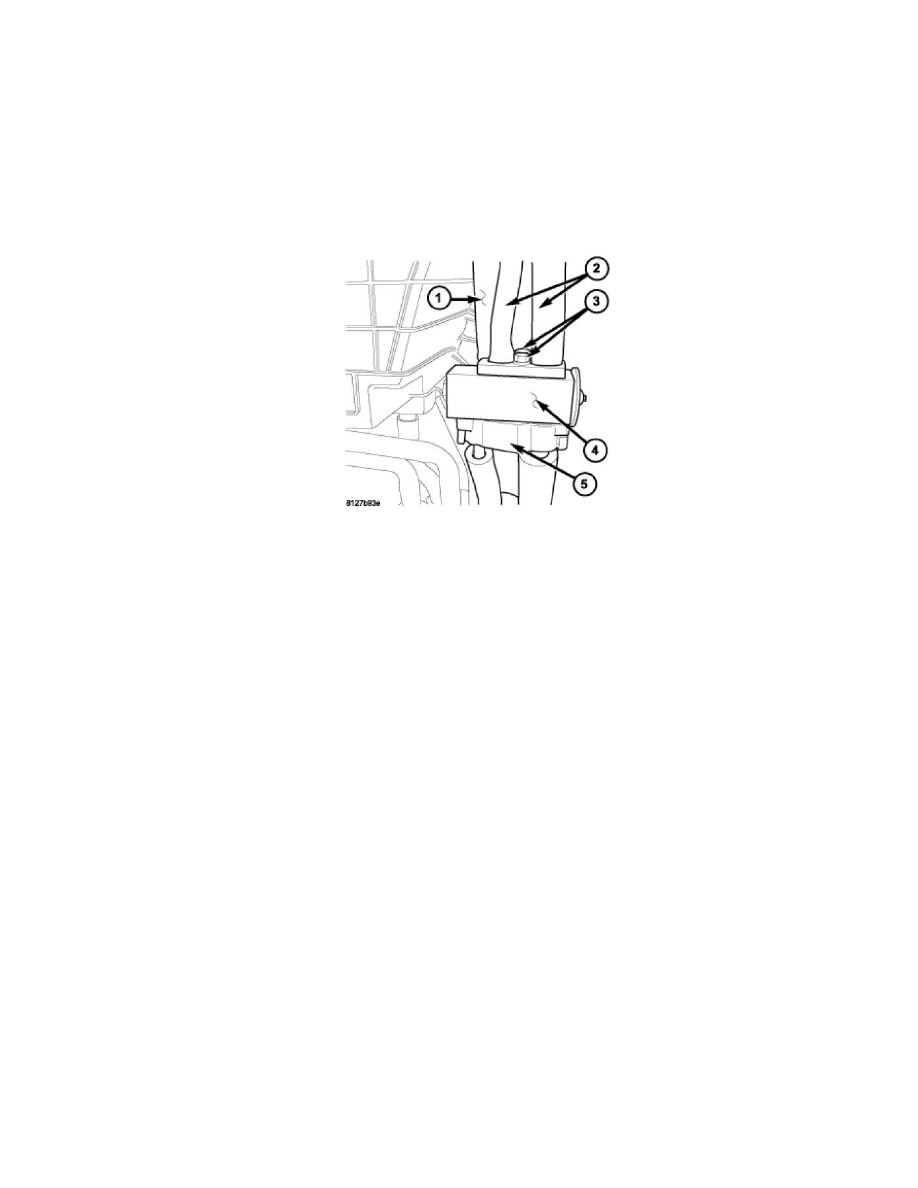
3. Remove the insulator (1) from around the rear A/C evaporator tubes (2) to gain access the two rear A/C expansion valve bolts (3).
4. Remove the two bolts that secure the rear A/C expansion valve (4) between the rear A/C evaporator tubes and the rear evaporator extension tube
tapping block (5).
5. Remove the rear A/C expansion valve from between the rear A/C evaporator tubes and the rear evaporator extension tube tapping block and
remove and discard the O-ring seals.
6. Install plugs in, or tape over the opened evaporator tubes and extension tube fittings and all rear expansion valve ports.
Installation
INSTALLATION
CAUTION: Be certain to adjust the refrigerant oil level when servicing the A/C refrigerant system See: Service and Repair/Refrigerant Oil
Level. Failure to properly adjust the refrigerant oil level will prevent the A/C system from operating as designed and can cause serious A/C
compressor damage.
NOTE: When replacing multiple A/C system components, refer to the Refrigerant Oil Capacities chart to determine how much oil should be
added to the refrigerant system See: Service and Repair/Refrigerant Oil Level.
NOTE: Replacement of the refrigerant line O-ring seals and gaskets is required anytime a refrigerant line is opened. Failure to replace the
rubber O-ring seals and metal gaskets could result in a refrigerant system leak.