
Durango 2WD V8-5.7L Hybrid (2009)
Connecting Rod: Removal and Replacement
Piston and Connecting Rod - Removal
REMOVAL
WARNING: On vehicles equipped with the high voltage system, you must thoroughly read and follow all High Voltage Safety procedures. In
addition, before performing any diagnostic or service procedure near a high voltage component, you must perform the High
Voltage Power Down. Failure to follow these instructions may result in possible serious or fatal injury See: Hybrid Drive
Systems/Battery System, Hybrid Drive/Service Precautions
1. Perform the HEV high voltage power down procedure See: Hybrid Drive Systems/Battery System, Hybrid Drive/Service and Repair/Battery
System - High Voltage Power Down
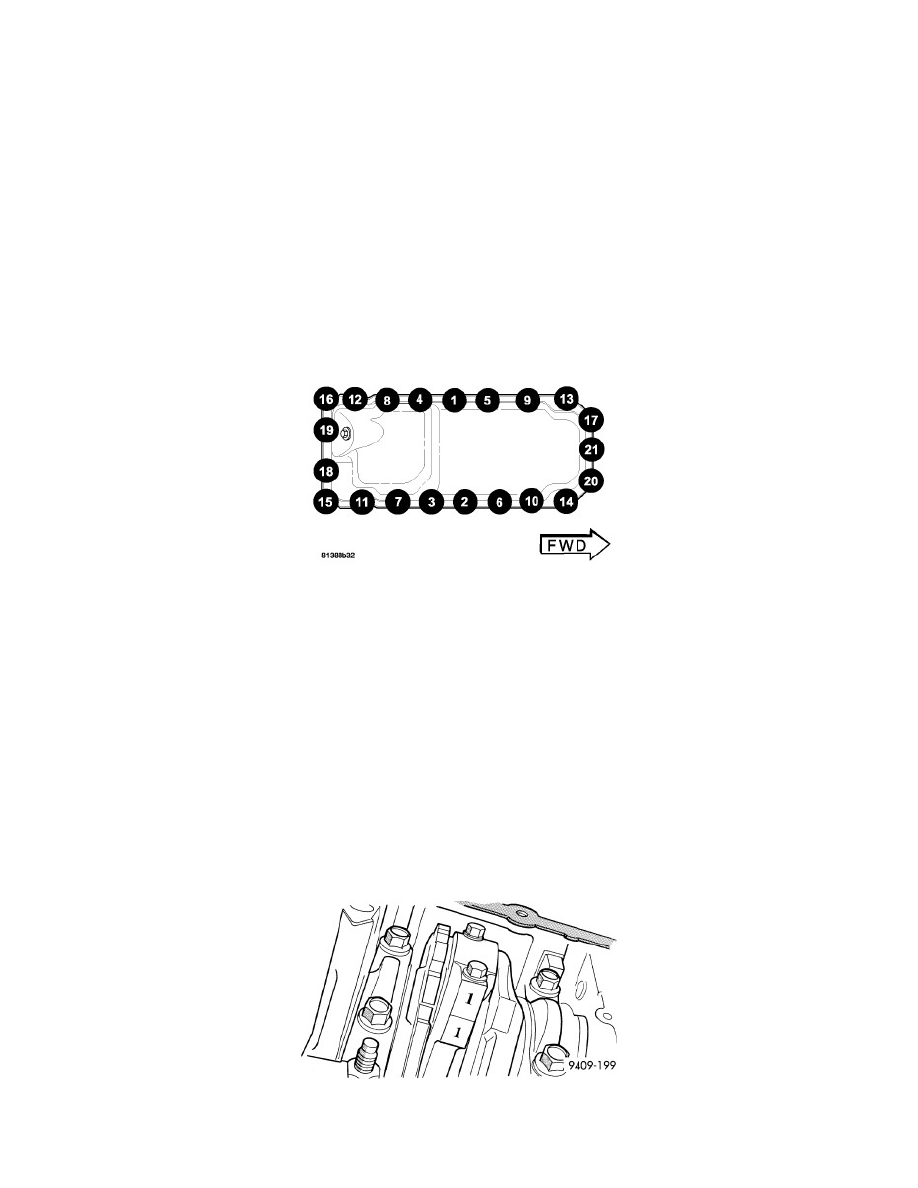
2. Using the sequence shown, remove the oil pan bolts and remove the oil pan and gasket/windage tray See: Engine Lubrication/Oil Pan/Service and
Repair/Engine Oil Pan - Removal
3. Remove the cylinder heads See: Cylinder Head Assembly/Service and Repair/Removal and Replacement/Cylinder Head - Removal
4. If necessary, remove the ridge from the top of the cylinder bores with a reliable ridge reamer before removing the pistons from the cylinder block.
Be sure to keep the tops of the pistons covered during this operation.
NOTE: When removing the piston and connecting rod assemblies from the engine, rotate the crankshaft until each connecting rod is centered
in the cylinder bore.
CAUTION: Do not use a number stamp or a punch to mark the connecting rods or caps, as damage to the connecting rods could occur.
NOTE: The connecting rods and bearing caps are not interchangeable and should be marked before removal to make sure they are installed
in their original locations.
5. Mark connecting rod and bearing cap positions using a permanent ink marker or scribe tool.