
Durango 2WD V8-5.7L Hybrid (2009)
Engine Mount: Service and Repair
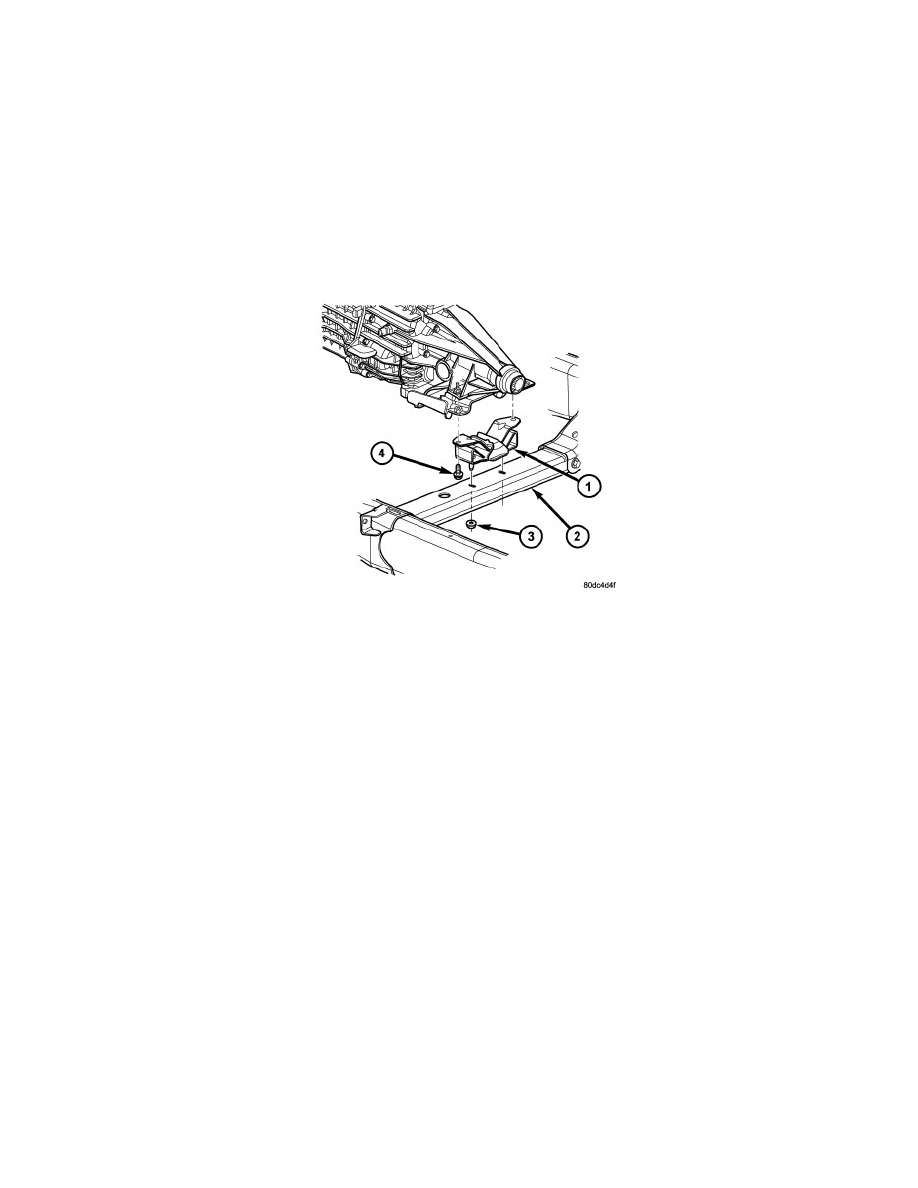
Engine Mount Insulator - Installation
Rear
INSTALLATION
WARNING: On vehicles equipped with the high voltage system, you must thoroughly read and follow all High Voltage Safety procedures. In
addition, before performing any diagnostic or service procedure near a high voltage component, you must perform the High
Voltage Power Down. Failure to follow these instructions may result in possible serious or fatal injury See: Hybrid Drive
Systems/Battery System, Hybrid Drive/Service Precautions
NOTE: Mopar(R) Lock & Seal Adhesive must be applied to the bolts before installation.
1. Apply Mopar(R) Lock & Seal Adhesive to the transmission mount bolts.
2. Install the bolts that attach the transmission mount to the transmission bracket (4) and tighten to 61 Nm (45 ft. lbs.).
3. Lower the transmission so the transmission mount (1) rests on the crossmember (2), and the studs of the transmission mount are aligned in the slots
in the crossmember.
4. Install the nuts (3) onto the transmission mount studs and tighten to 54 Nm (40 ft. lbs.).
5. Perform the HEV high voltage power up procedure See: Hybrid Drive Systems/Battery System, Hybrid Drive/Service and Repair/Battery System
- High Voltage Power Up
Front
INSTALLATION
WARNING: On vehicles equipped with the high voltage system, you must thoroughly read and follow all High Voltage Safety procedures. In
addition, before performing any diagnostic or service procedure near a high voltage component, you must perform the High
Voltage Power Down. Failure to follow these instructions may result in possible serious or fatal injury See: Hybrid Drive
Systems/Battery System, Hybrid Drive/Service Precautions
NOTE: For mount to engine block and left engine bracket to front axle bolts, apply Mopar(R) Lock & Seal Adhesive, Medium Strength
Thread-locker.