
Durango 2WD V8-5.7L Hybrid (2009)
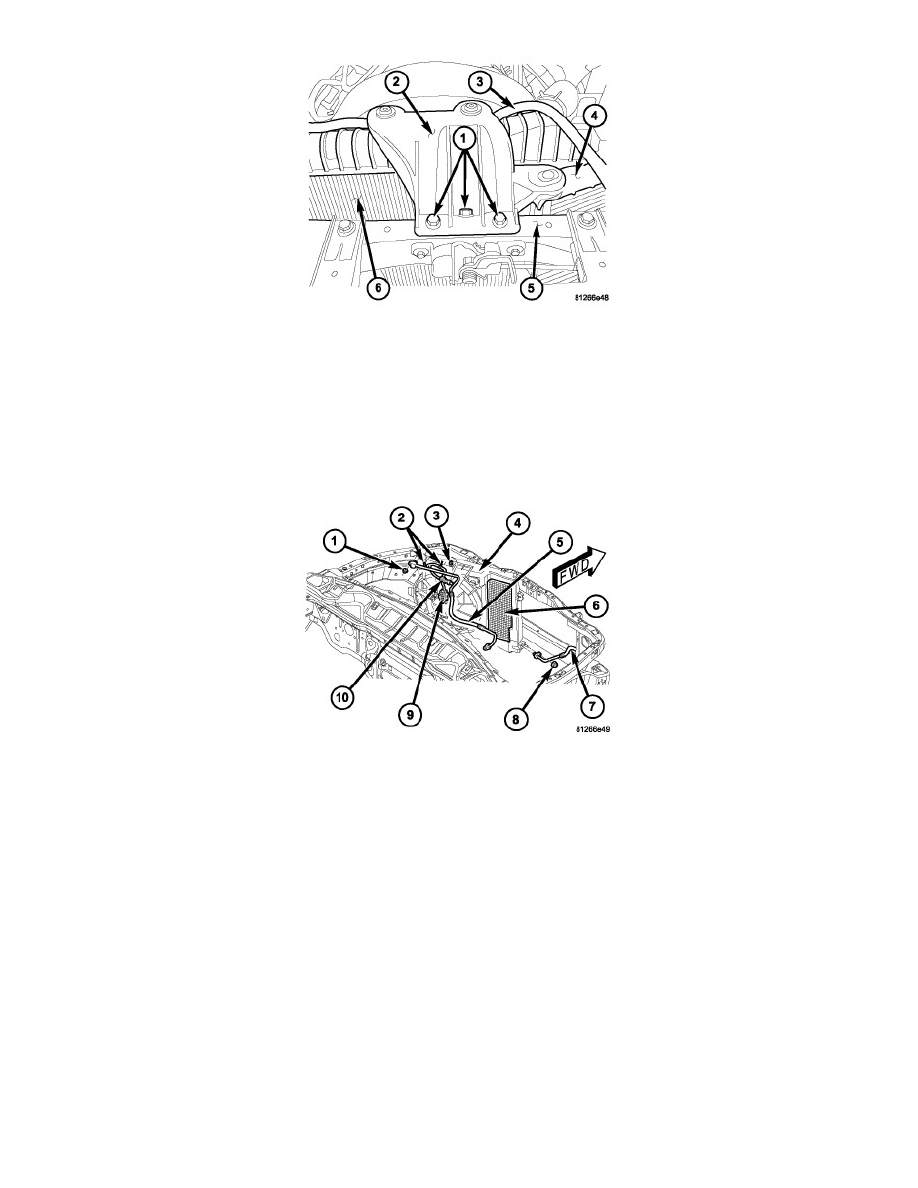
3. Carefully push back the radiator (6) for clearance and install the condenser/cooling fan assembly (4). Insert the two lower condenser fan shroud
mounting tabs into the holes in the lower front crossmember.
4. Install the bolt that secures the condenser/cooling fan assembly to the upper left fender rail. Tighten the bolt to 9.5 Nm (85 in. lbs.).
5. Position the radiator overflow hose (3) to it's installed location
6. Align the upper mounting tab of the condenser/cooling fan assembly to the hole in the upper radiator support (2) and install the upper radiator
support.
7. Install the three bolts (1) that secure the upper radiator support to the upper front crossmember (5). Tighten the bolts to 23 Nm (17 ft. lbs.).
8. Remove the tape or plugs from the discharge and liquid line fittings and condenser ports.
9. Lubricate new rubber O-ring seals with clean refrigerant oil and install them and new gaskets onto the discharge and liquid line fittings. Use only
the specified O-rings as they are made of a special material for the R-134a system. Use only refrigerant oil of the type recommended for the A/C
compressor in the vehicle.
10. Connect the A/C discharge line (5) and the A/C liquid line (7) to the A/C condenser (6).
11. Install the nuts (1 and 8) that secure the A/C discharge and liquid lines to the A/C condenser. Tighten the nuts to 22 Nm (16 ft. lbs.).
12. Install the A/C discharge line into the retainer (3) located on the condenser fan shroud.
13. Install the wire harness and the two wire harness retainers (2) to the condenser fan shroud (4).
14. Connect the wire harness connectors to the condenser cooling fan motor (9) and the A/C pressure transducer (10).