
Durango 2WD V8-5.9L VIN Z LDC (2000)
Receiver Dryer: Service and Repair
WARNING: REVIEW THE WARNINGS AND CAUTIONS BEFORE PERFORMING THE FOLLOWING OPERATION.
REMOVAL
1. Disconnect and isolate the battery negative cable.
2. Recover the refrigerant from the refrigerant system. Refer to: "Service and Repair" See: Service and Repair
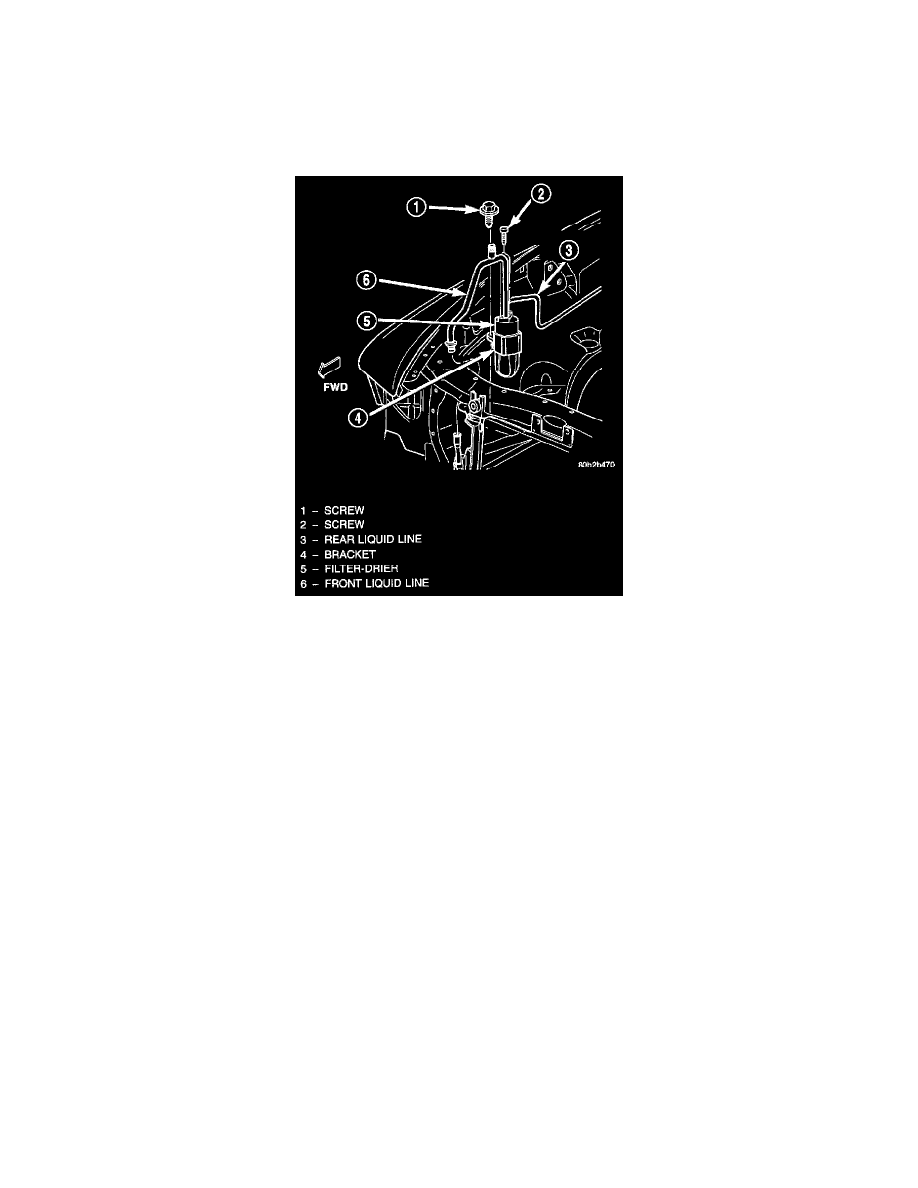
Filter-Drier Remove/Install
3. Remove the screws that secure the front and rear liquid line block fittings to the filter-drier inlet and outlet. Disengage the block fittings from the
filter-drier. Install plugs in, or tape over all of the opened refrigerant line fittings.
4. Remove the screw that secures the filter-drier mounting bracket to the front fender wheelhouse front extension.
5. Remove the filter-drier from the engine compartment.
INSTALLATION
1. Position the filter-drier and its bracket to the front fender wheelhouse front extension as a unit and loosely secure it with the mounting screw.
2. Remove the tape or plugs from the front liquid line block fitting and the filter-drier inlet. Install the front liquid line block fitting to the filter-drier
inlet and secure the connection with a screw. Tighten the mounting screw to 13.5 Nm (120 in. lbs.).
3. Remove the tape or plugs from the rear liquid line block fitting and the filter-drier outlet. Install the rear liquid line block fitting to the filter-drier
outlet and secure the connection with a screw. Tighten the mounting screw to 13.5 Nm (120 in. lbs.).
4. Tighten the filter-drier bracket mounting screw to 6.8 Nm (60 in. lbs.).
5. Connect the battery negative cable.
6. Evacuate the refrigerant system. Refer to: "Service and Repair" See: Service and Repair
7. Charge the refrigerant system.
NOTE: If the filter-drier is replaced, add 30 milliliters (1 fluid ounce) of refrigerant oil to the refrigerant system. Use only refrigerant oil of the
type recommended for the compressor in the vehicle.