Durango 4WD V8-4.7L VIN P Flex Fuel (2007)

Expansion Valve: Service and Repair
Plumbing - Front
Removal
REMOVAL
WARNING: Refer to the applicable warnings and cautions for this system before performing the following operation. Failure to follow the
warnings and cautions could result in possible personal injury or death.
1. Recover the refrigerant from the refrigerant system.
2. Disconnect and isolate the negative battery cable.
3. Raise and support the vehicle.
4. Remove the right front wheelhouse splash shield.
NOTE: It is not necessary to remove the front A/C liquid line from the receiver drier when removing the A/C lines from the A/C expansion valve.
If care is used, the liquid line can be flexed to gain access to the expansion valve. This also applies to the rear A/C lines, if equipped.
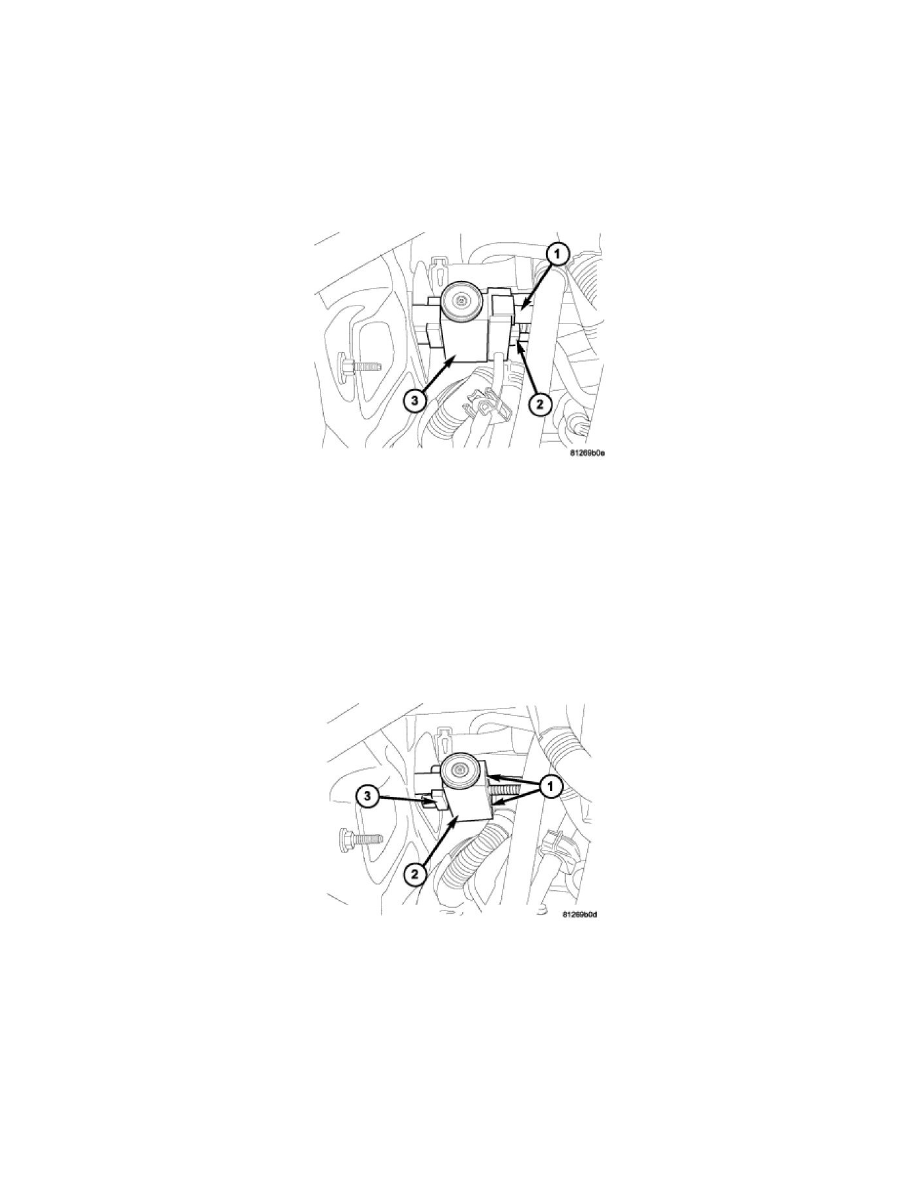
5. Carefully remove the A/C suction line (1) and the A/C liquid line (2) from the A/C expansion valve (3).
6. Remove the two bolts (1) that secure the A/C expansion valve (2) to the evaporator tube tapping block (3).
7. Remove the A/C expansion valve from the evaporator tube tapping block and remove and discard the O-ring seals.
8. Install plugs in, or tape over the opened evaporator tube fittings and all expansion valve ports.
Installation
INSTALLATION
CAUTION: Be certain to adjust the refrigerant oil level when servicing the A/C refrigerant system. Failure to properly adjust the refrigerant
