
Durango 4WD V8-4.7L VIN P Flex Fuel (2007)
6. Raise and support the vehicle.
7. Remove the right front wheelhouse splash shield.
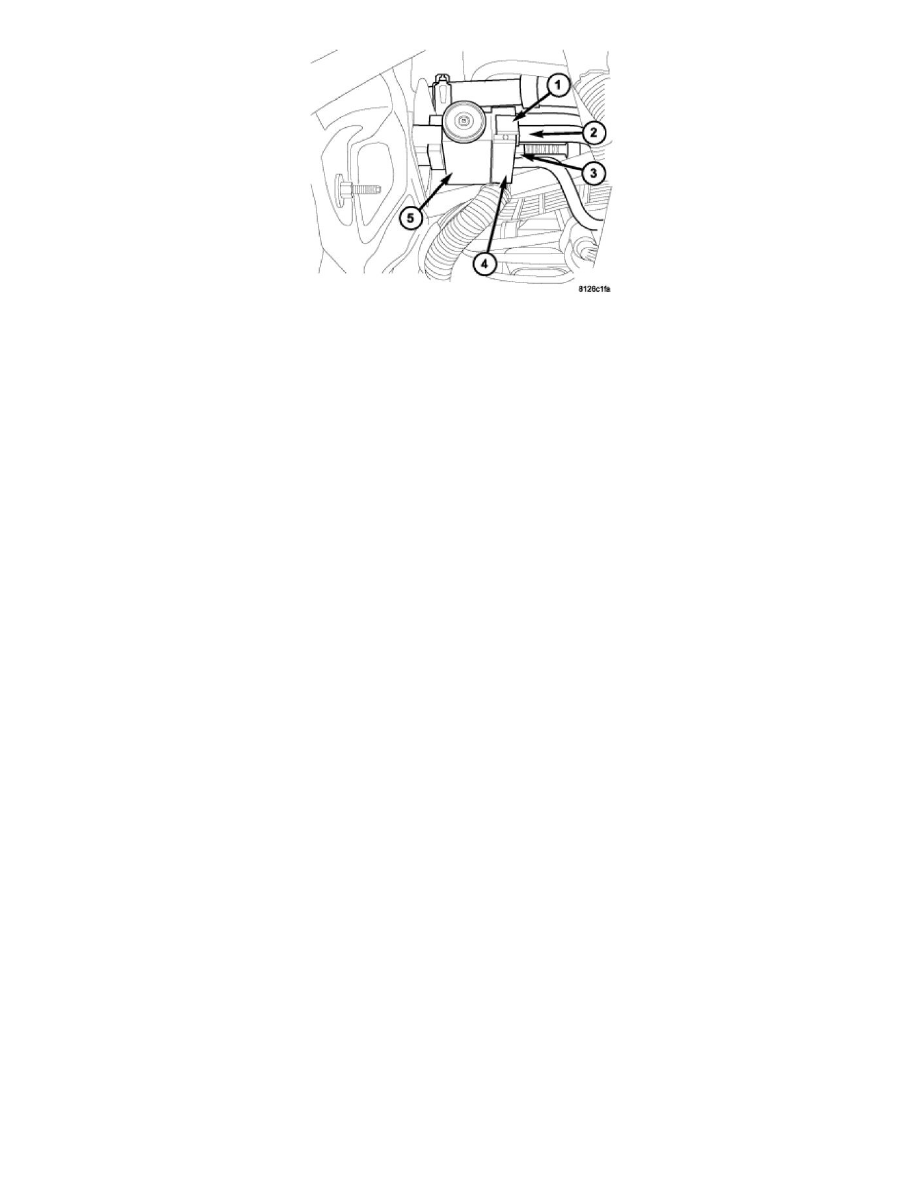
8. Remove the plastic retainer (1) that secures the A/C suction line (2) to the liquid line tapping block (4).
9. Remove the nut (3) that secures the liquid line tapping block to the A/C expansion valve (5).
10. Disconnect the A/C suction line and the rear section of the A/C liquid line from the A/C expansion valve and remove and discard the O-ring seals
and gaskets.
11. Install plugs in, or tape over the opened refrigerant line fittings and the expansion valve ports.
12. Separate the A/C suction line from the liquid line tapping block.
13. On models equipped with the rear heating-A/C system, disconnect the underbody refrigerant line from the A/C suction line.
14. Remove the A/C suction line from the engine compartment.
Installation
INSTALLATION
CAUTION: Be certain to adjust the refrigerant oil level when servicing the A/C refrigerant system. Failure to properly adjust the refrigerant
oil level will prevent the A/C system from operating as designed and can cause serious A/C compressor damage.
NOTE: When replacing multiple A/C system components, refer to the Refrigerant Oil Capacities chart to determine how much oil should be added to
the refrigerant system.
NOTE: Replacement of the refrigerant line O-ring seals and gaskets is required anytime a refrigerant line is opened. Failure to replace the rubber O-ring
seals and metal gaskets could result in a refrigerant system leak.