
Durango 2009 Hybrid 4WD V8-57L HVAC Hose/Line Component Service and Repair Instructions
1. Position the underbody line assembly underneath the vehicle body.
2. Carefully raise the hoist until the frame and body mounts line up together.
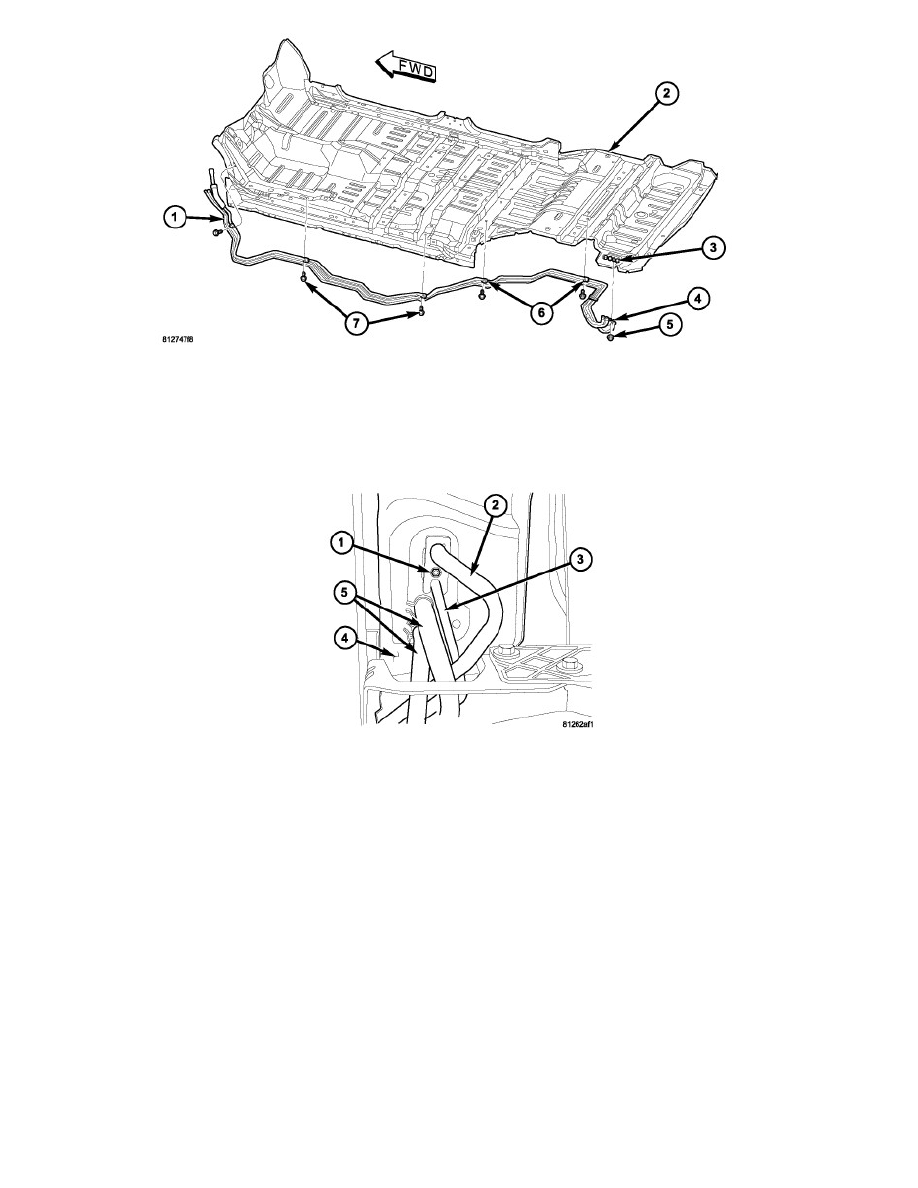
3. Install the five screws that secure the underbody lines (1) to the vehicle underbody (2).
4. Install all body mount bolts to the passenger side of the vehicle. Tighten all passenger and driver side mount bolts securely.
5. Raise the hoist and remove the jack stands from under the vehicle.
6. Connect the rear heater hoses (5) to the rear heater core tubes that extend through the rear floor panel (4) behind the right rear wheel housing and
install the heater hose clamps.
7. Remove the tape or plugs from fittings on the rear suction line (2) and the rear liquid line (3) and the rear evaporator extension line tapping plate
ports.
8. Lubricate new rubber O-ring seals with clean refrigerant oil and install them onto the rear suction and liquid line fittings. Use only the specified
O-rings as they are made of a special material for the R-134a refrigerant system. Use only refrigerant oil of the type recommended for the A/C
compressor in the vehicle.
9. Connect the rear suction and liquid line fittings to the rear evaporator line tapping plate.
10. Install the nut (1) that secures the rear refrigerant lines to the rear evaporator line tapping plate. Tighten the nut to 23 Nm (17 ft. lbs.).