
Durango RT 4WD V8-5.9L VIN Z LDC (2002)
Ball Joint: Testing and Inspection
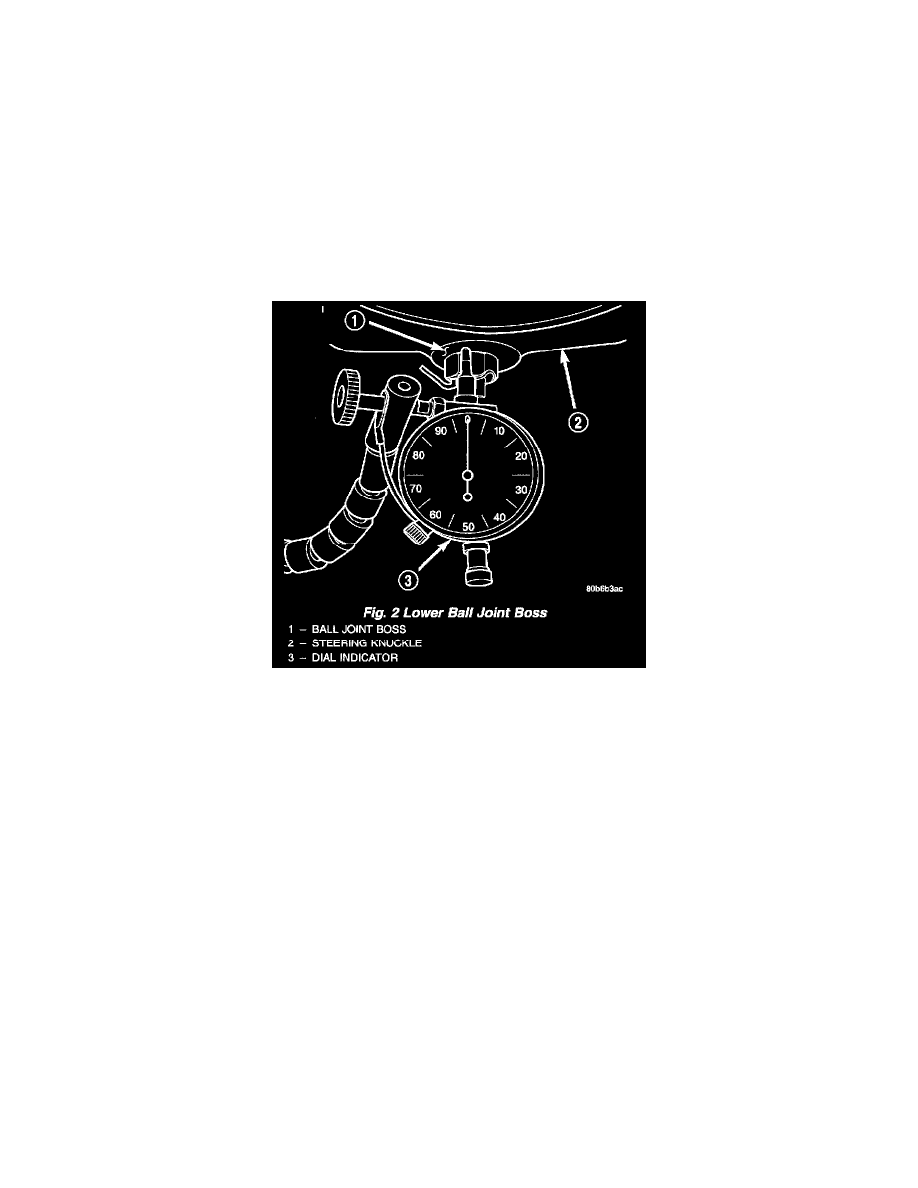
Lower Ball Joint
DIAGNOSIS AND TESTING - LOWER BALL JOINT
NOTE: If the ball joint is equipped with a lubrication fitting, grease the joint then road test the vehicle before performing test.
1. Raise the front of the vehicle. Place safety floor stands under both lower suspension arms as far outboard as possible. Lower the vehicle to allow
the stands to support some or all of the vehicle weight.
NOTE: The upper suspension arms must not contact the rebound bumpers.
2. Remove the tire and wheel assemblies.
3. Mount a dial indicator solidly to the underside of the lower suspension arm.
4. Position indicator plunger against the bottom surface of the steering knuckle lower ball joint boss.
NOTE: The dial indicator plunger must be perpendicular to the machined surface of the steering knuckle lower ball joint boss.
5. Position a pry bar over the top of the upper suspension arm and under the pivot bar of the upper suspension arm. Pry down on the upper
suspension arm and then zero the dial indicator.
6. Reposition the pry bar under the upper suspension arm and on top of the jounce/rebound bracket. Pry up on the upper suspension arm and record
the dial indicator reading.
7. If the travel exceeds 1.52 mm (0.060 inch), replace the lower ball joint.