
Dynasty L4-153 2.5L SOHC VIN K TBI (1992)
H-Valve: Service and Repair
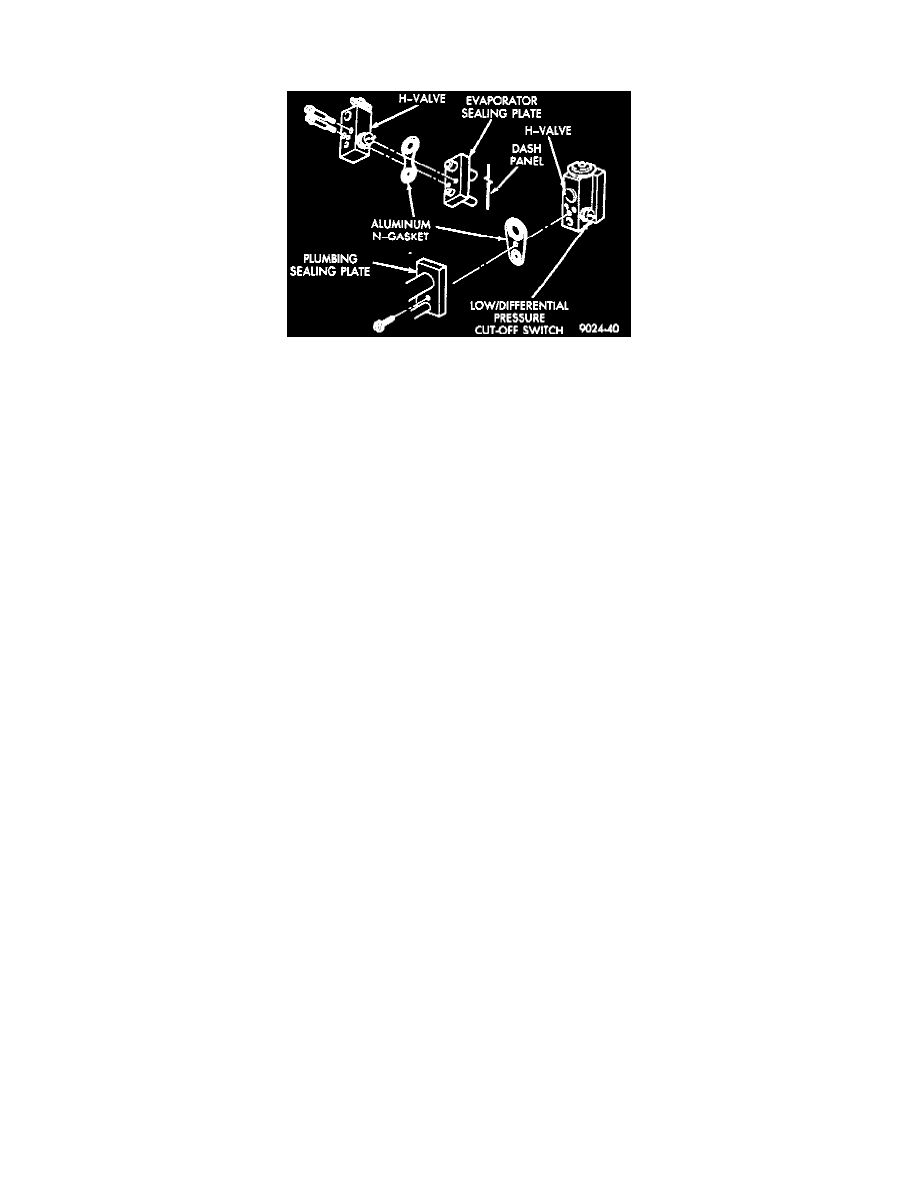
REMOVAL
Expansion Valve
CAUTION: The refrigerant system must be completely discharged before proceeding with this operation.
1. Remove the 8 mm x 30 mm x 1.25 thread bolt in center of plumbing sealing plate.
2. Carefully pull refrigerant line assembly towards front of vehicle (take care not to scratch valve sealing surfaces with tube pilots) and cover with
plastic sheeting.
3. Remove two 1/4-20 Torx Head screws. Hold valve once cap screws are removed, valve is completely disconnected.
4. Carefully remove valve.
TO INSTALL PERFORM THE FOLLOWING OPERATION
1. Remove and replace the aluminum N-gaskets (1 on evaporator plate and 1 on plumbing plate).
2. Remove sealing cap from H-valve control head side sealing surface only and carefully hold it against evaporator sealing plate (do not scratch
sealing surface) and install two 1/4-20 NC Torx Drive screws and tighten 100 ± 30 inch pounds (11 ± 3 Nm).
3. Remove sealing cap from plumbing side sealing surface and carefully hold plumbing up to valve and install the 8mm x 3Omm x 1.25 thread bolt
and tighten to 200 ± 30 inch pounds (23 ± 3 Nm).
4. Connect wires to low pressure cut-off switch.
5. After expansion valve is installed and system charged and leak checked, repeat performance check.