Dynasty L4-153 2.5L SOHC VIN K TBI (1992)

1.
With the ignition key in the OFF position, disconnect the negative battery cable.
2.
Loosen the alternator adjustment screw lock nut, mounting bolt, and belt adjusting bolt. Remove the alternator belt and A/C belt.
3.
Remove the A/C compressor and the alternator. Remove the A/C compressor and alternator bracket. On 1989-1990 vehicles, install the new A/C
and alternator bracket (P/N 4556173) using the following procedure. For 1991, **1992 and 1993** vehicles, use the following procedure to
re-torque the original bracket. **1991, 1992 AND 1992** VEHICLES ARE ALREADY EQUIPPED WITH THE NEW STYLE BRACKET. DO
NOT REPLACE THE BRACKET.
NOTE:
THE FOLLOWING PROCEDURE IS CRITICAL. THE TORQUE SEQUENCE MUST BE FOLLOWED EXACTLY AS STATED IN STEP 4
THROUGH STEP 9.
4.
Pre-torque one side of the block bolt to 15 in.lbs. (1.7 N-m).
5.
Tighten the front of the block bolt to 40 ft.lbs. (54 N-m).
6.
Tighten the front of the block nut to 40 ft.lbs. (54 N-m).
7.
Tighten the five side of the head and block bolts to 40 ft.lbs. (54 N-m).
8.
On turbo and 2.5L engines, tighten the engine mount fore/aft through bolt to 100 ft.lbs. (135 N-m).
9.
Install the original alternator and tighten the pivot bolt to 40 ft.lbs. (54 N-m).
10.
Install the original A/C compressor.
11.
Install the new alternator drive belt (P/N 4713100). Tighten the adjusting bolt to increase alternator belt tension to 160 lbs.
12.
Tighten the adjusting bolt lock nut to 40 ft.lbs. (54 N-m).
13.
Start the vehicle and check for belt noise. Spray the alternator drive belt with water. If any chirping noise is created, the alternator is not properly
aligned and the rest of the procedure must be followed. If the noise is eliminated, install the A/C drive belt as described in the appropriate service
manual to complete the repair.
14.
Loosen the alternator belt and the alternator pivot bolt.
15.
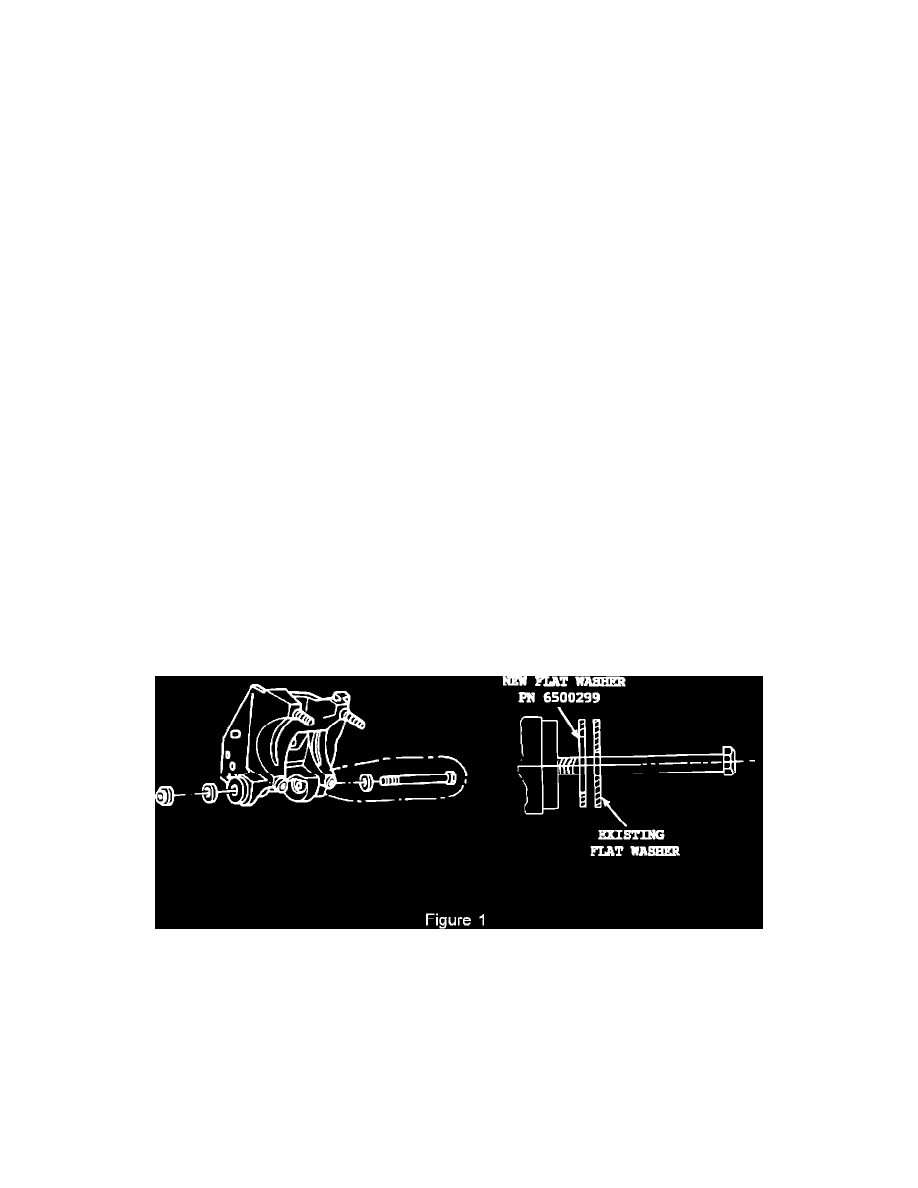
Install the existing flat washer and the new flat washer (P/N 6500299) as shown in Figure 1. The two washers must be centered with respect to the
pivot bolt.
16.
Replace and tighten the alternator pivot bolt to 40 ft.lbs. (54 N-m).
17.
Install the new alternator drive belt as described in steps 11 and 12.
18.
Install the A/C drive belt as described in the appropriate service manual.
POLICY:
Reimbursable within the provisions of the warranty.
