
Grand Caravan L4-153 2.5L SOHC VIN K TBI (1988)
Sliding Door Interior Trim Panel: Service and Repair
*** THIS ARTICLE HAS BEEN UPDATED BY TSB # 23-08-88 DATED MAY 16, 1988
REMOVAL
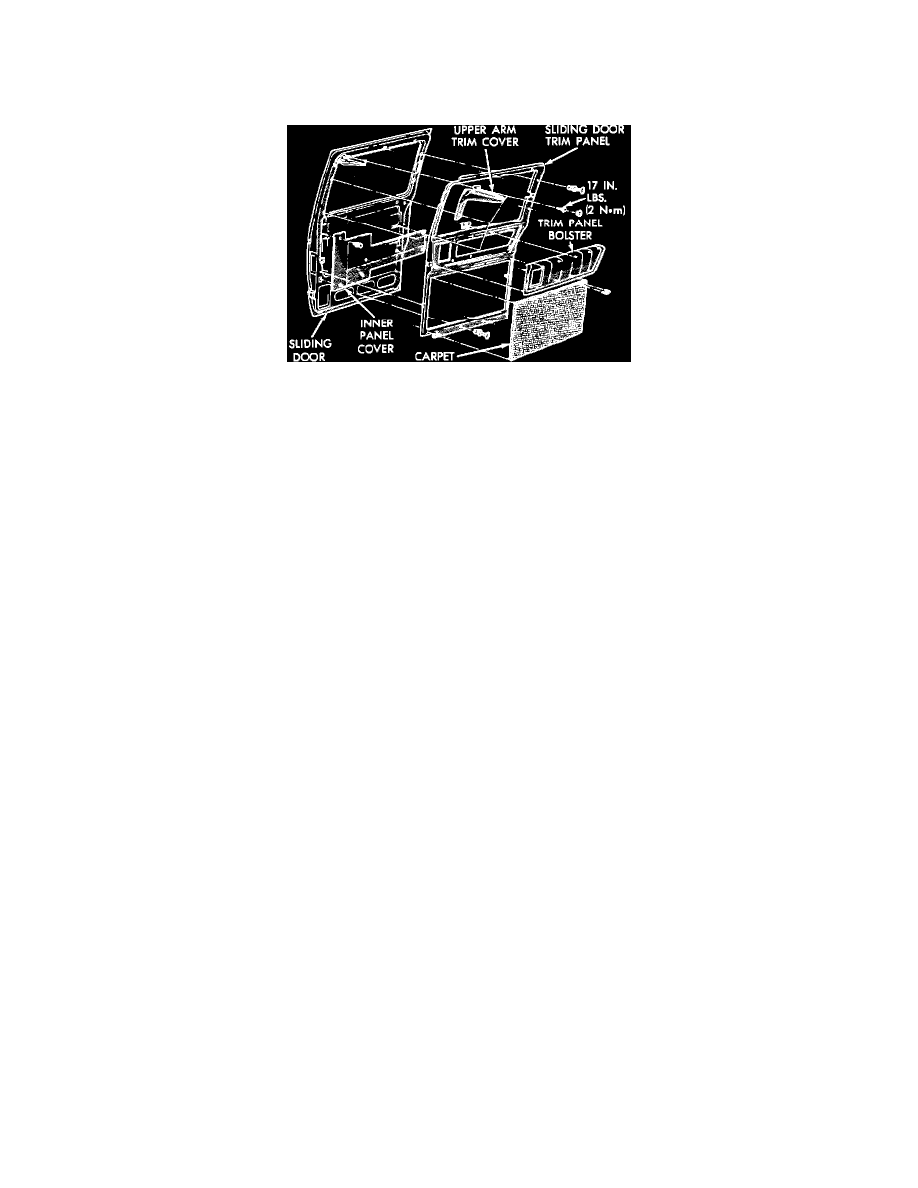
Sliding Door Trim Panel
1.
With door closed, remove door latch remote control bezel.
2.
Remove two (2) plugs and screws holding upper arm cover to the trim panel.
3.
Remove seven (7) plastic trim panel fasteners.
4.
Remove one (1) plug and screw from the trim panel.
5.
On carpet trim panel models, remove the hidden screw from the upper rearward corner of the carpet insert.
6.
Disengage five (5) frogleg fasteners used to retain the trim panel to the door.
7.
Remove the christmas tree fastener from the center of the carpet insert (if applicable).
7.
Remove the trim panel.
INSTALLATION
1.
Raise the trim panel to the door and push the five (5) frogleg fasteners, and the one (1) christmas fastener (if applicable), into the door.
2.
Install one (1) screw and plug through the trim panel into the door.
3.
On carpet trim panel models, install the hidden screw into the upper rearward corner of the carpet insert.
3.
Install the seven (7) plastic trim panel fasteners.
4.
Install the two (2) screws and plugs used to fasten the upper arm trim cover to the door.
5.
Install the door latch remote control bezel.