
Grand Caravan L4-153 2.5L SOHC VIN K TBI (1988)
8.
Install primary shoe return spring using brake spring pliers or equivalent.
9.
Place protruding hole rim of cable guide in secondary shoe web hole, then holding guide in position, install secondary shoe return spring through
cable guide and secondary shoe. Install spring on anchor pin using brake spring pliers or equivalent. Ensure cable guide remains flat against
secondary shoe web during and after return spring installation. Also ensure secondary spring end overlaps primary spring end on anchor
pin.
10.
Using suitable pliers, squeeze spring ends around anchor pin until parallel.
11.
Install adjuster screw assembly between primary and secondary brake shoes with star wheel on secondary shoe side. The left side adjuster
assembly stud is stamped "L" and is cadmium-plated. The right side adjuster assembly is stamped "R" and is colored black.
12.
Install shoe-to-shoe spring, then position adjusting lever spring over pivot pin on shoe web.
13.
Install adjusting lever under spring and over pivot pin, then slide lever slightly rearward.
14.
Install nails, springs and retainers.
15.
Thread adjuster cable over guide and hook end of overload spring in lever. Ensure eye of cable is pulled tight against anchor and in a straight line
with guide.
16.
Install brake drum, tire and wheel assembly.
17.
Adjust brakes.
18.
If any hydraulic connections have been opened, bleed brake system.
19.
Check master cylinder fluid level, and replenish as necessary.
20.
Check brake pedal for proper feel and return.
21.
Lower vehicle and road test. Do not severely apply brakes immediately after installation of new brake linings or permanent damage may
occur to linings, and/or brake drums may become scored. Brakes must be used moderately during first several hundred miles of operation
to ensure proper burnishing of linings.
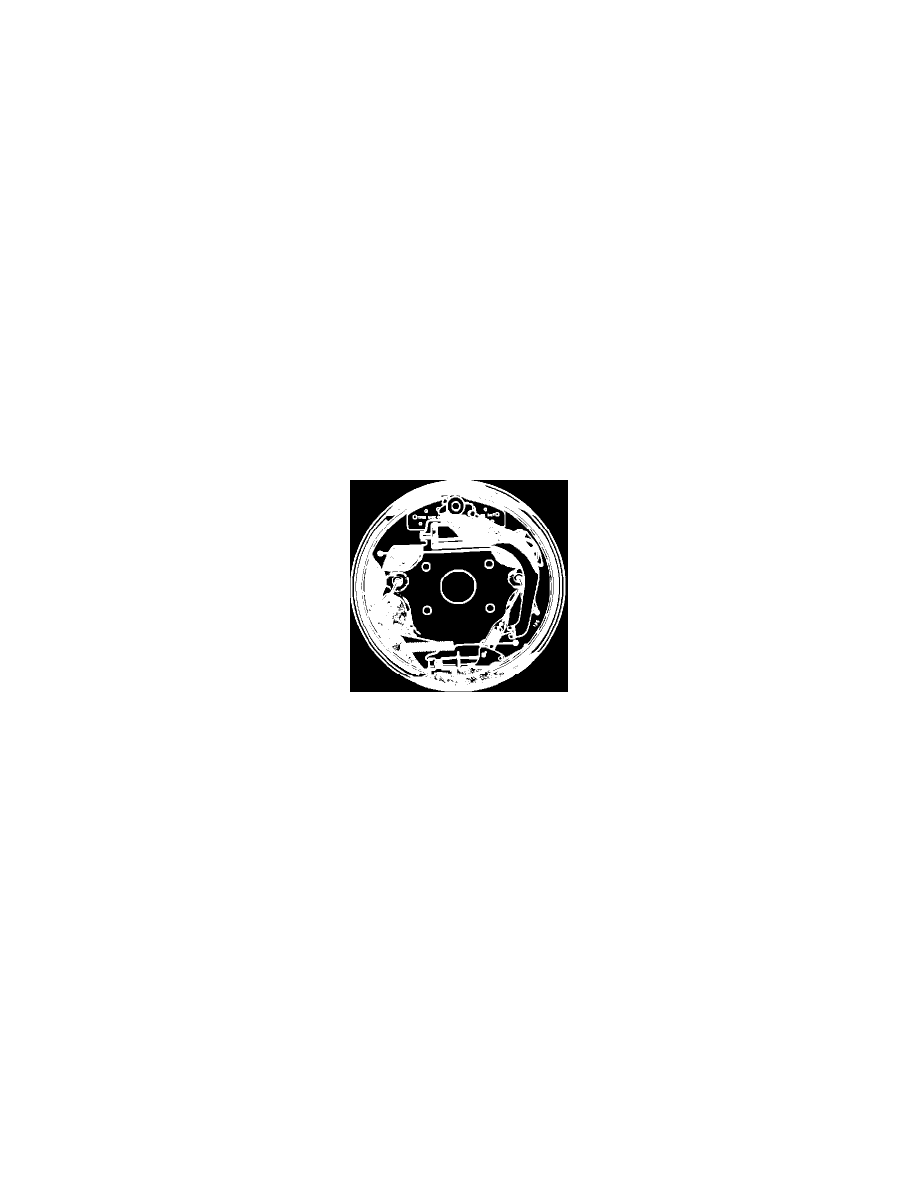
With 12 Inch Drums
Fig. 2 Drum brake assembly. 12 inch brake drums.
REMOVAL
1.
Raise and support vehicle.
2.
Remove wheel and tire assembly.
3.
Remove axle shaft nuts, washers, and cones, then the axle shaft. If cones do not release, rap axle shaft sharply at center.
4.
Remove outer hub nut, then straighten lock washer and remove washer, inner nut, and bearing.
5.
Remove brake drum. If brake lining is dragging on brake drum, back off brake adjustment by rotating adjusting screw.
6.
Unhook adjusting lever return spring from lever, remove lever and return spring from lever pivot pin, and unhook adjuster lever from adjuster
cable assembly.
7.
Using suitable pliers, unhook upper shoe-to-shoe spring, then unhook and remove shoe hold-down springs.
8.
Disconnect parking brake cable from parking brake lever.
9.
Remove shoes, lower shoe-to-shoe spring and star wheel as an assembly.
INSPECTION
1.
Using suitable solvent, clean support, then inspect for burrs and remove as necessary.
2.
Clean and lubricate threads of adjusting screws, then inspect for pulled or stripped threads.
3.
If spring paint shows discoloration, end coils are distorted, or spring strength is questionable, replace spring.
INSTALLATION
Pivot screw and adjusting nut have lefthand threads on left side brakes and righthand threads on right side brakes.
1.
Using suitable lubricant, lubricate and assemble star wheel assembly, then lubricate guide pads on support plates.
2.
Assemble star wheel, lower shoe-to-shoe spring, and brake shoes and position assembly on support plate.