
Grand Caravan V6-181 3.0L SOHC (1989)
1.
Place an oil pan under the vehicle to catch fluid leakage (oil loss will be minimal).
2.
Disconnect the existing cooler hoses from the fittings at the base of the radiator (Figure 2) and from the transmission fittings (Figure 3).
Save the clamps for reinstallation.
3.
Install the supplied valve, hose and bracket assembly (PN C3940406) in place of the removed hoses as follows.
Note:
The hoses on the new assembly are banded together with tape and the ends are pre-molded to align them for installation to
the appropriate transmission and cooler fittings. Do not disturb the tape wrappings.
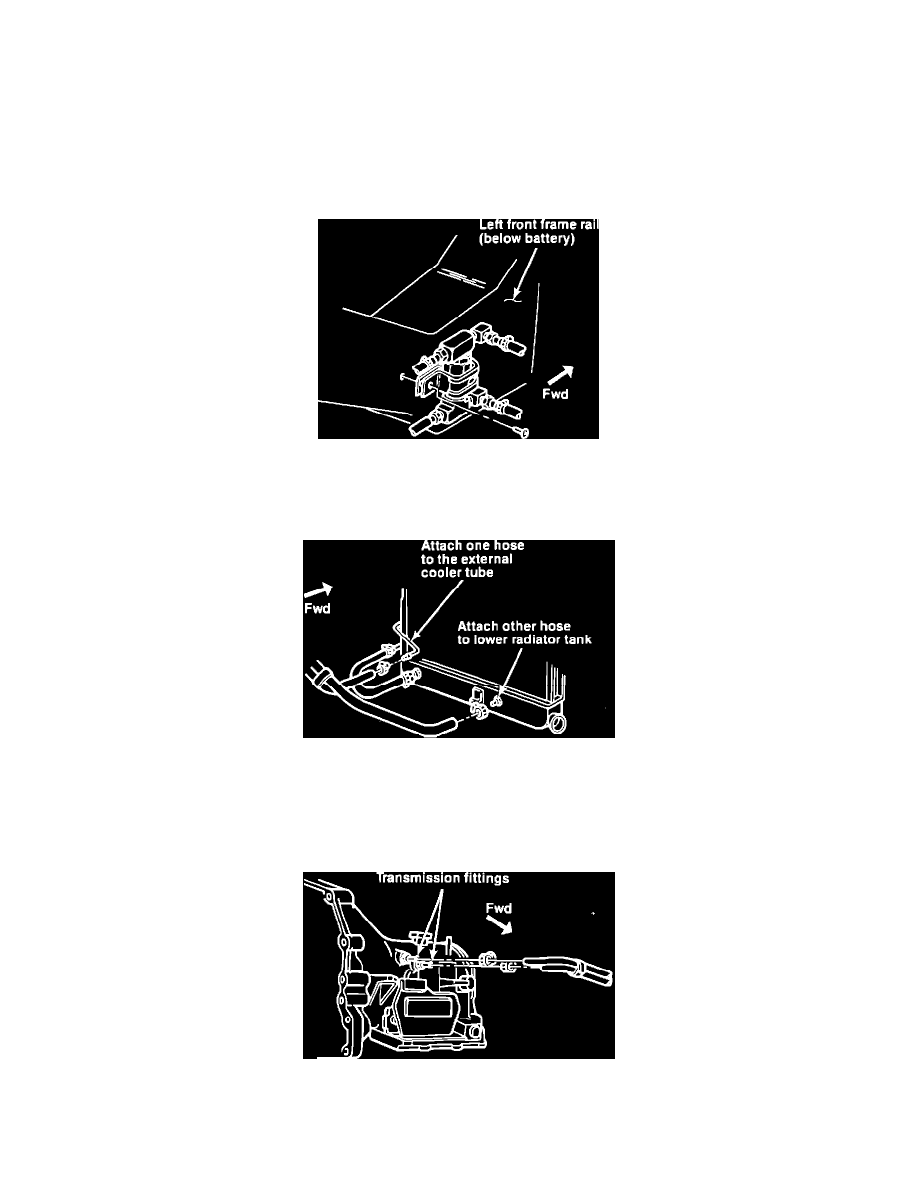
Figure 1
^
Support the valve and hose assembly by loosely attaching the valve support bracket to the left front frame rail with the supplied screw, using
the existing hole in the rail (Figure 1).
Figure 2
^
Attach the hoses to the fittings at the base of the radiator and secure with the original clamps (Figure 2).
Important:
Note that bolh hoses do not attach to the lower radiator tank fittings. As shown in Figure 2, one hose attaches to the lower
radiator tank fitting and the other hose attaches to the external cooler tube.
Figure 3
^
^ Attach the hoses to the transmission fittings and secure with the original clamps (Figure 3).