
Grand Caravan V6-3.3L Flex Fuel (2008)
Trim Panel: Service and Repair
Front Door Trim Panel
Front Door Trim Panel - Removal
REMOVAL
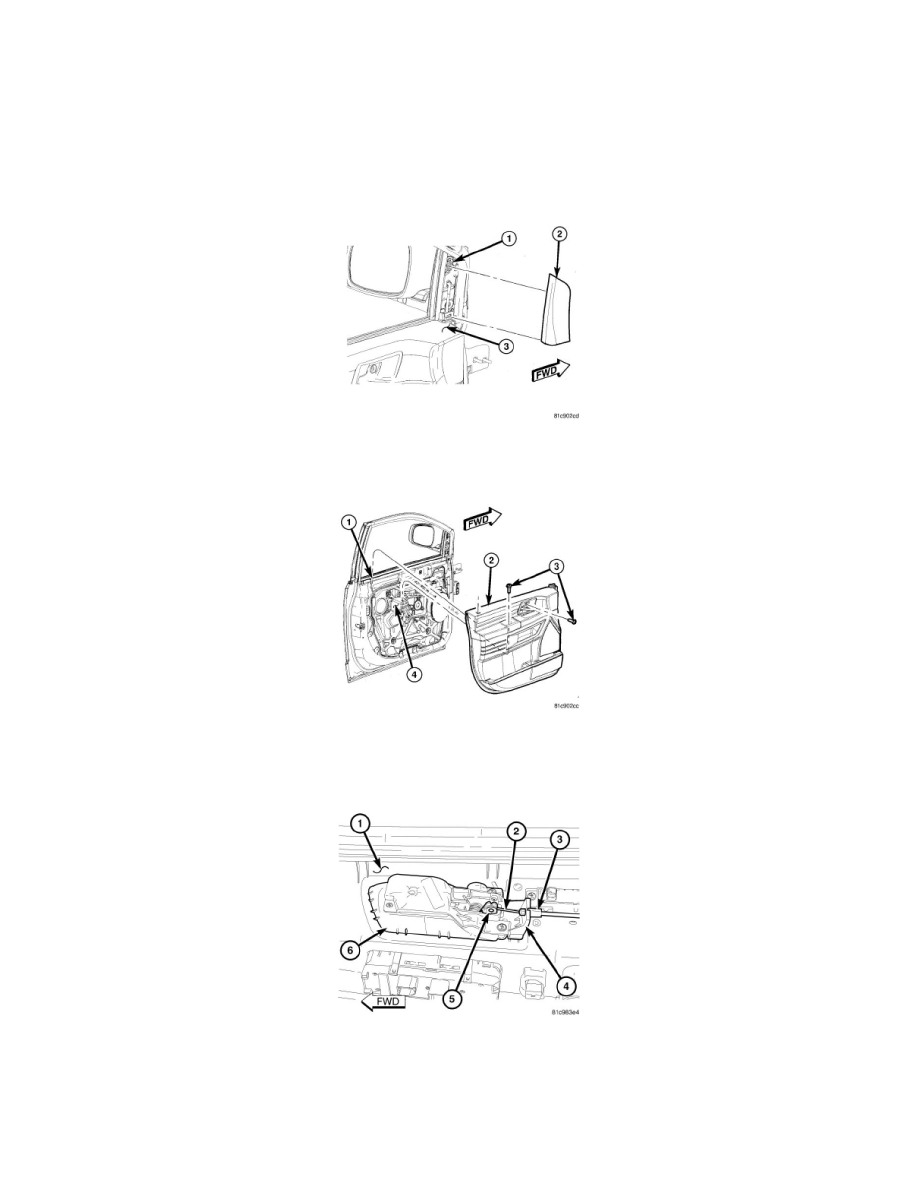
NOTE: Left side door shown in illustrations. Right side door similar.
1. Disconnect and isolate the negative battery cable
2. Using trim stick C-4755 or equivalent, disengage the two retaining tabs that secure the side view mirror flag (2) to the front door (1) and the front
door trim panel (3) and remove the mirror flag.
3. Remove the two screws (3) that secure the front door trim panel (2) to the door (4).
4. Using trim remover C-4829-A or equivalent, disengage the retaining tabs that secure the door trim panel to the door.
5. Lift the door trim panel upward and disengage the top of the trim panel from the door and the door lock knob (1).
6. Position the top of the door trim panel away from the door to gain access to the electrical connectors and interior door handle linkage.
7. Disconnect the power door switches and courtesy lamp electrical connectors.
8. Disengage the cable housing (3) from the interior door handle bracket (4).
9. Disconnect the interior door handle cable (2) from the handle (5).
10. Remove the front door trim panel (1) from the vehicle.
11. If required, disengage the front of the interior handle (6) from the door trim panel and slide the handle forward to remove the handle from the trim
panel.