
Grand Caravan V6-3.3L Flex Fuel (2008)
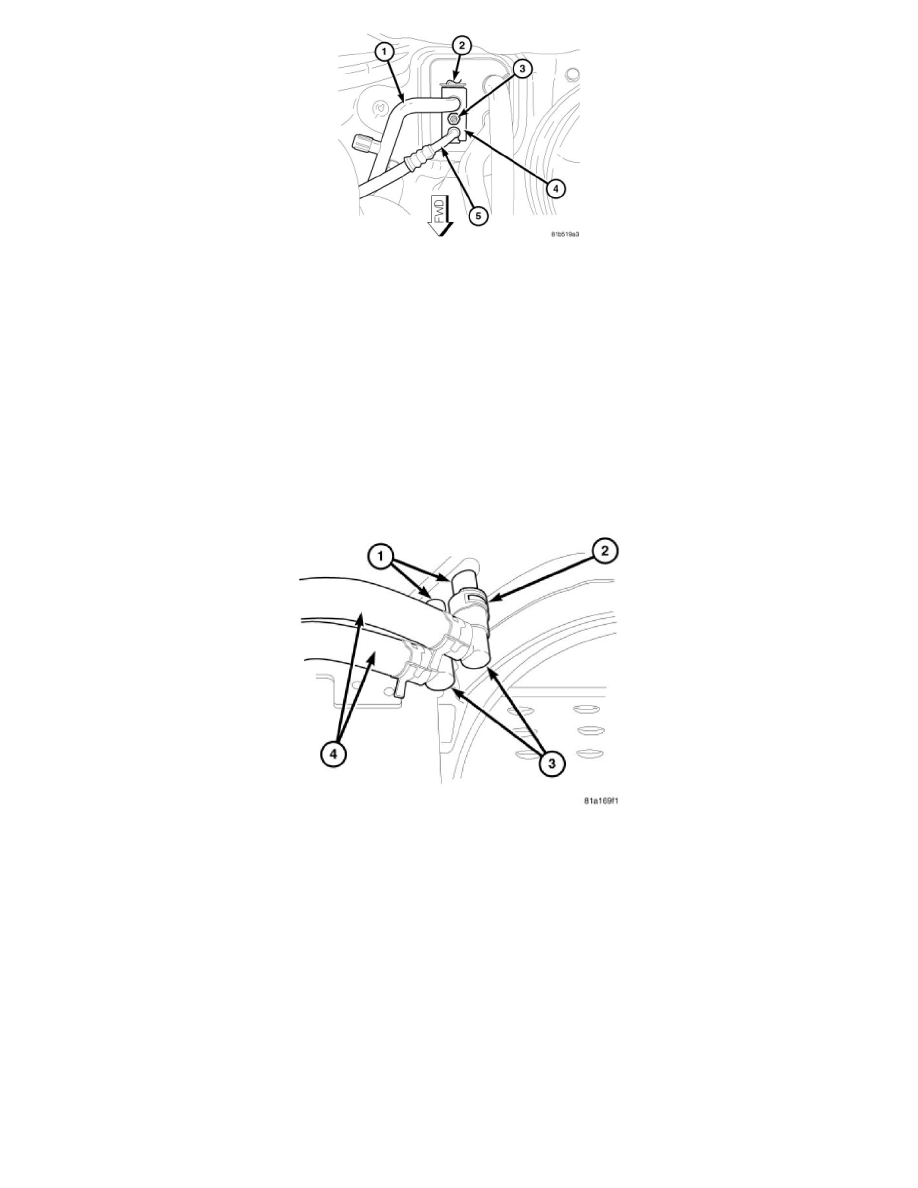
8. Remove the nut (3) that secures the A/C suction line (1) and the A/C liquid line (5) to the A/C expansion valve (2).
9. Disconnect the A/C suction and liquid lines from the A/C expansion valve and remove and discard the washer seals.
10. Separate the A/C liquid line from the tapping block (4) of the A/C suction line.
11. Disengage the A/C suction line from the retaining brackets located near the center of the dash panel and at the rear of the receiver/drier.
12. Remove the A/C suction line from the engine compartment.
13. Install plugs in, or tape over the opened refrigerant line fittings and the compressor and expansion valve ports.
Underbody Line
REMOVAL
WARNING: Refer to the applicable warnings and cautions for this system before performing the following operation See: Service
Precautions/Warning and See: Service Precautions/Caution. Failure to follow the warnings and cautions may result in serious or fatal injury.
NOTE: To prevent any contaminates from entering the rear heating-A/C system, make sure that the area around the underbody line
connections is clean of any dirt or foreign residue prior to disconnecting the lines.
1. Disconnect and isolate the negative battery cable.
2. Recover the refrigerant from the refrigerant systemSee: Service and Repair/Procedures/Refrigerant System Recovery.
3. Drain the engine cooling systemSee: Engine, Cooling and Exhaust/Cooling System/Service and Repair.
4. Raise and support the vehicle.
CAUTION: DO NOT apply excessive force on underbody heater lines or rear heater hose quick connect fittings when disconnecting the
connections. Excessive force may damage or deform the fittings and or lines, causing an engine coolant leak.
5. Disconnect the underbody heater lines (4) from the rear heater core tubes (1) which extend through the rear floor panel in front of the right rear
wheel housing by releasing the insert (2) in each rear quick connect fitting (3) and carefully pulling downward on the fittings while using a slight
twisting motion.
6. Lower the underbody heater lines and drain any residual coolant from the lines into a suitable container.