
Grand Caravan V6-3.3L Flex Fuel (2008)
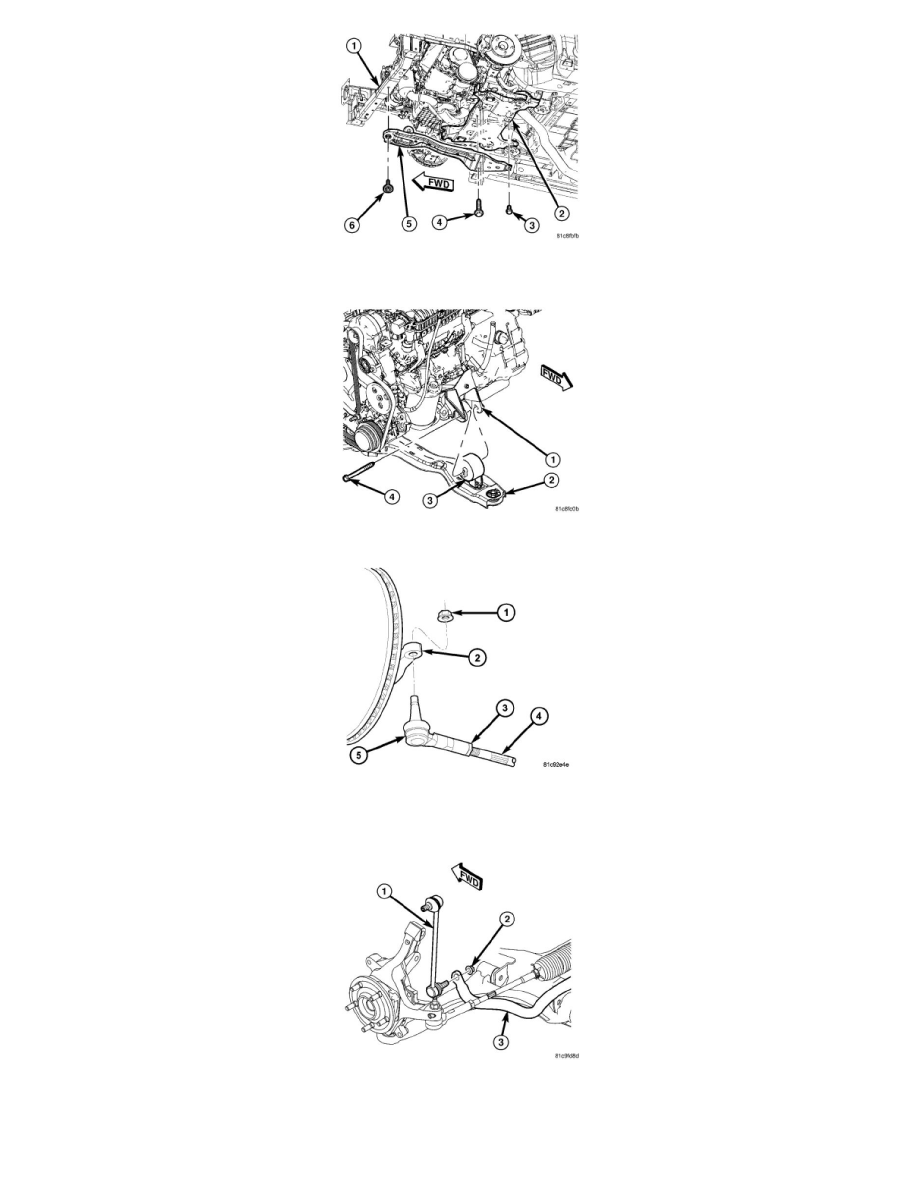
8. Position the fore-aft crossmember in the engine compartment and install the mounting bolts (3, 4, 6). Tighten the forward mounting bolt (6) to 113
Nm (83 ft. lbs.). Tighten the rearward mounting bolts (3, 4) at the suspension crossmember (2) to 55 Nm (41 ft. lbs.).
9. Install the front engine mount thru-bolt (4). Tighten the bolt to 57 Nm (42 ft. lbs.).
10. On each side of vehicle, attach the outer tie rod (5) to the knuckle (2). Start a NEW nut (1) onto the outer tie rod stud. While holding the stud
stationary, tighten the nut using a wrench. Using a crowfoot wrench on a torque wrench, tighten the nut to 75 Nm (55 ft. lbs.). Then, tighten the nut
an additional 245° turn after that torque is met.
11. Attach the stabilizer bar link (1) at each end of the stabilizer bar (3). At each link, install and tighten the nut (2) while holding the stabilizer bar
link lower stud stationary. Tighten the nuts to 88 Nm (65 ft. lbs.).