
Grand Caravan V6-3.3L VIN R (2005)
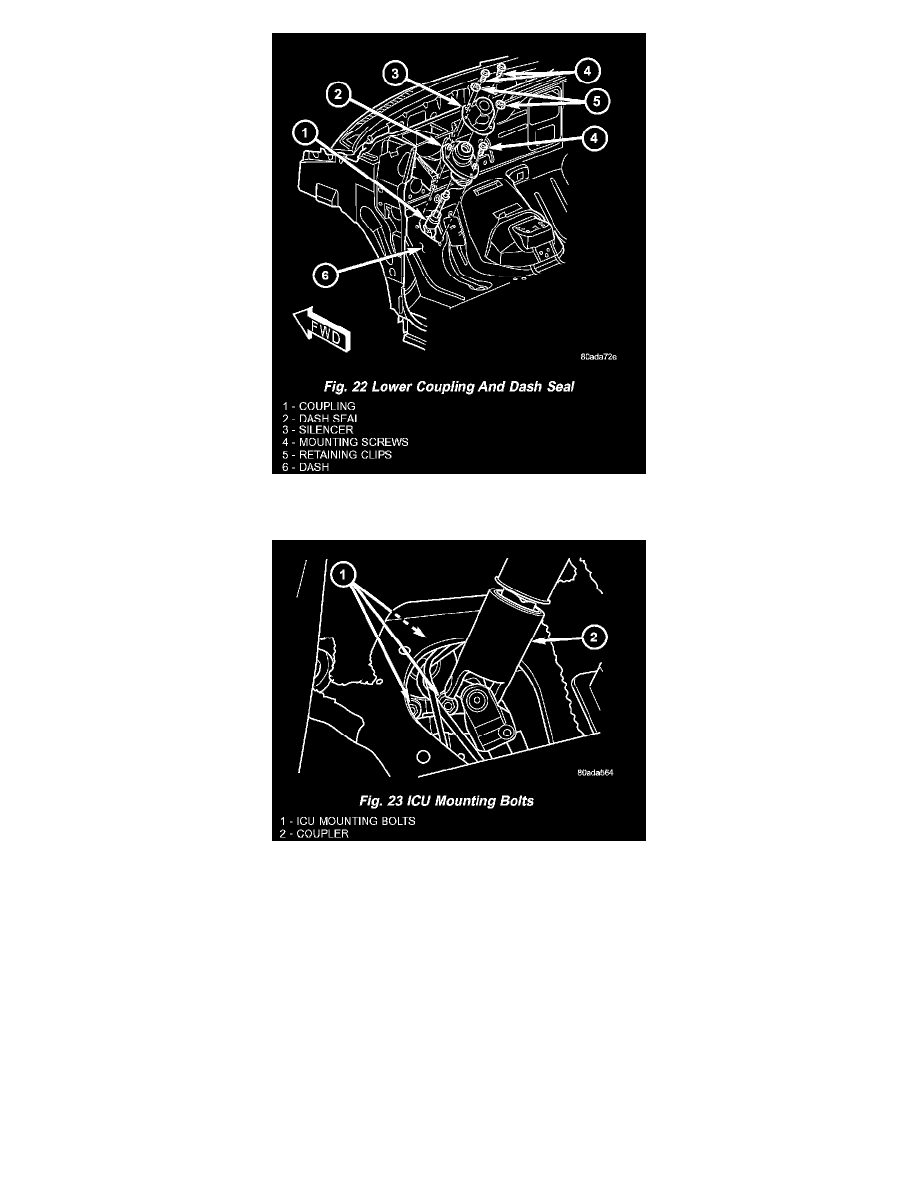
16. If equipped, remove the two clips securing silencer to dash seal (Fig. 22). Remove silencer.
17. Remove the three screws securing the dash seal (Fig. 22). Remove seal.
18. Remove the 3 bolts attaching the ICU to its mounting bracket (Fig. 23).
19. Remove ICU from the vehicle through engine compartment.
20. If required, to separating the CAB from the HCU.
INSTALLATION - LHD
1. Place the ICU in its bracket below the master cylinder. Start the upper mounting bolt to hold it in place.
2. Inside the vehicle, install the remaining 2 mounting bolts attaching the ICU to the mounting bracket (Fig. 23). Tighten all 3 mounting bolts to a
torque of 11 Nm (97 inch lbs.).
3. Install the dash seal and three mounting screws (Fig. 22).
4. If equipped, install the silencer on top of the dash seal (Fig. 22).
5. Connect the steering shaft coupling and install the pinch bolt (Fig. 22). Tighten the pinch bolt to 28 Nm (250 inch lbs.).
6. Remove the steering wheel holder.
CAUTION: Because of the flexible section in the primary and secondary brake tubes, the brake tubes must be held in proper orientation when
tightened and torqued. These tubes must not contact each other or other vehicle components when installed. Also, after the brake tubes are
installed on the HCU, ensure all spacer clips are reinstalled on the brake tubes.