
Grand Caravan V6-3.3L VIN R (2005)
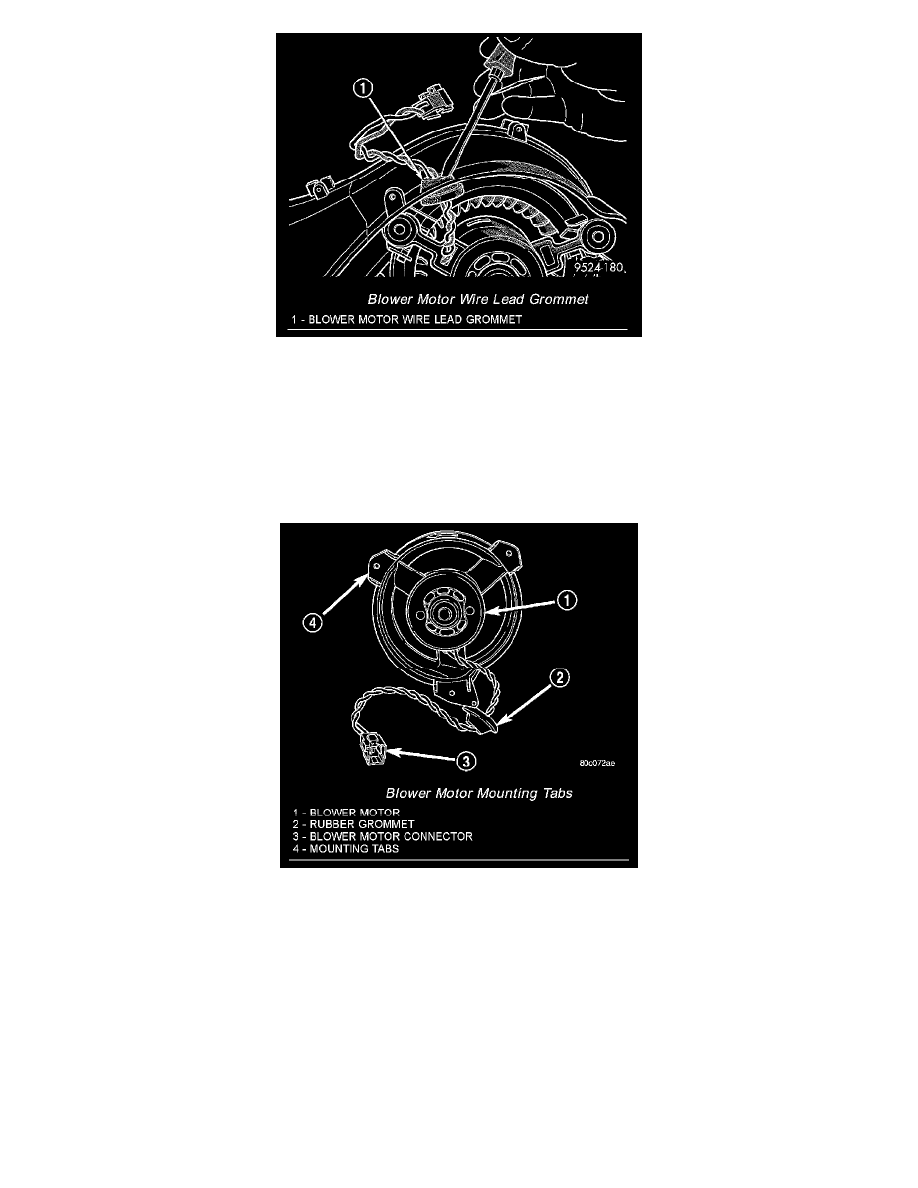
Blower Motor Wire Lead Grommet
8. Push the rubber grommet through the opening in the lower air inlet housing.
9. Route the blower motor wire lead through the opening in the lower air inlet housing and remove the lower air inlet housing from the vehicle.
10. Position the recirculation-air door as necessary to access and remove the three screws that secure the blower motor to the lower half of the HVAC
housing.
11. Gently flex the recirculation air door downward to gain access to remove the blower motor from the HVAC housing.
NOTE: To aid in installation, note the position of the blower motor mounting tabs prior to removal.
Blower Motor Mounting Tabs
12. Remove the blower motor from the HVAC housing by rotating and tilting the blower motor as necessary.
INSTALLATION
1. Gently flex the recirculation-air door downward to gain access to install the blower motor into the HVAC housing.
2. Position the blower motor to the HVAC housing and tilt and rotate the blower motor as necessary to install it into the HVAC housing.
3. Align the blower motor mounting tabs to the locations noted during removal and install the three screws that secure the blower motor to the HVAC
housing. Tighten the screws to 2 N·m (17 in. lbs.).
4. Route the blower motor wire lead through the opening in the lower air inlet housing and seat the rubber grommet.
5. Position the recirculation door pivot shaft into the lower air inlet housing and install the inlet housing.
6. Install the four screws (from the bottom) that secure the lower air inlet housing to the upper air inlet housing and the lower HVAC housing.
Tighten the screws to 2 N·m (17 in. lbs.).
7. Install the one screw (from the top) that secures the lower air inlet housing to the upper air inlet housing. Tighten the screw to 2 N·m (17 in. lbs.).