
Grand Caravan V6-3.8L (2009)
The software release level is visible in the blue header at the top of the StarSCAN(R) screen.
NOTE:
The StarSCAN(R) diagnostic scan tool fully supports Internet connectivity. However, to take advantage of this feature you must first configure the
StarSCAN(R) for your dealership's network. Make sure the StarSCAN(R) is configured to the dealership's network before proceeding. For
instruction on setting up your StarSCAN(R) for the dealer's network refer to either:
"DealerCONNECT > Service > StarSCAN and StarMOBILE tools > Online Documentation", or refer to the StarSCAN(R) Quick Start Networking
Guide. The StarSCAN(R) Quick Start Networking Guide is also available on the website under the "Download Center".
NOTE:
If this flash process is interrupted/aborted, the flash should be restarted.
1. Install a battery charger and verify that the charging rate provides approximately 13.5 volts. Set the battery charger to continuous charge. Do not
allow the charger to time out during the flash process. Remove the charger from the battery when the flash process is complete.
2. Connect the CH9410 StarSCAN(R) ethernet cable to the StarSCAN(R) and the dealer's network drop.
3. Connect the CH9404D StarSCAN(R) vehicle cable to the StarSCAN(R) and the vehicle data link connector (DLC).
4. Power ON the StarSCAN(R).
5. Turn the ignition key to the run position.
6. Select "ECU View"
7. Touch the screen to highlight the BSM in the list of modules.
8. Select "More Options".
9. Select "ECU Flash".
10. Record the "Part Number", displayed on the "Flash BSM" screen, for later reference.
11. Select "Browse for New File". Follow the on screen instructions.
12. Highlight the listed BSM calibration.
13. Select "Download to Scantool".
14. Select "Close after the download is complete, then select "Back".
15. Select "Update Controller". Follow the on screen instructions.
16. When the BSM update is complete, select "OK".
17. Verify that the part number changed at the top of the "Flash BSM" screen.
18. Verify proper operation of the BSM.
NOTE:
Due to the Radio programming procedure, a DTC may be set in other modules (TCM, BCM, SKREEM, etc.) within the vehicle, if so equipped.
Some DTC's may cause the MIL to illuminate. From the "Home" screen select "System View". Then select "All DTCs". Press "Clear All Stored
DTCs" if there are any DTCs shown on the list.
POLICY:
Reimbursable within the provisions of the warranty.
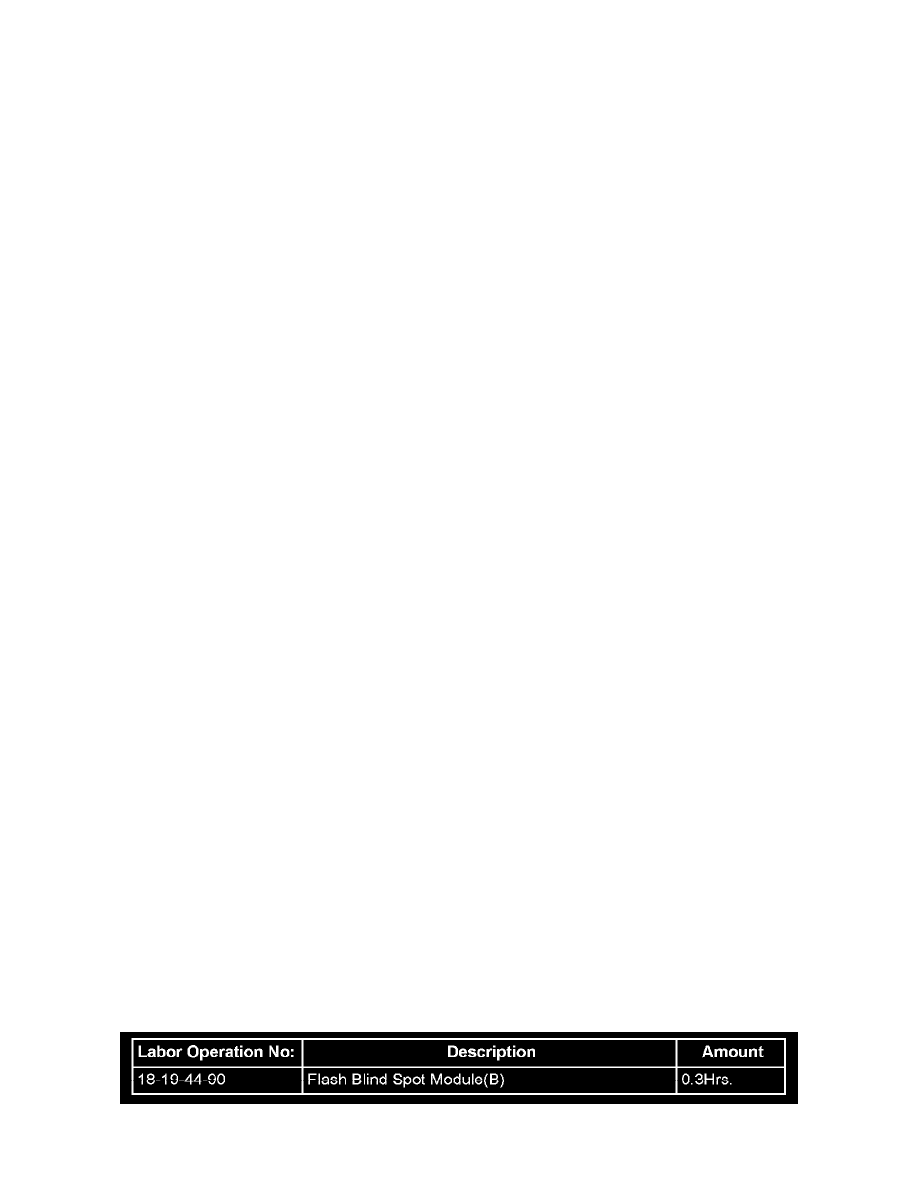
TIME ALLOWANCE: