
Grand Caravan V6-3.8L (2009)
Front Door Panel: Service and Repair
Front Door Trim Panel - Installation
INSTALLATION
NOTE: Prior to reinstalling the door trim panel, replace any trim panel retaining tabs that may have been damaged during the removal
process.
NOTE: Left side door shown in illustrations. Right side door similar.
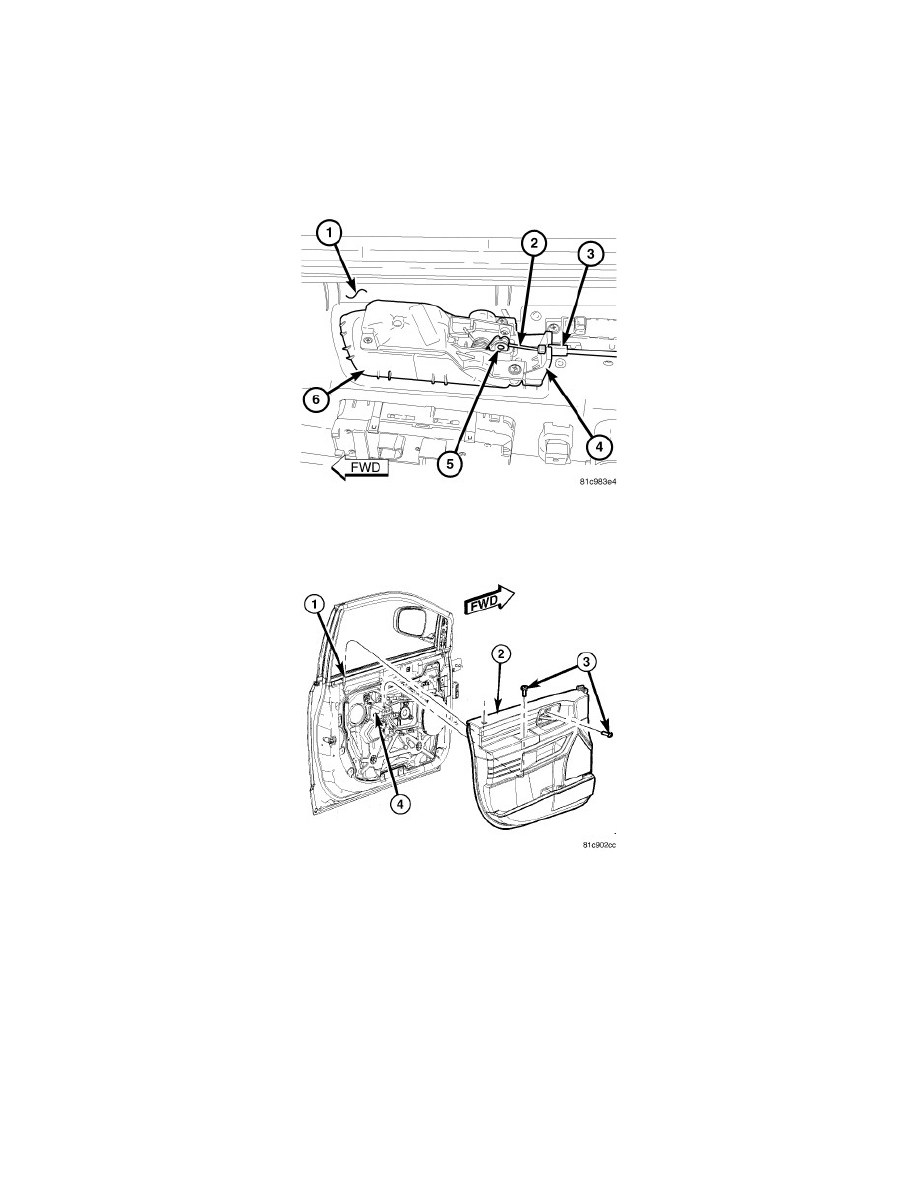
1. If removed, install the rear of the interior door handle (6) into the door trim panel (1) and engage the front of the handle to the trim panel.
2. Position the door trim panel to the door and connect the interior door handle cable (2) to the handle (6).
3. Engage the cable housing (3) to the interior door handle bracket (4). Make sure the cable housing is fully engaged to the bracket.
4. Connect the power door switches and courtesy lamp electrical connectors.
5. Lift the front door trim panel (2) upward and install it over the door lock knob (1).
6. Engage the top of the front door trim panel to the door.
7. Engage the retaining tabs that secure the door trim panel to the door. Make sure the retaining tabs are fully engaged.
8. Install the two screws (3) that secure the front door trim panel to the carrier plate (4). Tighten the screws securely.