Grand Caravan V6-3.8L (2009)

Hose/Line HVAC: Service and Repair
A/C Discharge Line - Removal
REMOVAL
WARNING: Review safety precautions and warnings before performing this procedure See: Service Precautions/Warning and See: Service
Precautions/Caution. Failure to follow the warnings and cautions may result in serious or fatal injury.
1. Disconnect and isolate the negative battery cable.
2. Recover the refrigerant from the refrigerant system See: Service and Repair/Refrigerant System Recovery.
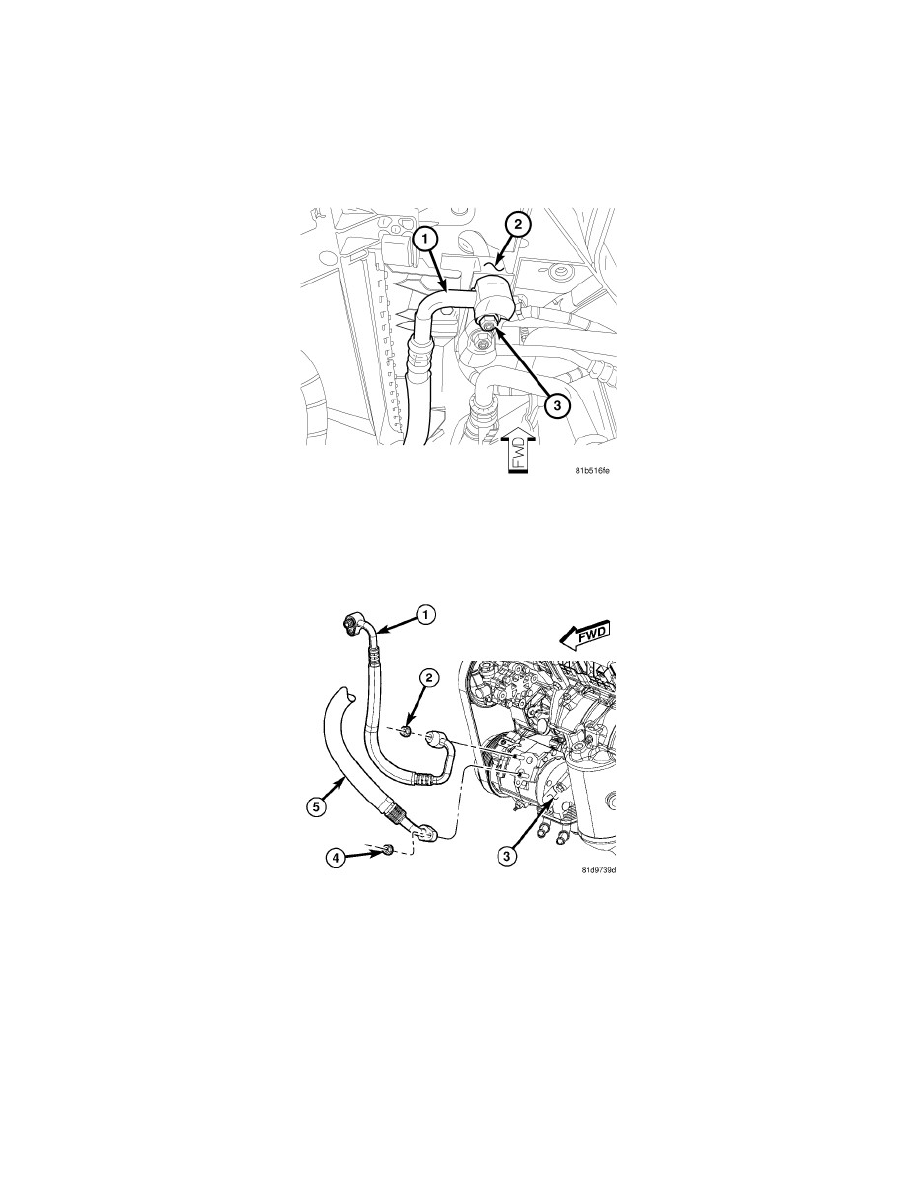
3. Remove the nut (3) that secures the A/C discharge line (1) to the condenser tapping block (2) located in the right front corner of the engine
compartment.
4. Disconnect the A/C discharge from the A/C condenser.
NOTE: 4.0L engine shown. Other engines similar.
5. Remove the nut (2) that secures the A/C discharge line (1) to the A/C compressor (3).
6. Disconnect the A/C discharge line from the A/C compressor.
7. Remove the A/C discharge line from the engine compartment and remove and discard the O-ring seals and gaskets.
8. Install plugs in, or tape over the opened refrigerant line fittings and the condenser and compressor and ports.
A/C Discharge Line - Installation
INSTALLATION
CAUTION: Be certain to adjust the refrigerant oil level when servicing the A/C refrigerant system See: Service and Repair/Refrigerant Oil
Level. Failure to properly adjust the refrigerant oil level will prevent the A/C system from operating as designed and can cause
serious A/C compressor damage.
