
Grand Caravan V6-3.8L (2009)
NOTE: The A/C liquid line is serviced in two sections. The front section connects between the A/C condenser and the receiver/drier. The rear
section connects between the receiver/drier and the A/C expansion valve. On models equipped with the rear heating-A/C system, the
rear section of the A/C liquid line also includes an extension tube that connects the liquid line to the underbody lines.
FRONT SECTION
1. Disconnect and isolate the negative battery cable.
2. Recover the refrigerant from the refrigerant system See: Service and Repair/Refrigerant System Recovery.
3. Remove the air cleaner housing and inlet duct from the engine compartment.
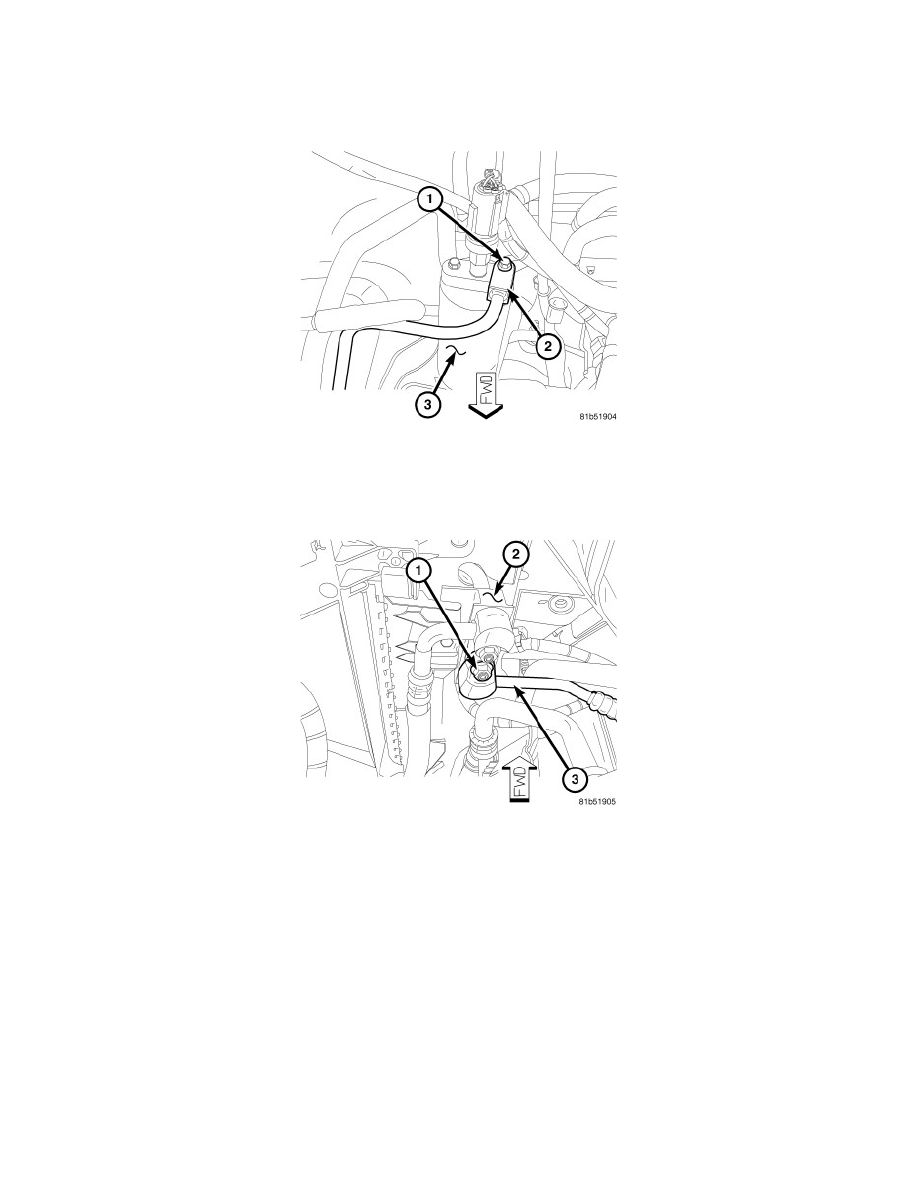
4. Remove the bolt (1) that secures the front section of the A/C liquid line (2) to the A/C receiver/drier (3).
5. Disconnect the front section of the A/C liquid line from the A/C receiver/drier and remove and discard the O-ring seal.
6. Remove the nut (1) that secures the front section of the A/C liquid line (3) to the condenser tapping block (2) located in the right front corner of
the engine compartment.
7. Disconnect the front section of the A/C liquid line from the A/C condenser and remove and discard the O-ring seals and gasket.
8. Disengage the front section of the A/C liquid line from the retaining clip located near the right frame rail and remove the liquid line from the
engine compartment.
9. Install plugs in, or tape over the opened refrigerant line fittings and the condenser and receiver/drier ports.
REAR SECTION