Grand Caravan V6-3.8L (2009)

8. Install the bolt (1) that secures the A/C suction line (3) to the right front frame rail (2). Tighten the bolt to 9 Nm (80 in. lbs.).
NOTE: 4.0L engine shown. Other engines similar.
9. Lubricate a new O-ring seal with clean refrigerant oil and install it and a new gasket onto the opened suction line fitting. Use only the specified
O-ring seal as it is made of a special material for the R-134a system. Use only refrigerant oil of the type recommended for the A/C compressor in
the vehicle.
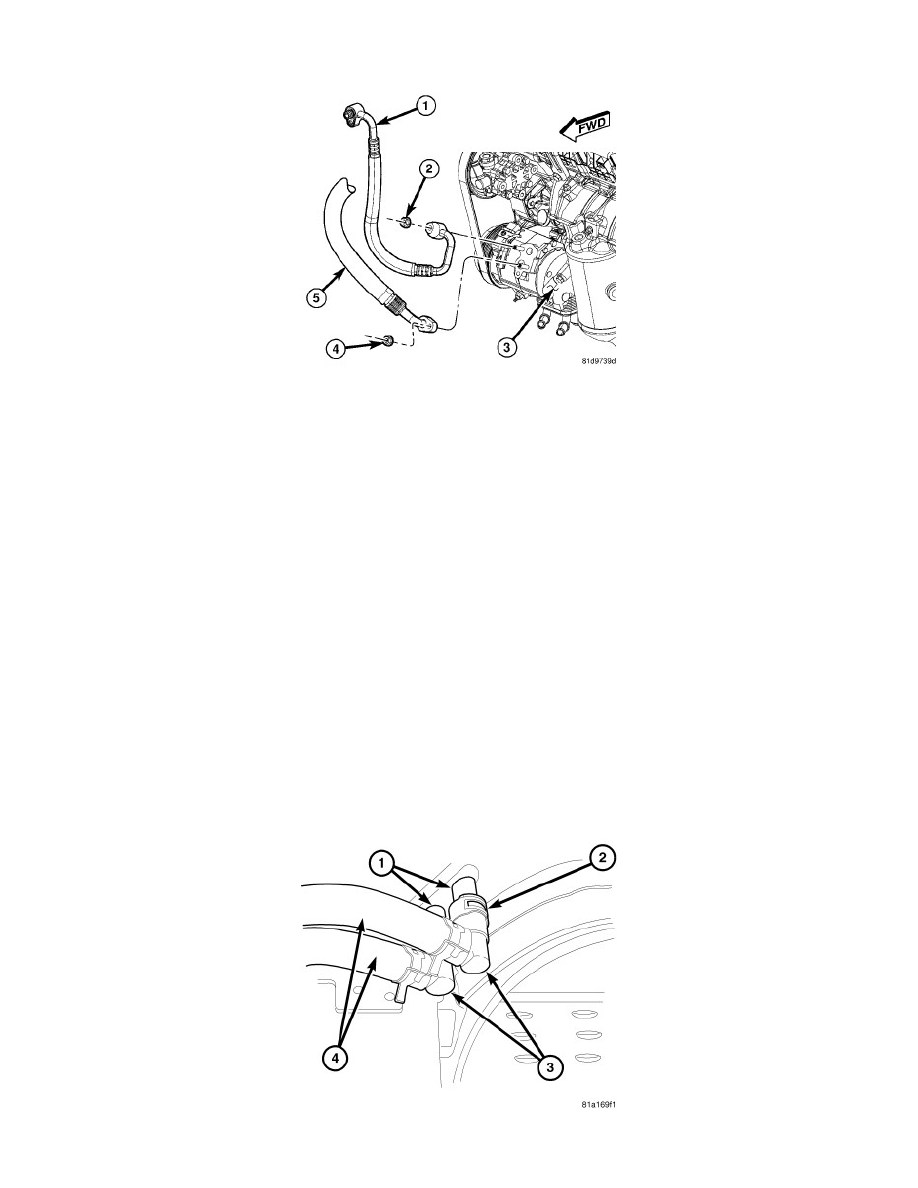
10. Install the A/C suction line (5) onto the A/C compressor (3).
11. Install the nut (4) that secures the A/C suction line to the A/C compressor. Tighten the nut to 20 Nm (15 ft. lbs.).
12. Install the air cleaner housing and inlet duct.
13. On models equipped with the rear heating-A/C system, connect the A/C suction line to the underbody suction line See: A/C Underbody Lines -
Installation.
14. Reconnect the negative battery cable.
15. Evacuate the refrigerant systemSee: Service and Repair/Refrigerant System Evacuate.
16. Adjust the refrigerant oil level See: Service and Repair/Refrigerant Oil Level.
17. Charge the refrigerant systemSee: Service and Repair/Refrigerant System Charge.
A/C Underbody Lines - Removal
REMOVAL
WARNING: Refer to the applicable warnings and cautions for this system before performing the following operation See: Service
Precautions/Warning and See: Service Precautions/Caution. Failure to follow the warnings and cautions may result in serious or
fatal injury.
NOTE: To prevent any contaminates from entering the rear heating-A/C system, make sure that the area around the underbody line
connections is clean of any dirt or foreign residue prior to disconnecting the lines.
1. Disconnect and isolate the negative battery cable.
