Grand Caravan V6-3.8L (2009)

Engine Control Module: Removal and Replacement
Powertrain Control Module - Removal
REMOVAL
1. Disconnect and isolate negative battery cable.
2. Remove the left front wheelhouse splash shield, See: Body and Frame/Fender/Front Fender/Front Fender Liner/Service and Repair/Splash Shield -
Removal.
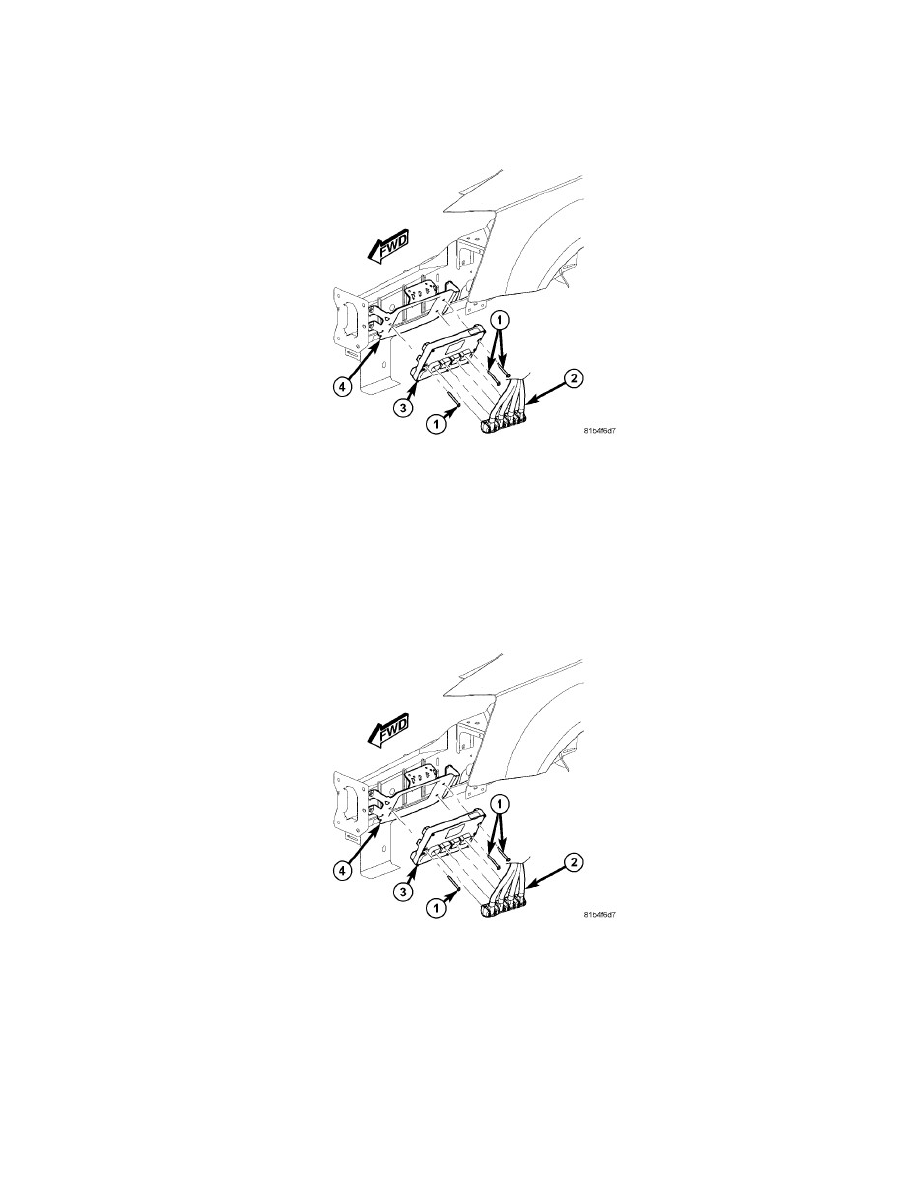
3. Remove the electrical connectors (2) from the powertrain control module (PCM) (3).
4. Remove the bolts (1) and PCM (3) from the bracket (4).
Powertrain Control Module - Installation
INSTALLATION
1. Install the powertrain control module (PCM) (3) and bolts (1) to bracket (4). Tighten the bolts to 4.5 Nm (40 in. lbs.).
2. Install the electrical connectors (2) to the PCM (3).
3. Install the left front wheelhouse splash shield, See: Body and Frame/Fender/Front Fender/Front Fender Liner/Service and Repair/Splash Shield -
Installation
4. Connect the negative battery cable, tighten the nut to 5 Nm (45 in. lbs.).
5. Using scan tool, program the all necessary information into the PCM, . See: Powertrain Management/Computers and Control Systems/Testing and
Inspection/Programming and Relearning/PCM/ECM Reprogramming
