Grand Caravan V6-3.8L VIN L (2007)

Lower Side Moulding / Trim: Service and Repair
Removal
REMOVAL
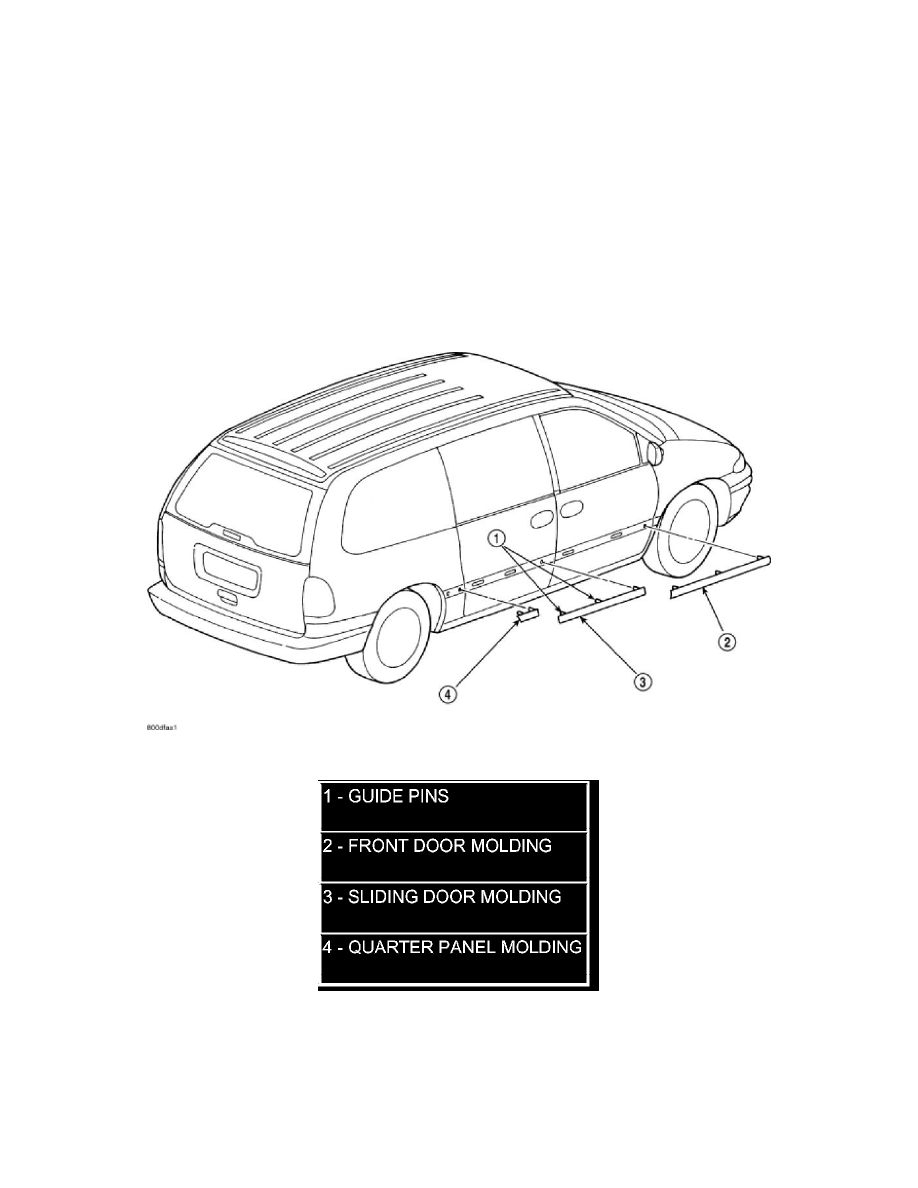
Refer to (Figure 1), (Figure 2), (Figure 3), (Figure 4) or (Figure 5) for proper location of fasteners holding the molding to the wheelhouse lip and rocker
panels.
1. Warm the affected stick on molding and body metal to approximately 38°C (100°F) using a suitable heat lamp or heat gun.
2. If equipped, remove pop rivets holding molding edge to wheelhouse lip.
3. Pull stick on molding from painted surface.
4. Remove adhesive tape residue from painted surface of vehicle. Use a 3M Scotch-Brite Molding Adhesive and Stripe Removal Disc, or equivalent,
to clean adhesive residue from painted surfaces. These products are available from automotive paint suppliers. Refer to instructions supplied with
the specific product for proper usage.
Figure 1 BODY SIDE MOLDINGS - BASE TYPICAL
