
Grand Caravan V6-3.8L VIN L (2007)
Lower Side Moulding / Trim: Service and Repair
Installation
INSTALLATION
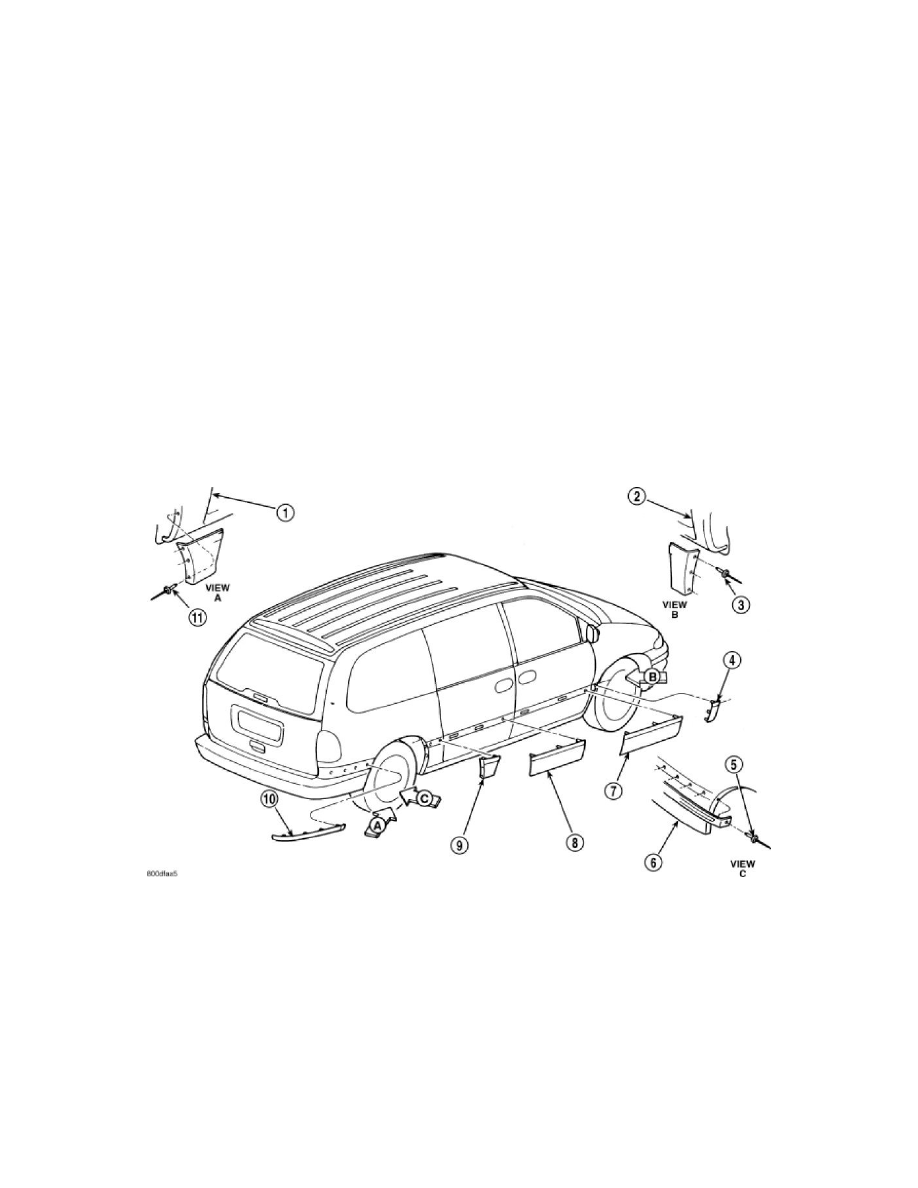
Refer to (Figure 2), (Figure 5), (Figure 4), (Figure 1) or (Figure 3) for proper location of fasteners to hold the molding to the wheelhouse lip and rocker
panels.
1. If molding is to be reused;
a. Remove tape residue from molding.
b. Clean back of molding with Mopar(R) Super Kleen, or equivalent.
c. Wipe molding dry with lint free cloth.
d. Apply a single coat of Mopar(R) TPO Molding Prep to tape side of molding and allow to dry thoroughly.
e. Apply new body side molding (two sided adhesive) tape to back of molding.
2. Clean body surface with Mopar(R) Super Kleen, or equivalent. Wipe surface dry with lint free cloth.
3. Remove protective cover from tape on back of molding.
4. Apply molding to body from front to rear, inserting locator pins into hole in body panel.
5. Using a roller tool, roll molding onto body panel with enough force to assure adhesion. Do not apply excessive force, or damage to body panels
may result.
6. Install pop rivets to hold molding edge to wheelhouse lip, if necessary.
Figure 1 BODY SIDE MOLDINGS - PREMIUM TYPICAL