
Grand Caravan V6-3.8L VIN L (2007)
Air Duct: Service and Repair
Floor Distribution Ducts
Removal - Front
REMOVAL
1. Roll back the carpet on the front floor from under the instrument panel toward the rear of the vehicle.
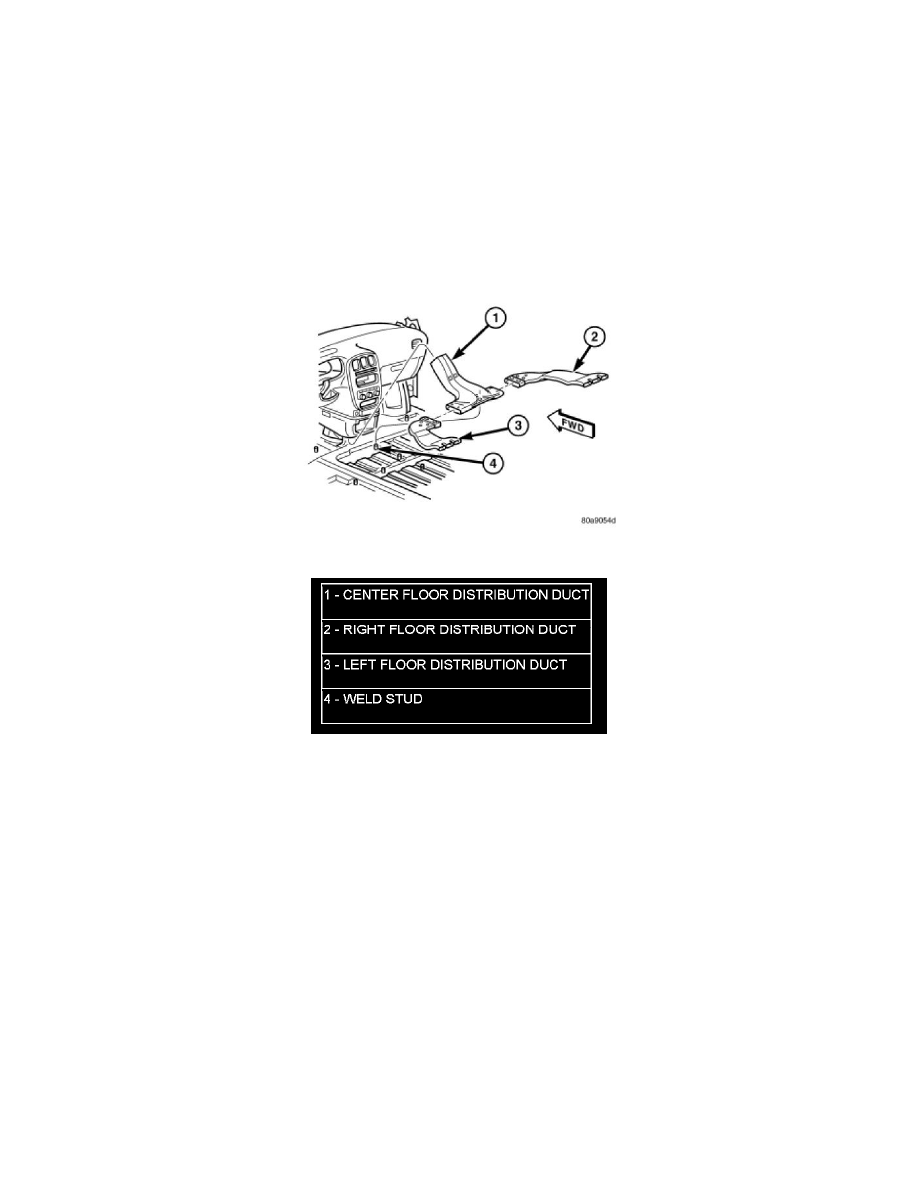
2. Lift the center floor distribution duct upward far enough to disengage its locator hole from the weld stud on the front floor panel (Figure 1).
3. Pull the center floor distribution duct rearward and disengage it from the floor outlet of the front HVAC housing.
4. Disassemble the right and/or left floor distribution ducts from the center floor distribution duct as required.
Figure 1 Floor Distribution Ducts - LHD Shown, RHD Typical
Installation - Front
INSTALLATION
1. Install the right and/or left floor distribution duct onto the center floor distribution duct as required.
2. Position the center floor distribution duct under the instrument panel center stack and engage it to the floor outlet of the front HVAC housing.
3. Align the locator hole on the center floor distribution duct with the weld stud on the front floor panel and install the distribution duct onto the weld
stud.
4. Install the carpet onto the front floor panel and under the instrument panel.
Removal - Rear
REMOVAL
1. Remove right rear quarter panel and D-pillar trim panels.
2. Remove the two screws that secure the rear floor distribution duct to the right inner quarter panel (Figure 1).
3. Slide the rear floor distribution duct forward to disengage it from the rear floor adapter duct and remove the distribution duct from the vehicle.
4. If required, disengage the rear floor adapter duct from the rear HVAC housing and remove the adapter duct from the vehicle.