Grand Caravan V6-3.8L VIN L (2007)

Power Trunk / Liftgate Hazard Sensor: Service and Repair
Installation
INSTALLATION
WARNING: USE EXTREME CAUTION WHEN TESTING PINCH SENSOR OPERATION.
CAUTION: Ensure liftgate surface is clean and dry prior to pinch sensor installation. Failure to do so will inhibit the adhesive backings ability
to adhere to the liftgate and cause improper system operation or premature component failure.
1. Position the pinch sensor to the liftgate.
2. Install the third screw from the top of the sensor first. Do not torque screw at this time.
3. Install the remaining three screws holding the sensor to the liftgate. Torque all screws to 25 in.lbs.
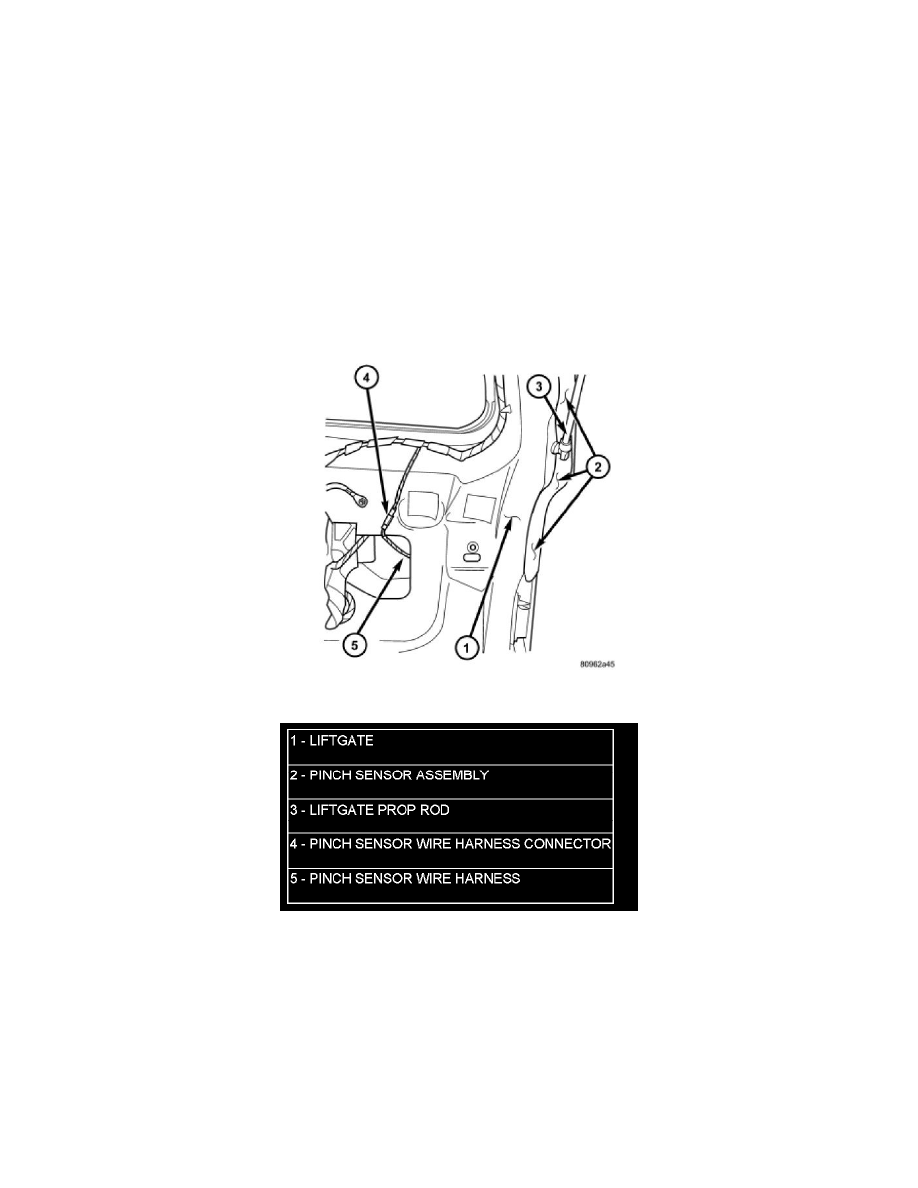
4. Install wire harness grommet in liftgate flange and route, connect the pinch sensor wire harness connector (Figure 1).
Figure 1 PINCH SENSOR LOCATION
5. Remove protective tape from the top of the pinch sensor. Firmly apply pressure to the sensor adhesive to secure it to the liftgate.
6. Install the trim panel on the liftgate.
7. Connect the battery negative cable.
8. Using an appropriate scan tool, check and erase any power liftgate control module diagnostic trouble codes related to the pinch sensor.
9. Verify power liftgate system and pinch sensor operation. Cycle the power liftgate through one complete open and close cycle, during the final
close cycle press the pinch sensor to verify the power liftgate detects an obstruction and returns to the full open position.
