
Grand Caravan V6-3.8L VIN L (2007)
Front Steering Knuckle: Service and Repair
Installation
INSTALLATION
1. If the hub and bearing needs to be installed in the knuckle, place the hub and bearing squarely into the center hole of the steering knuckle aligning
the threaded mounting holes of the hub and bearing with the mounting holes in the steering knuckle. Install the four mounting bolts and tighten
them to a torque of 65 Nm (45 ft. lbs.).
CAUTION: Before installing the knuckle on the ball joint stud, wipe the ball joint stud and knuckle contact area free of any grease or
debris, otherwise damage to the knuckle can occur. Use a clean shop cloth with Mopar(R) Brake Parts Cleaner applied to it for proper
cleaning. Do not spray the stud directly.
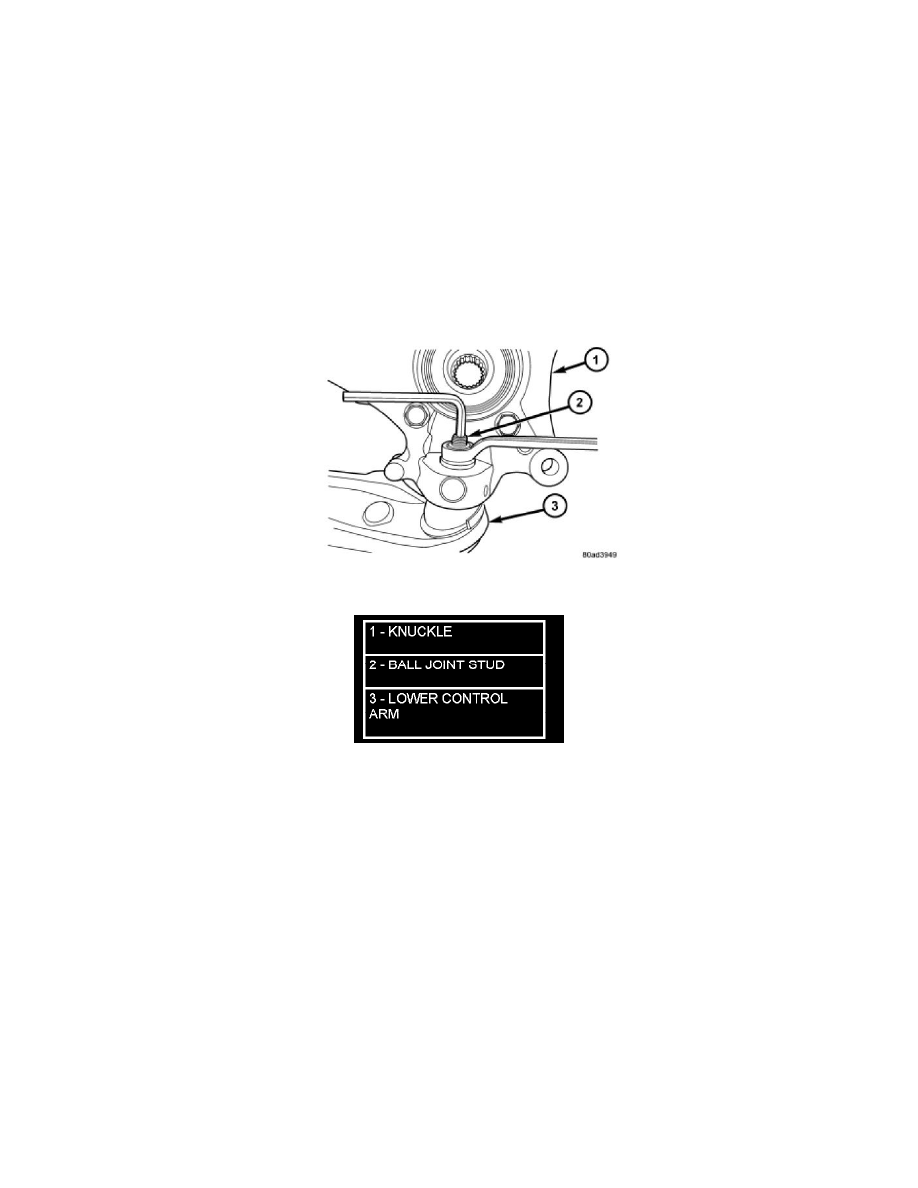
2. Place the knuckle on the ball joint stud.
3. Install a NEW steering knuckle to ball joint stud nut. Tighten the nut by holding ball joint stud with hex wrench while turning nut with a wrench
(Figure 1). Using a crowsfoot wrench on a torque wrench, tighten the nut to a torque of 108 Nm (80 ft. lbs.).
Figure 1 Ball Joint Nut Installation
4. Slide driveshaft stub axle into hub and bearing assembly.
CAUTION: The steering knuckle to strut assembly attaching bolts are serrated and must not be turned during installation. Install nuts
while holding bolts stationary in the steering knuckle.
CAUTION: If the vehicle being serviced is equipped with eccentric strut assembly attaching bolts, the eccentric bolt must be installed in
the bottom (slotted) hole on the strut clevis bracket (Figure 2).