
Grand Caravan V6-4.0L (2008)
16. Apply masking tape to outside surface of quarter panel below the center roller channel, rearward of the door opening.
17. Apply masking tape to door jamb area, rearward of the upper roller channel.
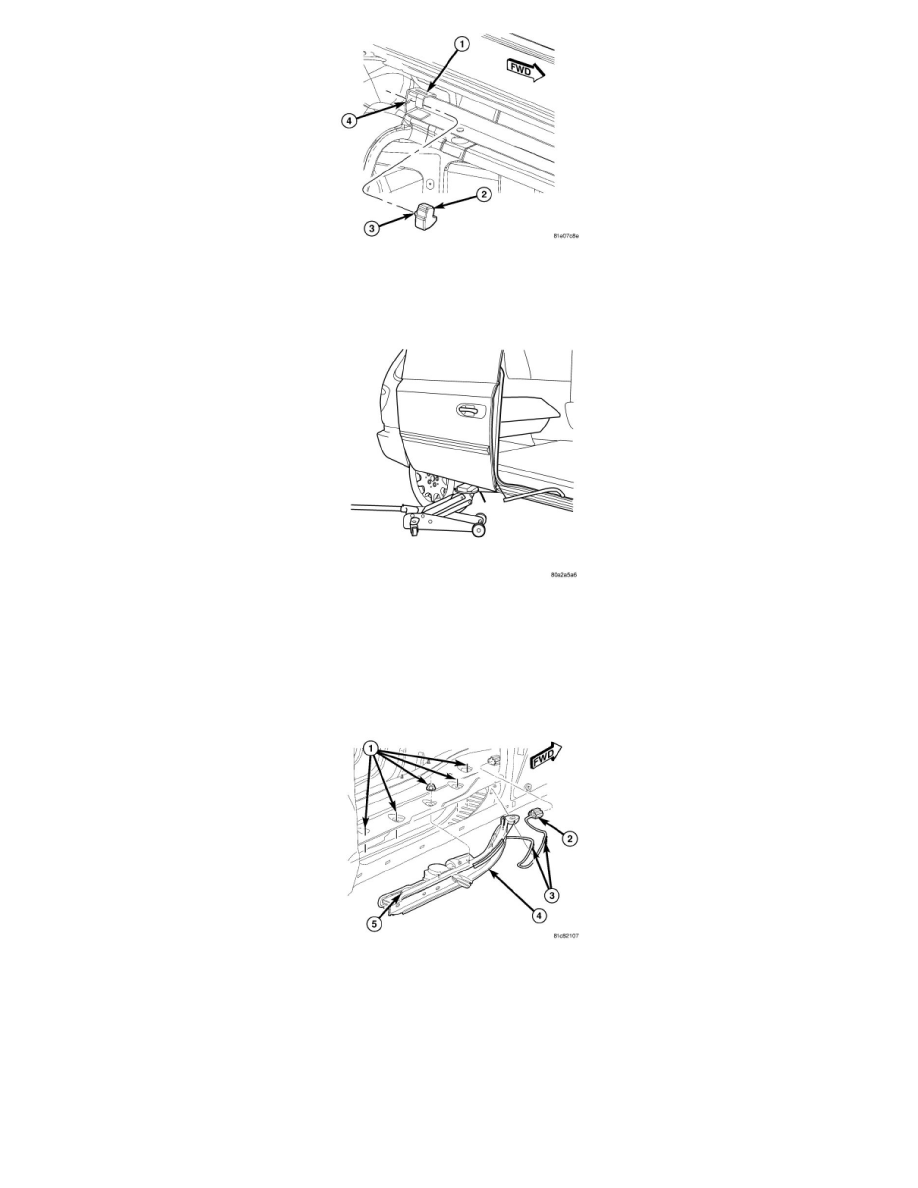
18. Remove the sliding door upper track bumper (2) by pulling out on the bottom edge of the bumper to disengage the retaining feature (3) from the
slot in the track (4).
NOTE: Do not remove the door hinges from the door as it is not necessary for servicing of the drive assembly. Removal of the hinges can effect
door to body fit resulting in abnormal door operation.
19. Support sliding door on a suitable lifting device with a padded upper surface. The door must be moveable forward and reward with lifting device
in place.
20. Slide door rearward until the upper sliding door hinge roller disengages from the upper channel.
21. Continue moving the door rearward until the lower rollers exit the lower track.
22. If necessary, remove the sliding door inner seal from the bottom of the door opening.
23. Remove the five power sliding door drive assembly retaining nuts (1).
24. Disconnect the power sliding door drive assembly electrical connector (3) at the front of the B-Pillar.
25. Carefully remove the wire harness routing clip from the body (2).
26. Carefully remove the power sliding door drive assembly (4) from the vehicle.