
Grand Caravan V6-4.0L (2008)
4. Connect the power door switches and courtesy lamp electrical connectors.
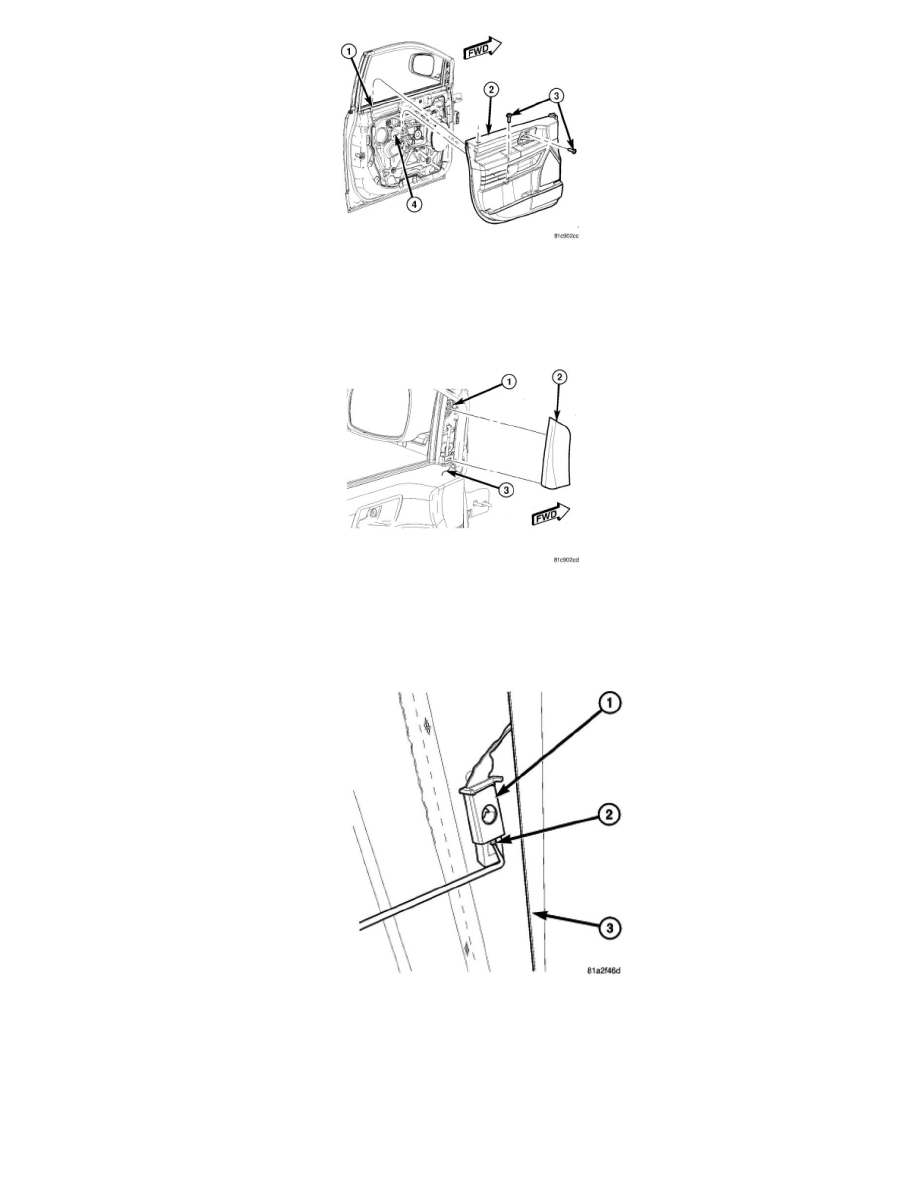
5. Lift the front door trim panel (2) upward and install it over the door lock knob (1).
6. Engage the top of the front door trim panel to the door.
7. Engage the retaining tabs that secure the door trim panel to the door. Make sure the retaining tabs are fully engaged.
8. Install the two screws (3) that secure the front door trim panel to the carrier plate (4). Tighten the screws securely.
9. Position the side view mirror flag (2) to the front door (1) and engage the two retaining tabs. Make sure the retaining tabs are fully engaged.
10. Reconnect the negative battery cable.
A-Pillar Trim Panel-Removal
REMOVAL
1. Assist Handle - Passenger Side Only (if equipped) - Remove the screw trim covers and screws from A-pillar.
2. Using trim stick or equivalent, gently pry off the A-pillar trim from A-pillar.
3. Using a small screwdriver or equivalent, press downward disengaging tether clip (2) and slide from housing (1).
A-Pillar Trim Panel-Installation
INSTALLATION