
Grand Caravan V6-4.0L (2008)
Hose/Line HVAC: Service and Repair
A/C Line - Removal
Discharge Line
REMOVAL
WARNING: Review safety precautions and warnings before performing this procedure See: Service Precautions/Warning and See: Service
Precautions/Caution. Failure to follow the warnings and cautions may result in serious or fatal injury.
1. Disconnect and isolate the negative battery cable.
2. Recover the refrigerant from the refrigerant systemSee: Service and Repair/Procedures/Refrigerant System Recovery.
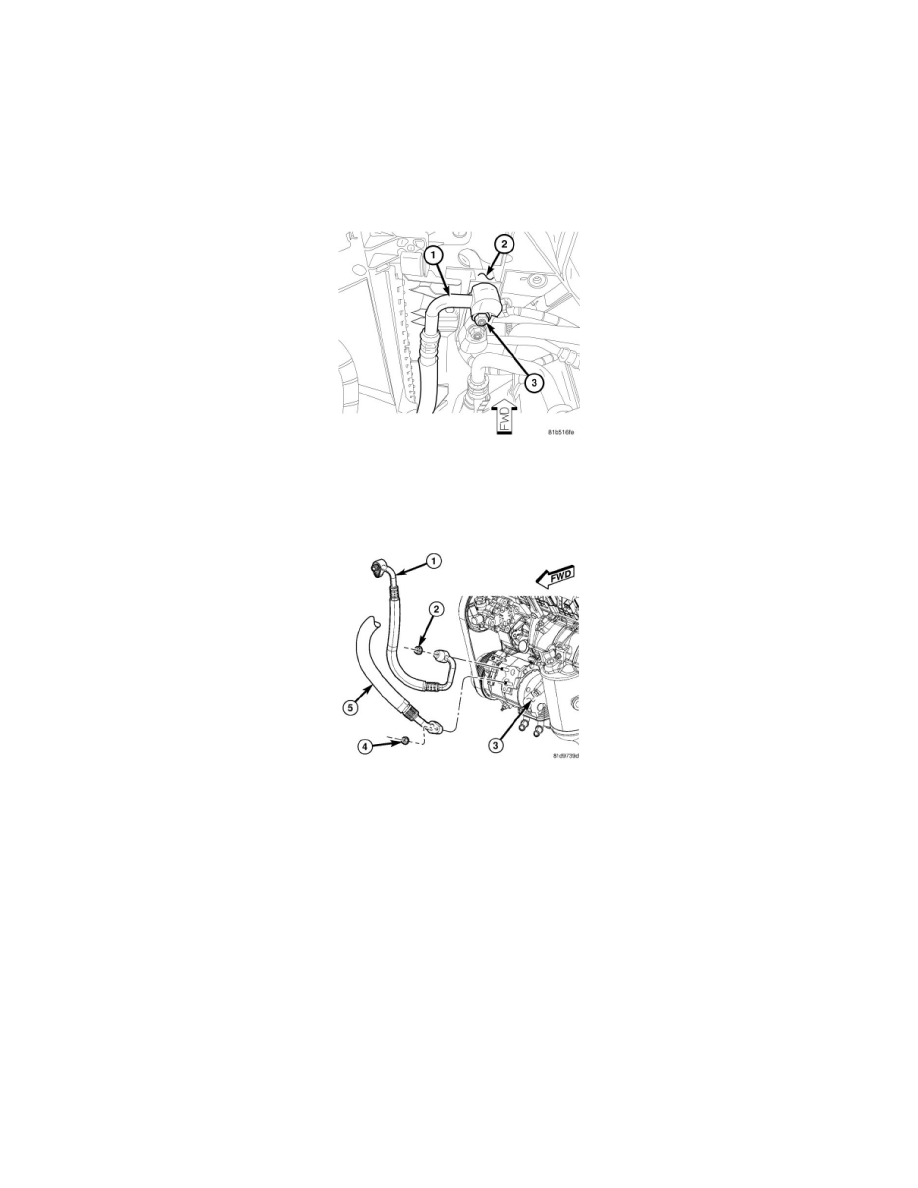
3. Remove the nut (3) that secures the A/C discharge line (1) to the condenser tapping block (2) located in the right front corner of the engine
compartment.
4. Disconnect the A/C discharge from the A/C condenser.
NOTE: 4.0L engine shown. Other engines similar.
5. Remove the nut (2) that secures the A/C discharge line (1) to the A/C compressor (3).
6. Disconnect the A/C discharge line from the A/C compressor.
7. Remove the A/C discharge line from the engine compartment and remove and discard the O-ring seals and gaskets.
8. Install plugs in, or tape over the opened refrigerant line fittings and the condenser and compressor and ports.
Liquid Line
REMOVAL
WARNING: Review safety precautions and warnings before performing this procedure See: Service Precautions/Warning and See: Service
Precautions/Caution. Failure to follow the warnings and cautions may result in serious or fatal injury.
NOTE: The A/C liquid line is serviced in two sections. The front section connects between the A/C condenser and the receiver/drier. The rear
section connects between the receiver/drier and the A/C expansion valve. On models equipped with the rear heating-A/C system, the rear
section of the A/C liquid line also includes an extension tube that connects the liquid line to the underbody lines.
FRONT SECTION