
Grand Caravan V6-4.0L (2008)
NOTE: Illustration shown with rear body cradle removed for clarity.
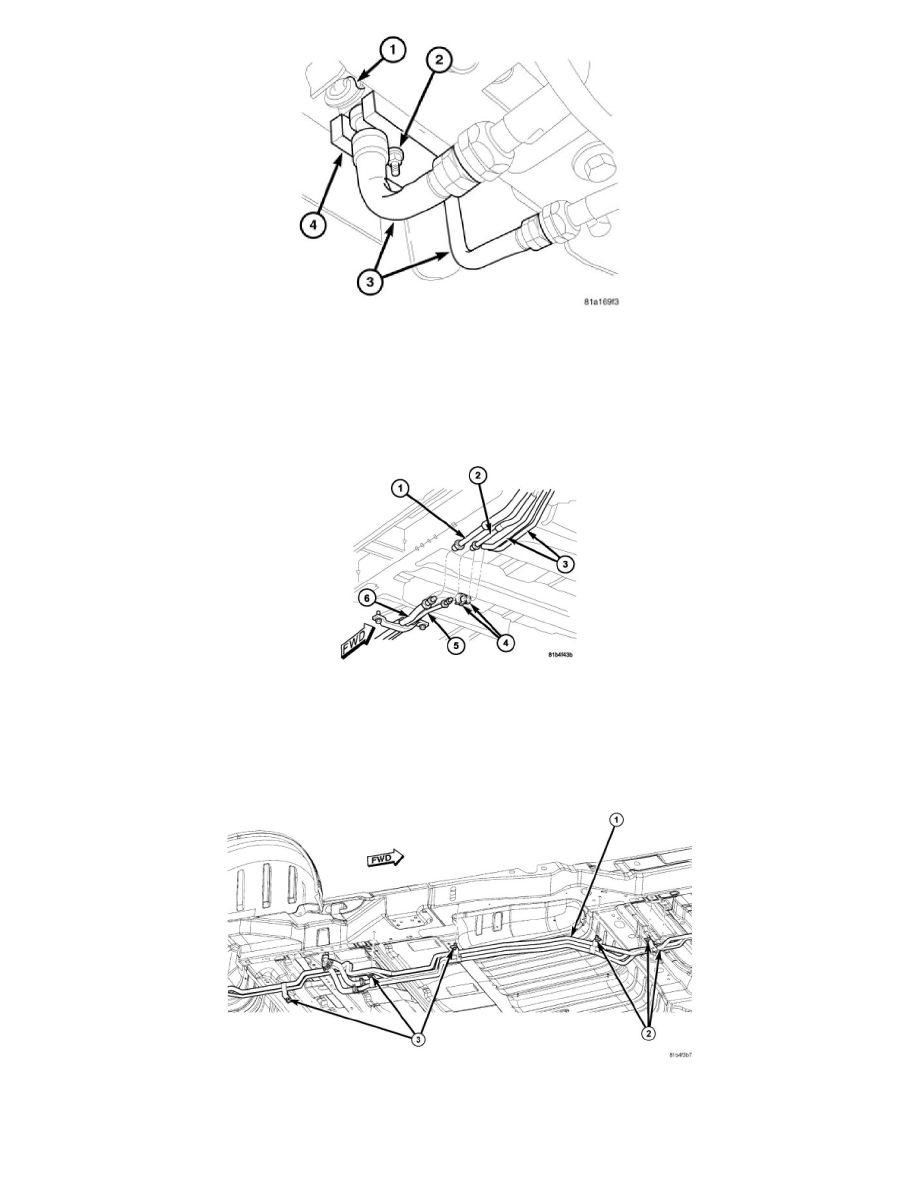
7. Loosen the fitting nuts that secure the underbody refrigerant lines to the underbody refrigerant extension lines (3) located behind the right rear
wheel housing.
8. Disconnect the underbody refrigerant lines from underbody refrigerant extension lines and remove and discard the O-ring seals.
9. Remove the nut (2) that secures the underbody refrigerant extension lines and sealing plate (4) to the rear A/C expansion valve (1).
10. Disconnect the extension lines from the rear A/C expansion valve and remove and discard the O-ring seals.
11. Loosen the fitting nuts that secure the underbody refrigerant lines (1 and 2) to the front A/C liquid line (5) and the front A/C suction line (6).
12. Disconnect the front A/C liquid and suction lines from the underbody refrigerant lines and remove and discard the O-ring seals.
NOTE: Replacement of the front heater hoses will be required if the hose ends are cut for removal.
13. Release the spring type hose clamps (4) and disconnect the front heater hoses from the underbody heater lines (3).
14. Support the rear axle with a suitable jack stand and remove the right rear shock mount from the rear frame rail and position the mount and shock
out of the way.
CAUTION: Use care not to damage the ABS wire lead or the brake line when repositioning the brake line bracket.