
Grand Caravan V6-4.0L (2008)
Trunk / Liftgate Switch: Service and Repair
D-Pillar Switch
Removal
REMOVAL
1. Disconnect and isolate the battery negative cable.
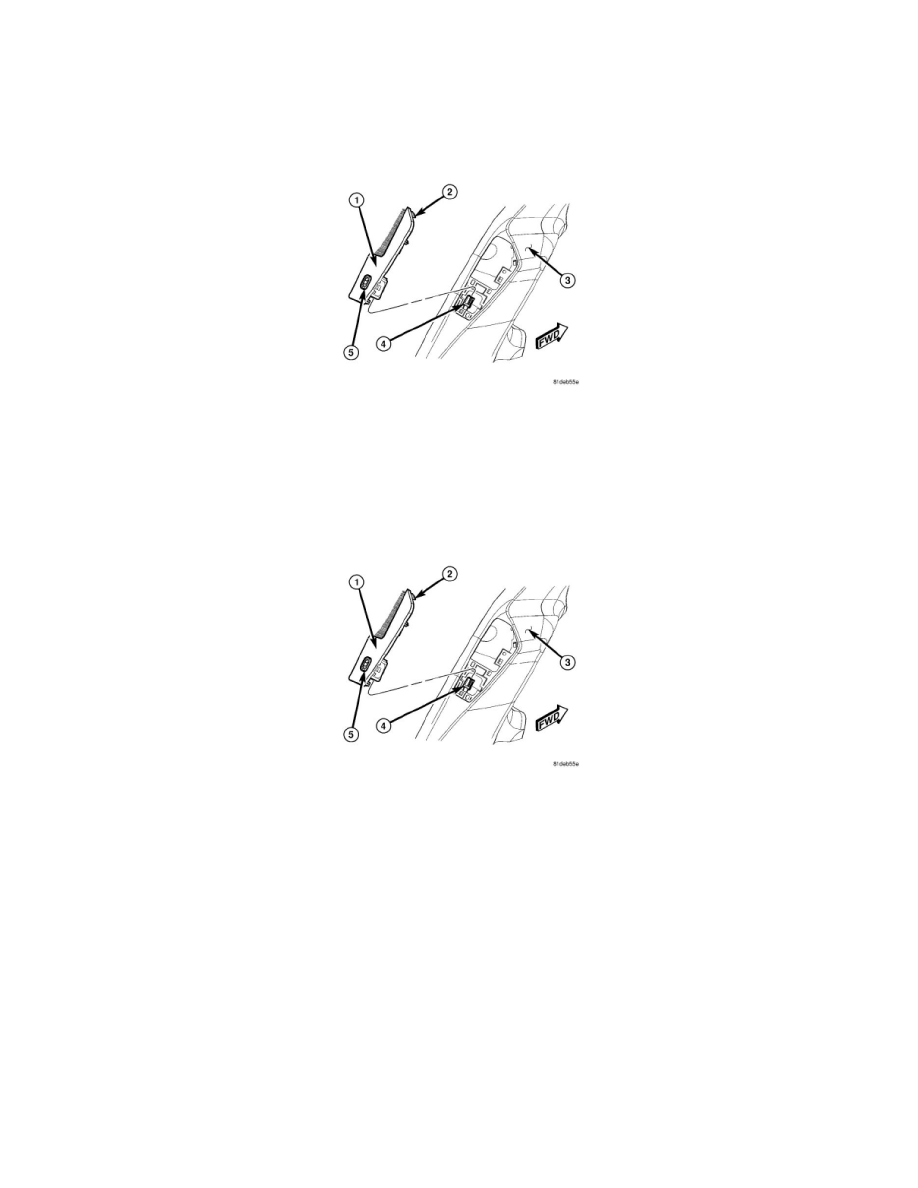
2. Using a trim stick C-4755 or equivalent, disengage the power liftgate D-Pillar switch bezel (1) from the upper D-Pillar trim panel (3).
3. Disconnect the switch electrical connector (4) and remove the switch from the vehicle.
4. Using a trim stick C-4755 or equivalent, carefully disengage the switch bezel retaining tabs and separate the power liftgate D-Pillar switch (5)
from the switch bezel (1).
Installation
INSTALLATION
1. Position the power liftgate D-Pillar switch (5) into the switch bezel (1) and press into position until the retaining tabs are fully engaged.
2. Position the power liftgate D-Pillar switch bezel (1) into the left rear of vehicle.
3. Connect the switch electrical connector (4).
4. Install the switch bezel (1) into the upper D-Pillar trim panel (3) until retaining tabs (2) are fully engaged.
5. Connect the battery negative cable.
6. Using an appropriate scan tool, check and erase any power liftgate control module diagnostic trouble codes related to the power liftgate D-Pillar
switch.