Grand Caravan AWD V6-3.8L VIN L (2001)

Brake Caliper: Service and Repair
Disc Brake Caliper
Front
REMOVAL - FRONT DISC BRAKE CALIPER (DISC/DISC BRAKES)
1. Depress the brake pedal past its first inch of travel and hold it in this position using a brake pedal depressor (holding) tool. This is done to isolate
the master cylinder from the brake hydraulic system disallowing the brake fluid to completely drain out of the brake fluid reservoir.
2. Raise the vehicle.
3. Remove front wheel and tire assembly.
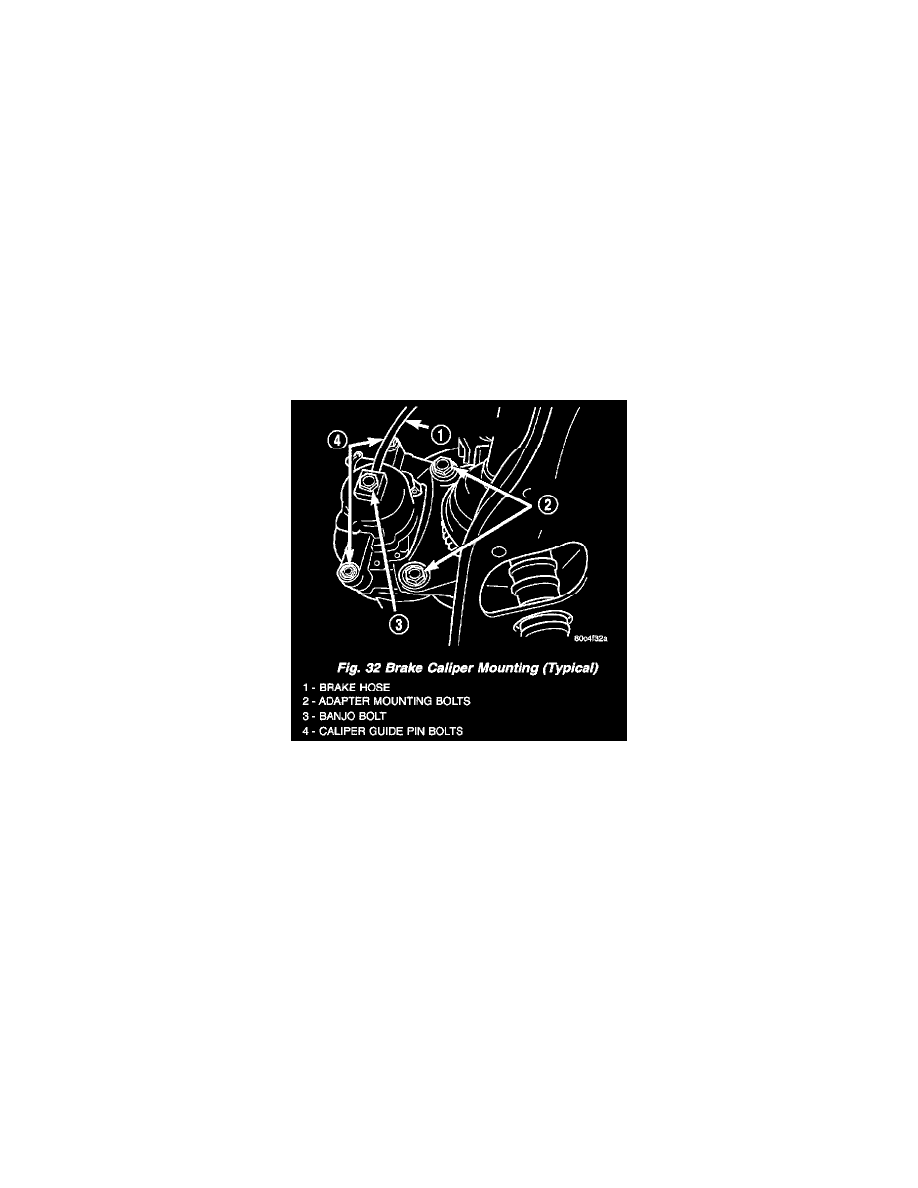
4. Remove the banjo bolt connecting the brake hose to the brake caliper. There are two washers (one on each side of the brake hose fitting) that will
come off with the banjo bolt. Discard these washers.
5. Remove the 2 caliper guide pin bolts.
6. Remove the brake caliper from the adapter.
REMOVAL - FRONT DISC BRAKE CALIPER (DISC/DRUM BRAKES)
1. Using a brake pedal holding tool, depress the brake pedal past its first one inch of travel and hold it in this position. This will isolate the master
cylinder from the brake hydraulic system and will not allow the brake fluid to drain out of the master cylinder reservoir when the lines are opened.
2. Raise the vehicle..
3. Remove the front tire and wheel assembly.
4. Remove the banjo bolt connecting the brake hose to the brake caliper. There are two washers (one on each side of the flex hose fitting) that will
come off with the banjo bolt. Discard the washers.
5. Remove the two brake caliper guide pin bolts.
6. Remove the disc brake caliper from the disc brake adapter.
INSTALLATION - FRONT DISC BRAKE CALIPER (DISC/DISC BRAKES)
CAUTION: TRW and Continental Teves brake calipers are not interchangeable. Each caliper is specifically designed for the unique brake system
(TRW - disc/drum brake combination and Continental Teves - disc/disc brake combination). If calipers are inter-changed, improper performance,
noise and increased stopping distance can occur.
1. Completely retract the caliper piston back into piston bore of the caliper. Use a C-clamp to retract the piston if necessary. Place a wood block over
the piston before installing the C-clamp to avoid damaging the piston.
CAUTION: Use care when installing the brake caliper assembly onto the steering knuckle, so that the seals on the caliper guide pin bushings do
not get damaged by the steering knuckle bosses.
2. Carefully position the brake caliper and shoes over the brake rotor and adapter.
3. Install the caliper guide pin bolts and tighten to a torque of 35 Nm (26 ft. lbs.). Extreme caution should be taken not to cross thread the caliper
guide pin bolts.
4. Install the anti-rattle clip on the outboard side of the caliper. Start the clip into the holes on the caliper, then stretch the clip legs past the abutments
on the caliper adapter.
