Grand Caravan FWD V6-229 3.8L VIN L MFI (1997)

6.
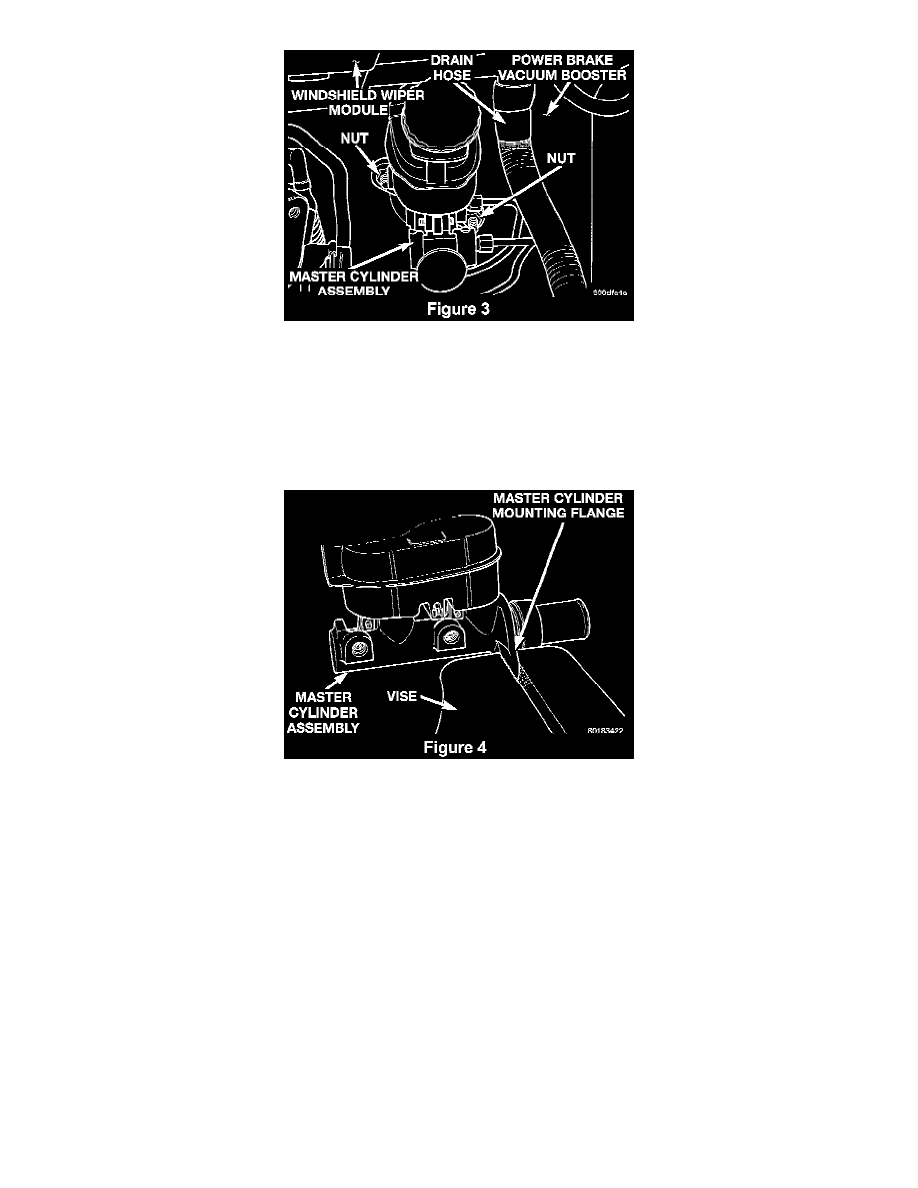
Remove the two (2) master cylinder attaching nuts (Figure 3).
7.
Slide the master cylinder straight out of the power brake booster.
8.
Remove the reservoir cap from the filler neck. Drain the brake fluid from the master cylinder reservoir and then re-install the cap.
NOTE:
Do not attempt to remove the filler neck as this may cause leakage or damage to the filler neck.
9.
Clamp the master cylinder in a vise, horizontally with the reservoir up, using only the mounting flange (Figure 4).
Caution:
When clamping the master cylinder in the vise, clamp only on the mounting flange as shown. Do not clamp on the primary piston, seal or body of the
master cylinder.
10.
Thoroughly clean the exterior of the master cylinder and reservoir.
11.
Using a plastic trim stick, carefully remove the vacuum seal from the groove in the master cylinder flange and discard. Do not attempt to pry the
seal off the master cylinder by inserting a sharp tool between the seal and the master cylinder casting. This may scratch the casting and prevent a
proper seal.
IMPORTANT:
Use CLEAN HANDS for all of the following disassembly and assembly procedures. ANY contamination inside the master cylinder bore or reservoir
may result in partial brake system loss after the vehicle is returned to the customer.
12.
Depress the primary piston slightly to remove load from the snap-ring. While holding the piston in this position, remove the snap-ring using
snap-ring pliers. Discard the snap-ring.
Note:
Do not use the provided piston assembly tool to remove the old piston. This may contaminate the tool and damage the new piston during assembly.
