
Grand Caravan FWD V6-229 3.8L VIN L MFI (1997)
Blower Motor Resistor: All Technical Service Bulletins
Front Blower Motor - Inoperative/Operates Erratically
NO: 24-06-97
GROUP: Heating & A/C
EFFECTIVE DATE: May 30, 1997
SUBJECT:
Front HVAC Blower Motor Resistor Connector Service
MODELS:
1996 - 1997 (NS) Town & Country/Caravan/Voyager
1996 - 1997 (GS) Chrysler Voyager (International Market)
NOTE:
THIS BULLETIN APPLIES TO VEHICLES BUILT PRIOR TO SEPTEMBER 6, 1996 (MDH 0906XX).
SYMPTOM/CONDITION:
The front Heater/Ventilation/Air Conditioning (HVAC) blower motor is inoperative; is inoperative on one or more speeds; or operates only on "HIGH"
speed.
DIAGNOSIS:
Visually inspect the front HVAC blower motor resistor and connector terminals for corrosion. If corrosion is discovered, perform the Repair Procedure.
PARTS REQUIRED:
AR (1)
05003316AA
Wiring, Blower Motor Resistor Pigtail
AR (5)
04778570
Tube, Shrink
1
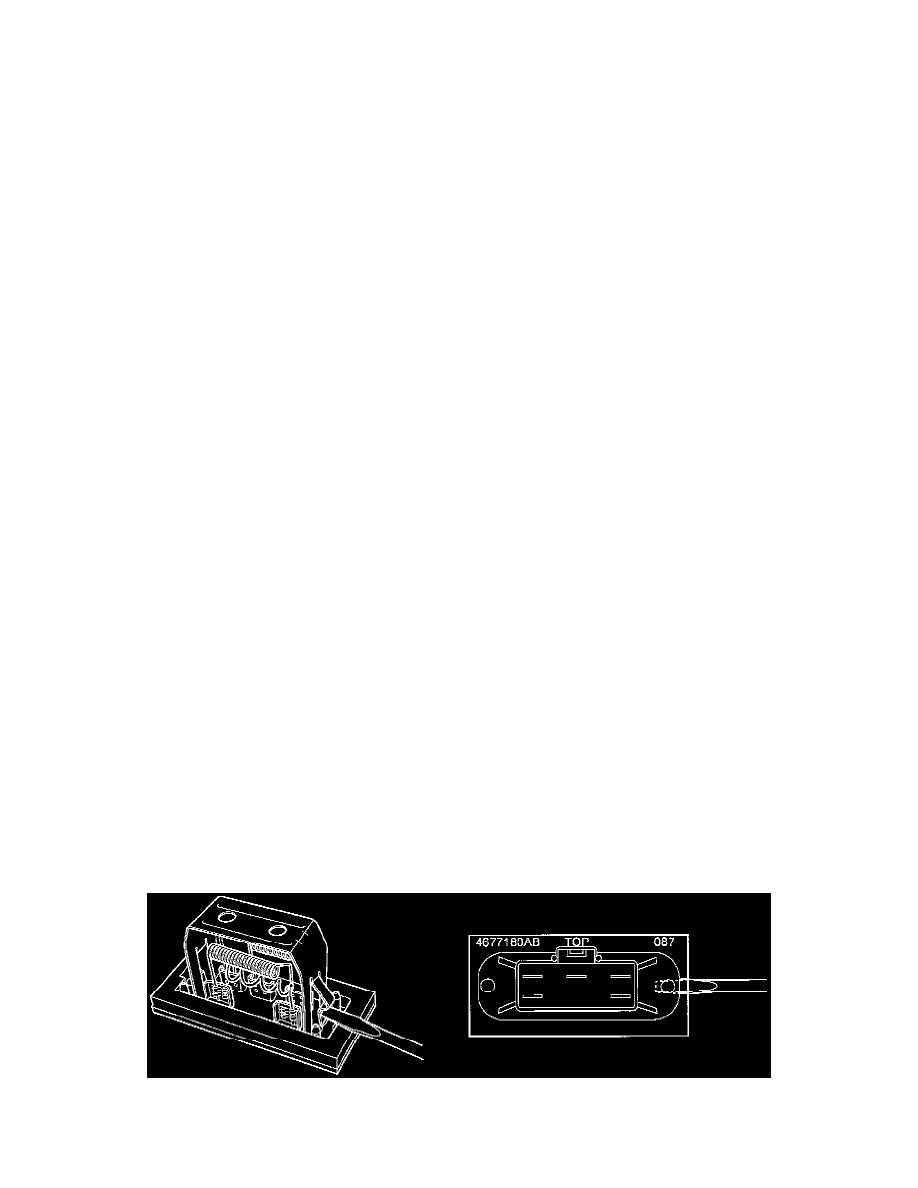
04677180AB
Resistor, Front Blower Motor
AR(1)
04641780
Strap, Tie
REPAIR PROCEDURE:
This bulletin involves replacing the blower motor resistor and wiring connector with revised parts.
1.
If equipped, remove the bracket on the A/C line from the right side strut tower mounting stud.
2.
Obtain the revised front blower motor resistor, p/n 04677180AB, (and wiring repair components if they will be required). Examine the integral
retainer clips of the resistor so it is understood what/where to push in on to release the resistor from the dash panel.
NOTE:
DO NOT TRY TO PULL THE RESISTOR OUT OF THE DASH PANEL WITHOUT RELEASING THE CLIPS, OTHERWISE RETENTION
TABS IN THE DASH PANEL WILL BE BENT MAKING IT VERY DIFFICULT TO REMOVE THE RESISTOR FROM THE CAVITY IN THE
DASH PANEL.
3.
Remove the resistor (located on the dash panel behind the right side strut tower) by inserting a flat blade tool behind inboard side of the fiber
board of the resistor and pushing inward. Two guide lines are on the inboard side of the resistor to help align the blade position with the retention
clip of the resistor. While fully pushing in the retention clip of the resistor gently pull on the resistor wiring to dislodge the resistor from the dash