
Grand Caravan FWD V6-3.0L VIN 3 (1999)
6.
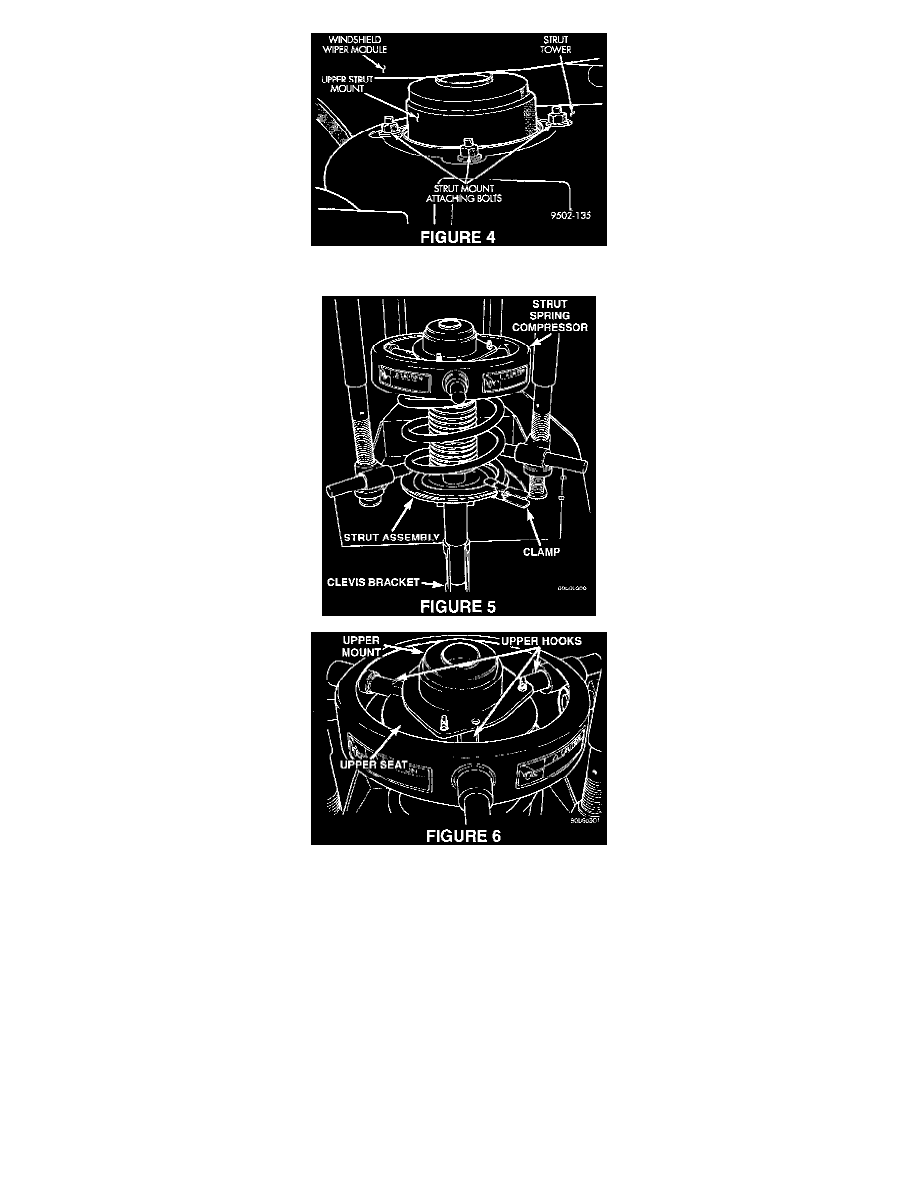
Remove the 3 nuts attaching the strut assembly upper mount to the strut tower and remove the strut assembly from the vehicle (Figure 4).
7.
Position the strut assembly in the strut coil spring compressor (Pentastar Service Equipment (PSE) tool W-7200, or the equivalent) closely
following the manufacturers instructions. The strut clevis bracket should be positioned outward. Position the upper hooks on top of the coil spring
upper seat. Place a clamp on the lower end of the coil spring, so the strut is held in place once the strut shaft nut is removed (Figure 5 and 6).
WARNING:
DO NOT REMOVE THE STRUT SHAFT NUT BEFORE THE COIL SPRING IS COMPRESSED. THE COIL SPRING IS HELD UNDER
PRESSURE AND MUST BE COMPRESSED, REMOVING SPRING TENSION FROM THE UPPER MOUNT AND PIVOT BEARING,
BEFORE THE SHAFT NUT IS REMOVED.
8.
Compress the coil spring until all coil spring tension is removed from the upper mount.
9.
Install Strut Nut Socket, Special Tool 6864, on the strut shaft retaining nut. Next, install a 10 mm socket on the hex on the end of the strut shaft.
While holding the strut shaft from turning, remove the nut from the strut shaft.
10.
Remove the upper mount from the strut shaft.
11.
Remove the upper pivot bearing from the top of the coil spring upper seat by pulling it straight up.