
Grand Caravan FWD V6-3.3L VIN 3 Flex Fuel (2002)
18.
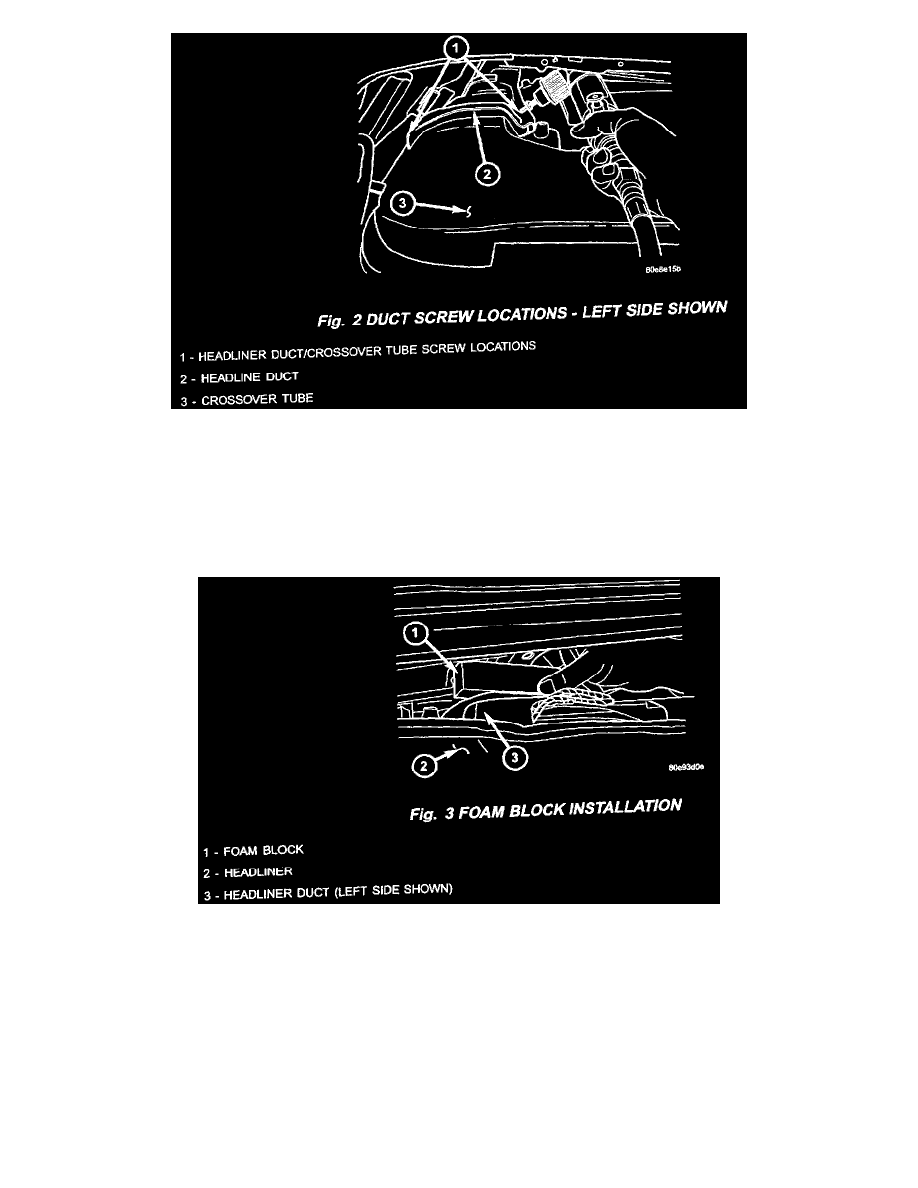
Press down on the rear left side of the headliner to access the crossover duct and headliner duct. Pressing the crossover tube and headliner duct
together, use a right angle drill to install the two self tapping screws as shown in (Fig. 2).
NOTE:
MAKE SURE THERE IS COMPLETE SEALING BETWEEN THE CROSSOVER TUBE AND THE HEADLINER DUCT BEFORE DRILLING
IN SCREWS.
19.
Perform step 18 on the other side of the headliner.
20.
From the left sliding door area, locate the headliner air vent above the 2nd row seat. Pull the headliner down just forward of the vent to access the
front of the headliner duct. Remove backing from foam block (p/n 05086279M) and place the foam block, adhesive side down, over the headliner
duct as shown in (Fig. 3).
21.
Perform step 20 on the right side of the headliner.
22.
Place headliner into position and install three new beige push pins, p/n TY98TL2AA to the center of the headliner.
23.
Install three new black push pins, p/n 06501916 across rear of the headliner.
24.
Install both C-pillar trim panels.
25.
Install the A/C duct to the right D-pillar and install both D-pillar trim panels.