Grand Caravan FWD V6-3.3L VIN 3 Flex Fuel (2002)

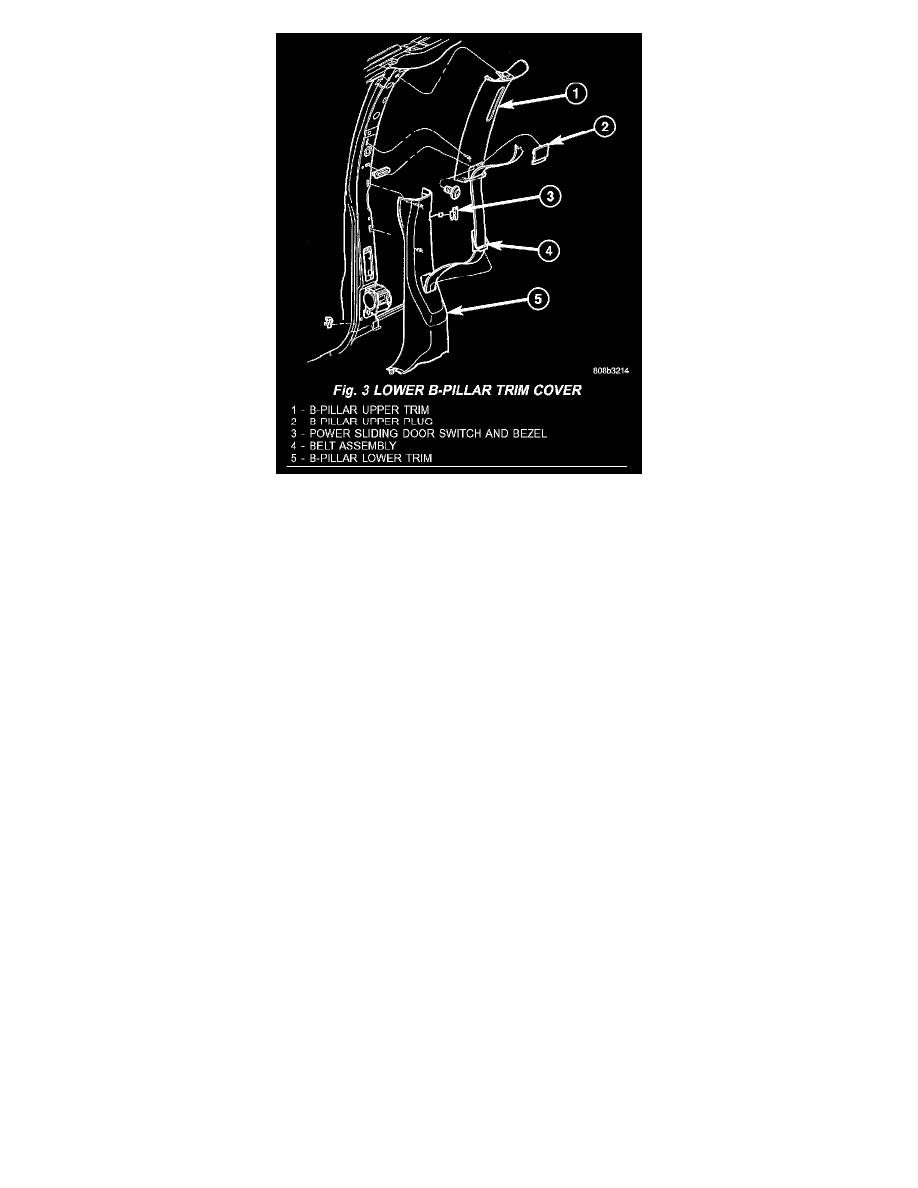
Fig. 3
4. Remove access panel from B-pillar trim (Fig. 3).
5. Disengage hidden clips attaching lower trim cover to B-pillar.
6. Remove lower B-pillar trim cover from vehicle.
INSTALLATION
NOTE: The driver's side a double ended stud is used. A nut has to be removed for the seat belt anchor removal and the stud for the retractor removal.
NOTE: On the passenger side there is a belt tension sensor.
1. On the passenger side secure grommet to seat belt sensor connector into bottom of B-pillar lower trim prior to install B-pillar lower trim cover.
2. Place lower B-pillar trim cover in position on vehicle (Fig. 3).
3. Insert seat belt through hole in lower B-pillar trim.
4. Engage hidden clips attaching lower trim cover to B-pillar.
5. Install access cover.
6. Install upper B-pillar trim cover.
7. Place seat belt anchor in position on floor so webbing is pointed rearward and slightly outboard.
8. Install bolt/nut attaching lower seat belt anchor to floor. Tighten seat belt anchor bolt/nut to 39 N.m (29 ft.lbs.) torque.
9. Verify that seat belt anchor does not interfere with seat track travel.
B-Pillar Upper Trim
B - PILLAR UPPER TRIM
REMOVAL
1. Remove bolt attaching lower seat belt anchor to floor.
2. Lower shoulder belt height adjuster to the bottom of travel.
3. Remove shoulder belt turning loop from height adjuster.
4. Use a Snap-on(R) Trim Pad Remover tool (A179A), or equivalent, and remove shoulder belt height adjuster knob.
